8 Moisture First Under Deck Storage Ideas Homeowners Can DIY
Practical moisture-first under deck storage ideas for homeowners: eight DIY friendly solutions, ground prep tips, and when to hire a pro.
8 Moisture First Under Deck Storage Ideas Homeowners Can DIY
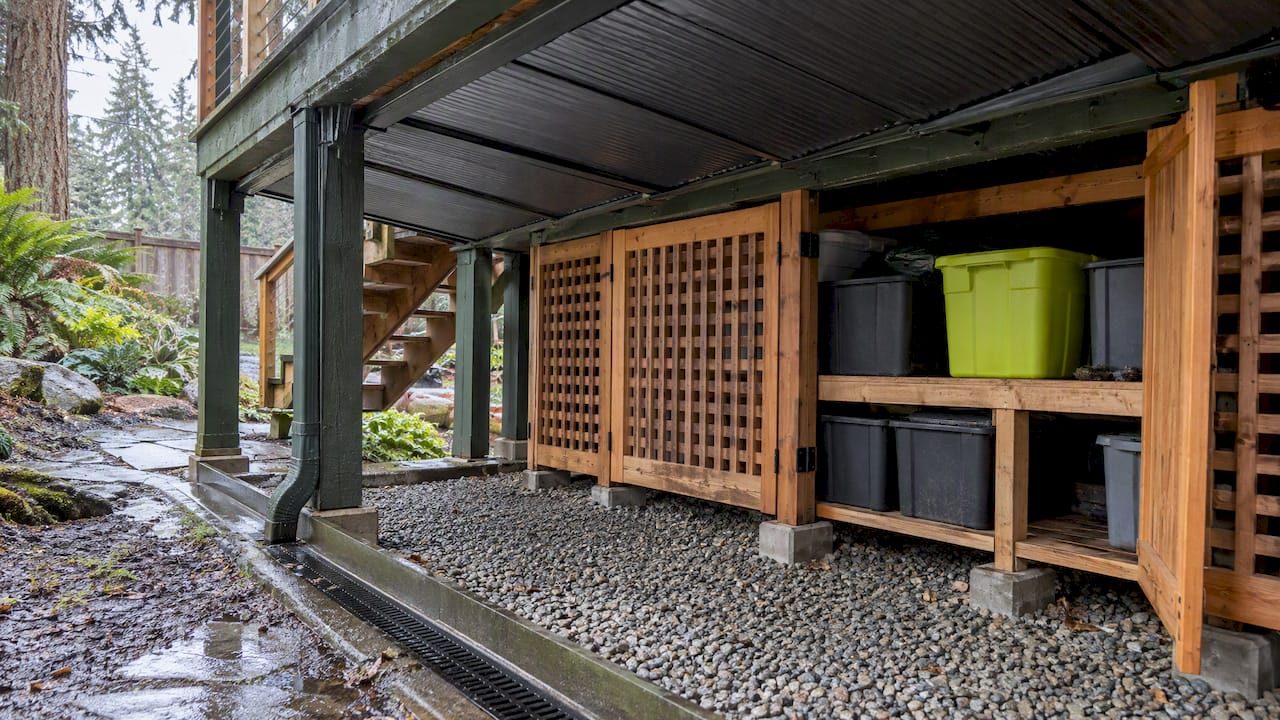
The most reliable under deck storage starts with water, not shelving: install a drainage or ceiling system above the joists (or a retrofit panel below them), build a drained and stable base underneath, then finish with raised shelving or weatherproof bins. Quick wins like stackable bins or a lattice screen work now, but check headroom and local permit rules before framing in doors or walls. Below, we cover the ideas, the moisture systems behind them, and when a contractor makes sense.
TL;DR:
Proper water drainage systems, such as above-joist membranes or retrofit panels, are essential for keeping under-deck storage dry and preventing ground moisture issues.
Ground preparation involving grading, gravel, and raised platforms helps prevent capillary moisture from reaching stored items and prolongs their lifespan.
Lattice enclosures are affordable and ventilated but offer limited security, whereas framed doors and fully enclosed rooms provide better protection and control over moisture and security.
DIY options like weatherproof bins, planter boxes, and pallet platforms can meet basic storage needs if the area is properly prepped and drainage is addressed.
Professional installation is recommended when structural modifications, waterproofing, or permits are needed, especially for built-in sheds or custom enclosures.
CactusdeckingBuild A Safer, More Usable DeckCactus Decking creates tailored outdoor living spaces with durable materials, in-house craftsmanship, and a clear construction process.Visit Cactus Decking
Table of Contents
1. Practical storage ideas ranked by ease and dryness
2. How do you keep the space under your deck dry?
3. Prepping the ground: grading, gravel, and raised flooring
4. Choosing an enclosure: lattice, doors, and ventilation
5. DIY projects you can build this weekend
6. When it makes sense to call a professional
7. Seasonal maintenance for under deck storage
8. Custom storage design for odd-shaped spaces
9. Lighting for under deck storage areas
Author perspective: fix water first, access second, finish last
How Cactus Decking can help with your under deck project
Sources
1. Practical storage ideas ranked by ease and dryness
Some of these work the day you buy them. Others need a dry ceiling or a drained base first, so we have grouped them loosely from simplest to most involved.
Weatherproof plastic bins and labeled boxes: best for seasonal gear like holiday decorations or cushions, and the cheapest entry point.
Cedar or composite deck boxes: more durable and better looking than bins, with low upkeep once sealed or finished.
Built-in under-deck shed or semi-enclosed room: the right call for mowers, generators, or other expensive equipment, though it usually needs structural framing and a permit check.
Lattice or slatted screening with a lockable gate: budget-friendly, keeps air moving, and hides clutter without trapping moisture.
Sliding or double doors framed into the fascia: the practical choice when you need to roll out a mower or wheelbarrow.
Raised pallet platforms or shelving units: lift stored goods off the ground so they stay ahead of damp soil.
Joist-mounted racks for tools and bikes: use overhead space that would otherwise go empty.
Planter boxes that double as decorative covers: dress up an access point while adding a small, lined storage nook underneath.
A few of these pair naturally:
Bins and cedar boxes sit well on a raised pallet platform, keeping both off damp ground.
Lattice screening pairs with a padlocked gate for light security without blocking airflow.
Joist racks free up floor space for a mower or snowblower stored inside a semi-enclosed room.
If your deck footprint is small to begin with, our guide to small deck ideas covers layouts that leave more usable space underneath.
2. How do you keep the space under your deck dry?
Moisture is the deciding factor in whether under-deck storage actually works, and there are three main approaches, according to This Old House’s guide to under-deck storage.
Above-joist membranes: installed during new deck construction, these sit under the decking boards and are typically the most cost-effective and longest-lasting option.
Below-joist trough or panel systems: the common retrofit choice for an existing deck, using EPDM or interlocking vinyl panels that channel runoff toward a gutter.
Gutter and downspout adaptations: tie into either system to carry water away from the house rather than letting it pool underfoot.
Even a well-built dry ceiling does not solve ground moisture on its own. This Old House notes that the ground beneath a dry ceiling can still stay damp, so a compacted gravel bed or pavers, combined with raised shelving, matters just as much as the roof overhead.
Sloped panels should angle toward the gutter line, and that water needs to discharge well away from your foundation, not just off the edge of the deck. Retrofitting after the fact is common and workable, but it costs more than building the drainage in from the start, so factor that into your budget if you are planning a full deck replacement anyway.
3. Prepping the ground: grading, gravel, and raised flooring
A dry ceiling only solves half the problem. The ground underneath needs grading away from the house, with a gentle slope (roughly a quarter inch per foot is a common guideline) directing water toward a drainage point rather than letting it pool against the foundation.
Lay geotextile fabric first, then a few inches of crushed stone (#8 or #57 works well) to let water drain through without washing out.
Choose pavers or a thin concrete pad instead of loose stone if you plan to roll in heavy equipment or set up a workbench.
Raise stored items on pallets or simple plinths so capillary moisture from the soil never reaches your boxes or shelving.
Stick with rot-resistant lumber, like pressure-treated or cedar, for any platform that touches the ground.
Gravel and fabric cost less and go in over a weekend. Pavers or concrete take longer and cost more but hold up better under a riding mower or a workbench.
Pro Tip: Elevate pallet platforms off the stone base so air can circulate underneath and moisture does not wick up into whatever you store on top.
4. Choosing an enclosure: lattice, doors, and ventilation
The right enclosure depends on what you are storing and how much airflow it needs. Open lattice is the cheapest route and keeps air moving, which matters for anything prone to mildew, but it offers little in the way of security or weather protection.
Framed access doors, whether a single door, a double door, or a sliding panel, give you real security and a cleaner look, though you will need to account for door hardware, hinge clearance, and a sill raised above the gravel base so water does not pool against the threshold.
Use lattice when airflow and low cost matter more than security or full weather protection.
Choose framed doors (single, double, or sliding) when you need lockable access for mowers, bikes, or tools.
Build a semi-enclosed or fully enclosed room with vinyl, fiber cement, or treated plywood for anything moisture-sensitive, like electronics or paper goods.
Add insect screens or small vents rather than sealing every gap completely, since some airflow prevents mold even in an enclosed space.
For a closer look at framing and installation details, our guide to under-deck drainage systems walks through how enclosures and drainage work together.
5. DIY projects you can build this weekend
A handful of projects cover most under-deck storage needs without requiring a contractor.
Lined planter box: build the frame from leftover decking or cedar scraps, add an EPDM liner, drill drainage holes, and elevate it off the deck rail to prevent rot, following the approach Fine Homebuilding outlines for deck planters.
Deck railing planter: a simpler build using cedar or pressure-treated lumber with drainage holes and weather sealing, as detailed in Family Handyman’s planter box project.
Pallet or pressure-treated platform: assemble with deck screws rather than nails, and anchor it to avoid shifting once loaded.
Exterior-rated shelving: choose marine-grade plywood or treated lumber, and use stainless or galvanized fasteners to resist rust.
Joist-mounted rack: load it only with lightweight items like tools or a bike, and use fasteners rated for the joist material rather than generic wood screws.
A basic tool list covers a drill, a circular saw, a level, exterior screws, and safety glasses.
Pro Tip: Check joist spacing and condition before mounting any overhead rack, since an older deck may not support much extra weight up there.
If you are also storing valuable tools or equipment, a dedicated garden tool safe adds a layer of security that a simple lock on a door does not.
6. When it makes sense to call a professional
Some projects cross the line from weekend DIY into permit territory. A few signs point to hiring a contractor:
You need structural changes to framing or joists to support a built-in shed or room.
Full waterproofing with above-joist membranes is part of the plan, not just a retrofit panel.
Headroom is tight and you are unsure whether the space meets local clearance or permit thresholds.
You want framed doors, flashing, and discharge routing done correctly the first time to protect the foundation.
A contractor typically handles membrane or panel installation, frames and hangs enclosure doors, and manages flashing and water discharge so runoff stays away from your foundation rather than pooling against it. A professional team can build custom deck installations, deck covers, and warranty-backed framing that can turn an under-deck area into genuinely dry, usable space.
Before a consultation, have rough measurements of the space, a few photos, and a short list of what you want to store. That alone saves a lot of back-and-forth once the visit starts.
7. Seasonal maintenance for under deck storage
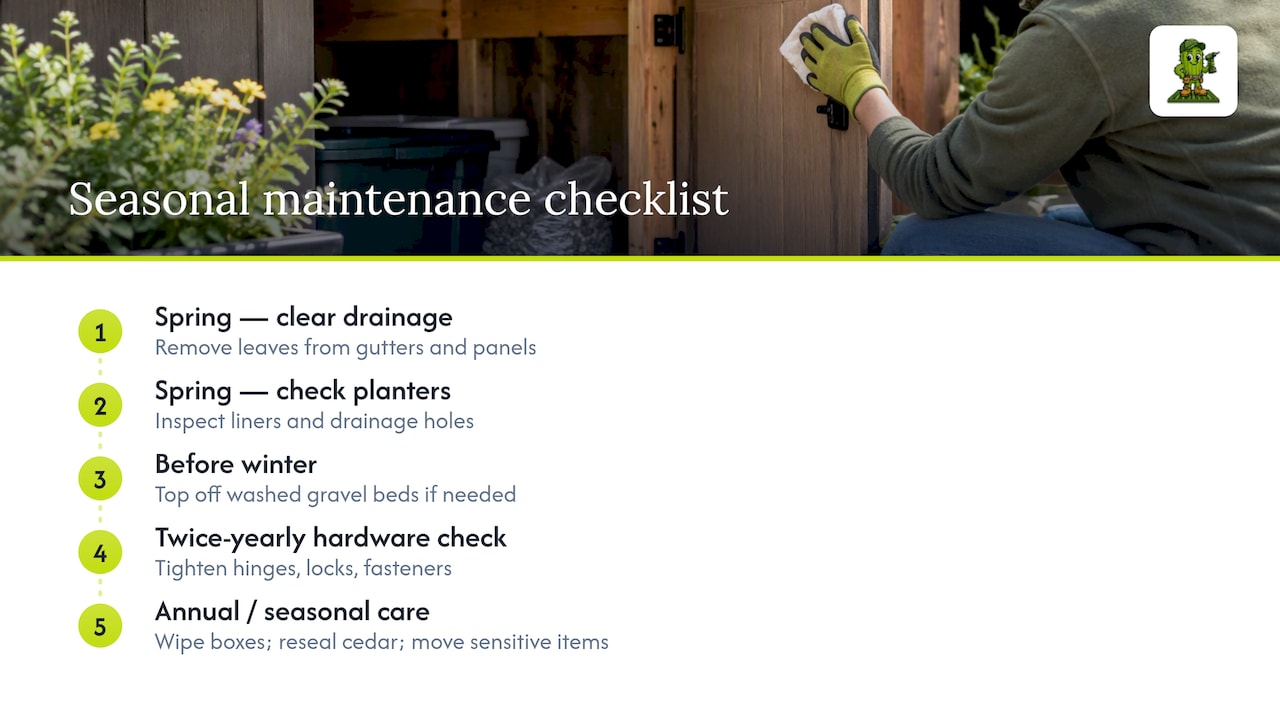
Even a well-built system needs a seasonal check. In spring, clear leaves and debris from gutters and drainage panels so runoff keeps flowing instead of backing up under the deck. Before winter, inspect gravel beds for washout and top them off if needed, since heavy rain season can shift loose stone over time.
Check hardware twice a year: door hinges, locks, and joist rack fasteners loosen with temperature swings, and a quick tightening pass prevents bigger repairs later. Look at planter box liners and drainage holes each spring for cracking or clogging, since a blocked liner holds water against wood and speeds up rot.
Wipe down cedar or composite boxes after long dry spells and before the wettest months, and reseal cedar surfaces roughly once a year if they are exposed to weather. In colder climates, pull sensitive items off raised platforms before the ground freezes and thaws repeatedly, since that cycle can shift gravel and pavers.
A five-minute walk-through each season catches small problems, a loose hinge, a sagging panel, a clogged gutter, before they turn into standing water under your deck.
8. Custom storage design for odd-shaped spaces
Not every under-deck space is a clean rectangle. Sloped yards, stairs cutting through the middle, or low spots near the foundation all call for a layout built around the space you actually have rather than a generic kit.
Start by mapping the tallest and shortest points of your clearance, since storage that needs to slide or roll belongs where headroom is greatest. Irregular corners work well for fixed shelving or a built-in bench, which can double as seating and storage the way a built-in deck seating project does above ground.
Where a staircase splits the space, consider two smaller zones instead of one large one: a lattice-screened bin area on one side, a lockable tool nook on the other. Sloped yards often drain naturally toward one corner, which is the logical spot for your drainage discharge point and the worst spot for anything stored directly on the ground.
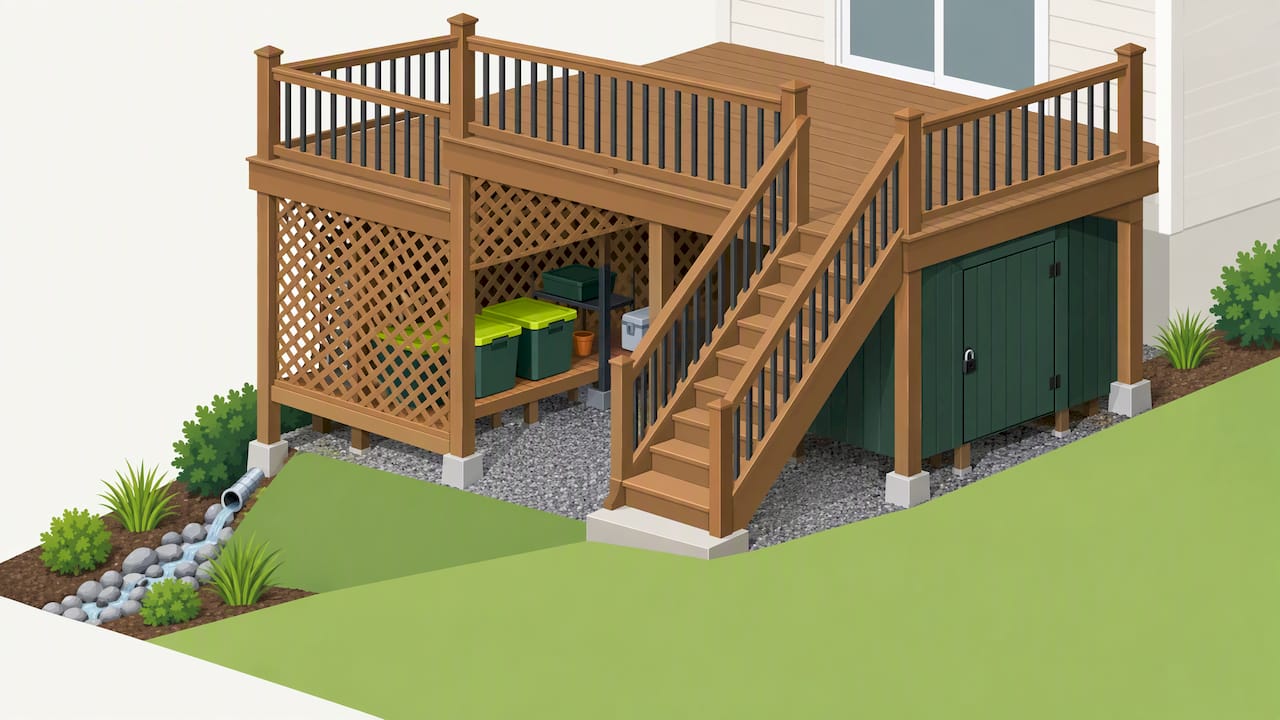
Custom framing costs more than an off-the-shelf shed kit, but it uses space that a standard kit would waste. For decks with unusual footprints, a custom deck installation approach from the design stage onward tends to fit the site better than retrofitting storage after the fact.
9. Lighting for under deck storage areas
Under-deck storage areas are usually the darkest spot in the yard, which makes basic lighting worth the small investment. Battery-powered or solar puck lights are the simplest option: no wiring, easy to mount under joists or on shelving, and good enough for finding a bin or a tool quickly.
For a more permanent setup, low-voltage LED strip lighting run along the joists gives even coverage across the whole space, and it pairs naturally with deck lighting already planned for the deck above. Motion-sensor fixtures near entry points are worth adding if the area doubles as a walkway, since they turn on automatically and use less power than a light left on by mistake.
Keep any wiring and fixtures rated for damp or wet locations, since even a well-drained space sees occasional moisture. If you are already planning deck lighting as part of a larger project, extending that same wiring plan under the deck is usually simpler than running a separate system later.
Author perspective: fix water first, access second, finish last
The order matters more than the budget. Waterproof the ceiling and base first, add doors or screening second, and only then worry about paint or trim. Temporary fixes are fine for a season. A permanent fix is worth the investment once you know you will use the space for years.
— Vlad
How Cactus Decking can help with your under deck project
If you want a dry, finished space under your deck without managing the framing, flashing, and permits yourself, that is exactly where we come in.
We design and install deck covers that turn an open underside into genuinely dry storage, build custom framing for enclosures and access doors, and handle the waterproofing details that keep water away from your foundation rather than against it. Installations can come backed by a warranty, and some companies handle the work from design through construction rather than handing it off to subcontractors.
A consultation typically starts with assessing your space, storage goals, and existing drainage or framing.
We can fold under-deck drainage and enclosure work into a full deck replacement or handle it as its own project.
Warranty-backed installation means that waterproofing and framing may be covered, not just the deck boards above.
Request a consultation through our deck covers page and we will walk through what your space can realistically become.
FAQ
What are some good storage options for under a deck?
Weatherproof bins, cedar or composite deck boxes, and raised pallet platforms work well for most households, especially once the ground is graded and covered with gravel or pavers. For larger or valuable items like mowers and generators, a framed, lockable enclosure with proper drainage is the better fit.
What should I do with the space under my deck?
Start with a water strategy: either an above-joist membrane installed during construction or a below-joist retrofit panel system that channels runoff to a gutter, as described in This Old House’s under-deck storage guide. Once that is handled, add a drained base and whatever combination of shelving, bins, or enclosure fits what you plan to store.
What are some DIY, cheap storage ideas for under a deck?
Stackable weatherproof bins and lattice screening with a lockable gate cost the least and go in fastest. A lined planter box built from leftover decking, following guidance from Fine Homebuilding, is another low-cost project that doubles as a decorative access cover.
How do I enclose the underside of a deck?
Lattice panels offer the cheapest, most ventilated option, while framed doors (single, double, or sliding) give better security and a finished look. For moisture-sensitive storage, build a semi-enclosed room using vinyl, fiber cement, or treated plywood, and add vents or insect screens rather than sealing every gap completely.
Do I need a permit to enclose the space under my deck?
Permit requirements depend on your local building department, but structural changes, full enclosures, and low headroom situations are the most common triggers for a permit review. Check with your local permitting office before framing in walls or doors, and consult a contractor if the clearance or structural questions are not straightforward.
Sources
Building under-deck storage: a comprehensive guide - This Old House
How to build a planter box for your deck railing (Family Handyman)