Built-In Deck Seating: Design Ideas and a DIY Build Guide
Discover creative design ideas and a DIY guide for built-in deck seating to enhance your outdoor space. Transform your deck today!
Built-In Deck Seating: Design Ideas and a DIY Build Guide
Built-in deck seating is worth building for most homeowners who want more usable space on a mid-size or small deck, and a basic perimeter bench is genuinely DIY-friendly if you can operate a circular saw and a level. Anything that doubles as a guardrail, spans a curve, or sits on a deck more than a few feet off the ground belongs with a contractor. That’s not caution for caution’s sake. It’s a load-bearing question, and load-bearing questions are where DIY projects go wrong.
Here’s the quick sort:
Build it yourself if you’re adding a simple bench along an existing solid rail or wall, your deck is close to grade, and you’re comfortable with basic framing.
Research first, build second either way. Sites like Decks and contractor columns like Tim Carter’s Ask The Builder lay out the framing math before you cut a single board.
The rest of this guide walks through layout options, exact sizing rules, materials trade-offs (including Trex composite), a full DIY build checklist, code triggers, and realistic cost ranges, so you can decide with actual numbers instead of guesswork.
Key Takeaways
Built-in deck seating rewards careful measurement and proper joist anchoring far more than it rewards fancy design software or expensive tools.
Point | Details |
|---|---|
Measure before you cut | Copy the height and depth of a chair you already find comfortable rather than guessing. |
Never fasten to boards alone | Anchor bench legs and frames into joists, posts, or blocking for real structural support. |
Match material to maintenance tolerance | Composite like Trex costs more upfront but skips the annual sealing that wood requires. |
Check codes before building a rail-bench | Benches that double as guardrails or sit near an elevated edge may trigger a permit review. |
Call a pro for structural or curved builds | Cactus Decking handles guardrail-integrated and complex bench projects with permitting included. |
Table of Contents
Built-In Deck Seating Ideas That Actually Get Used
Choosing Materials: Wood, Cedar, or Composite Like Trex
Sizing and Comfort Guidelines for Deck Benches
How Built-In Benches Get Framed and Anchored
DIY Deck Bench Build: Step-by-Step Checklist
Meeting Codes and Safety When a Bench Doubles as a Guardrail
Adding Storage, Planters, Lighting, and Cushions
Cost and Timeline: What to Budget For
Maintenance and Finishing Care for Built-In Seating
When to Bring in a Contractor Like Cactus Decking
A Practical Take on Built-In vs. Freestanding Seating
Get a Built-In Bench Built Right the First Time
Frequently Asked Questions
Sources
Built-In Deck Seating Ideas That Actually Get Used
Not every bench design earns its square footage. The ones that get used year after year solve a specific problem: not enough chairs, no place to set a drink, a railing that needed to be there anyway. Here’s what actually works, organized by the problem it solves.
Perimeter or straight bench. This is the default for a reason. Run a single bench along one long edge of a narrow or rectangular deck, and you get seating without eating into walking space. Best for decks under 200 square feet where every foot of floor matters.
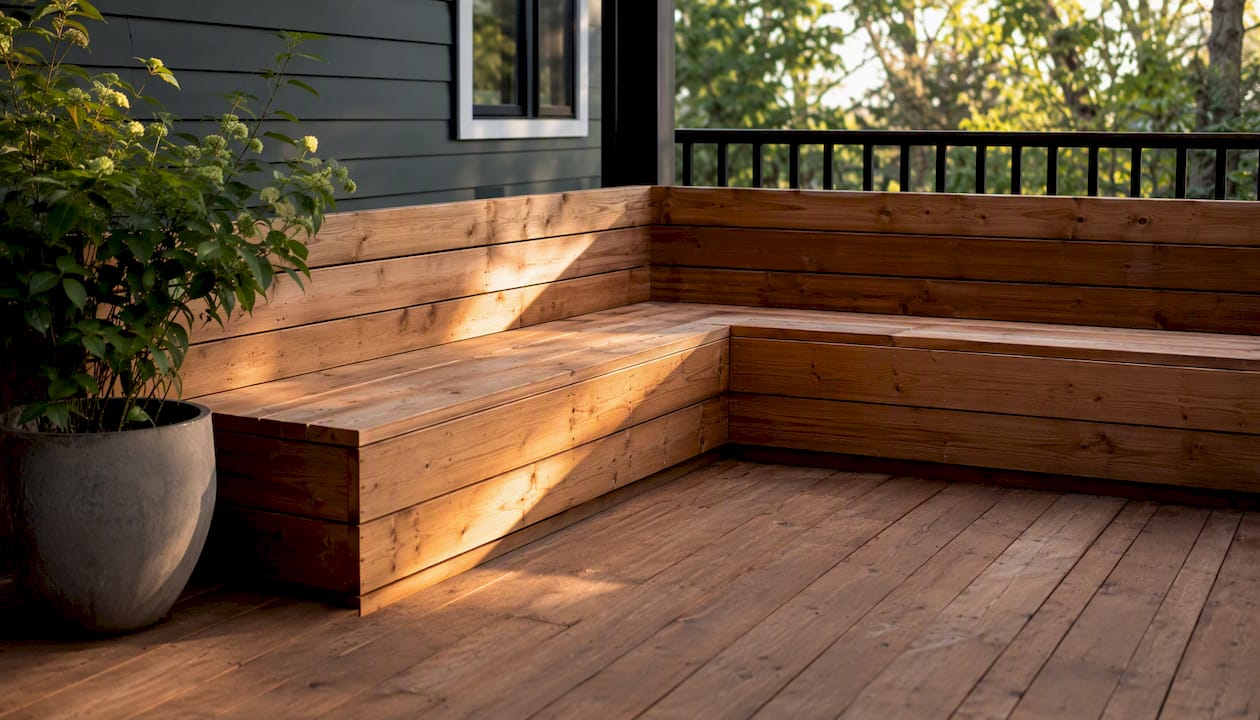
L-shaped and U-shaped benches. Wrap seating around two or three sides of a corner and you create an actual conversation area instead of a row of seats facing outward. Best for decks built around a fire pit, grill station, or dining table where people want to face each other.
Curved or radius benches. These take more skill to frame than straight runs, since each seat board needs its own cut angle. Best reserved for a feature moment, wrapping a round fire pit or framing a spa, and this is one of the layouts where hiring a finish carpenter usually pays off.
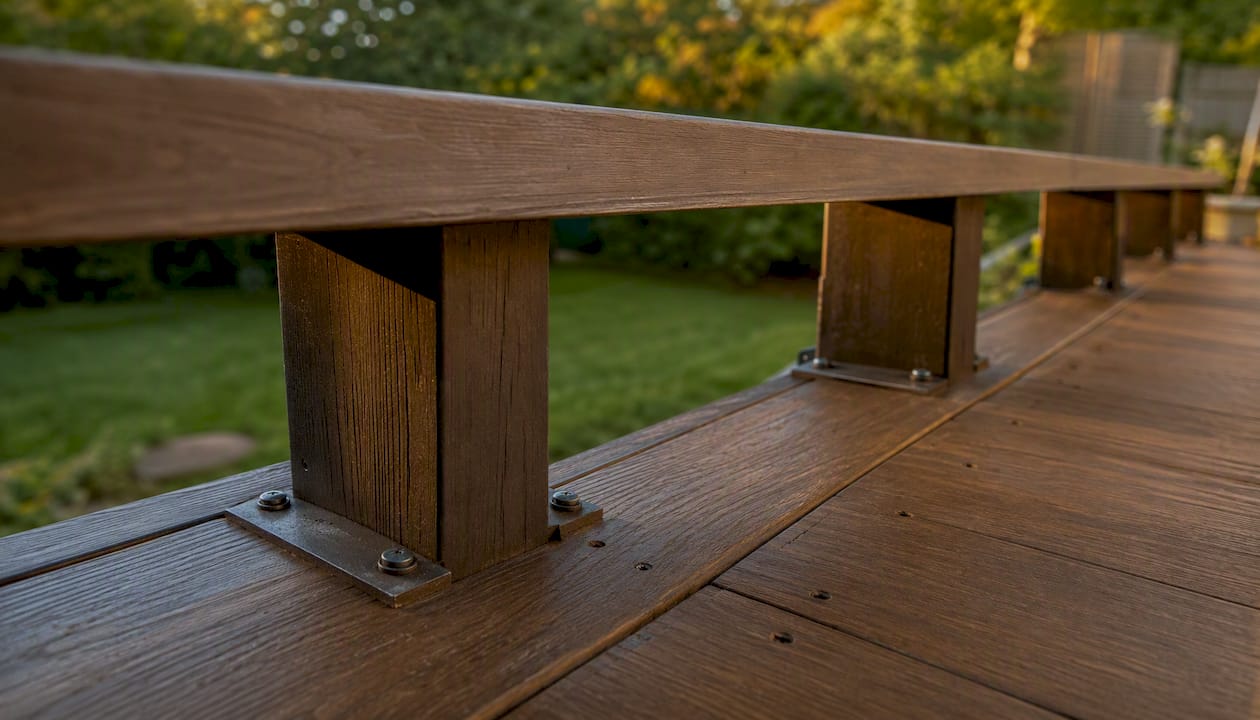
Bench-as-rail (railing-integrated seating). The bench itself acts as the required guardrail along an elevated edge. Best for decks where you want to reclaim the visual weight of a railing and turn it into function, but this is also the layout most likely to trigger a code review, which the codes section below covers in detail.
Bench with built-in planters. Flanking a bench with a planter box breaks up a long run visually and adds greenery without stealing floor space. Best for entries, deck corners, or breaking up a 12-foot straight run into something less monolithic.
Storage benches (bench chests). A hinged or lift-top lid turns dead seat space into storage for cushions, garden tools, or citronella candles. Best for smaller decks where you have no room for a separate storage box.
Floating benches. Cantilevered off a ledger or wall so the bench appears to hover, with no visible legs. Best for a clean, modern look, though it demands more precise blocking than a standard leg-supported bench.
Bench-dining combos. One long bench serves as seating for both a dining table and overflow lounge seating, useful when your deck hosts both dinner parties and casual hangouts. Best for decks that need to flex between two uses without adding furniture.
Photo galleries from sources like Houzz are worth an hour of scrolling before you commit to a layout. Save the three or four images closest to your own deck’s shape and bring them to whoever builds it, whether that’s you or a contractor.
Pro Tip: Sketch your deck’s footprint on paper first, mark the traffic paths people actually walk, and only place bench sections outside those paths. A beautiful bench that blocks the route from the door to the grill gets ignored within a month.
Backless benches read as more open and let people sit facing either direction, while backed benches are the better choice for anyone planning to linger through a long dinner or a second glass of wine.
Choosing Materials: Wood, Cedar, or Composite Like Trex
The material you pick decides how much time you’ll spend maintaining the bench versus sitting on it. Three options dominate: pressure-treated pine, cedar, and composite/PVC decking such as Trex.
Pressure-treated lumber is the budget option and the most forgiving for a first DIY project. It’s affordable, available at any lumberyard, and strong enough for structural framing. The trade-off is maintenance: it needs a sealant reapplied every one to two years or it grays and can check (small surface cracks) over time.
Cedar brings a natural reddish-brown tone and better rot resistance than standard pine without chemical treatment, which matters if you want bare skin against the wood on a hot afternoon. It costs more than pressure-treated lumber and still needs periodic staining to keep its color, or you can let it weather to a silver-gray patina, which some homeowners prefer.
Composite and PVC decking, with Trex as the best-known brand, skips the maintenance cycle almost entirely. There’s no staining, no sealing, and no splinters. Colors are baked into the material at the factory rather than applied on top, so a scratch doesn’t reveal a different color underneath the way a stain wear-through would. The trade-off is upfront cost, composite runs meaningfully higher than pressure-treated wood, and it can get warmer underfoot in direct summer sun than a lighter-colored wood.
Fastener choice matters as much as the board material. Stainless steel screws resist corrosion in wet climates and won’t streak the wood with rust stains the way standard coated screws sometimes do over a decade. Hidden-fastener clip systems, common with composite boards, give you a clean seat surface with no visible screw heads, though they take longer to install than simply face-screwing boards down.
Material | Durability | Maintenance | Style/Color Options |
|---|---|---|---|
Pressure-treated pine | Good with sealant upkeep | High: reseal every 1-2 years | Natural, stains well |
Cedar | Better rot resistance than pine | Moderate: stain or let weather | Warm reddish tone, ages to gray |
Composite/PVC (Trex) | Excellent, resists rot and splintering | Low: occasional wash only | Wide factory color range |
Pro Tip: If you’re mixing materials, like a pressure-treated frame under a composite seat surface, use stainless or coated deck screws rated for ground contact on any wood that touches the frame, even if the visible boards are composite. Corrosion inside a hidden frame is invisible until the bench wobbles.
Sizing and Comfort Guidelines for Deck Benches
Comfort is a measurement problem before it’s a design problem. Get the height and depth wrong by even an inch and a bench that looked great on paper feels awkward the first time someone sits on it.
Seat height for adult comfort typically falls between 16 and 20 inches, with 17 to 19 inches being the most commonly comfortable range. Anything shorter starts to feel like a child’s stool; anything taller leaves feet dangling for shorter adults. If you’re planning storage underneath, build the bench at least 18 inches tall so the compartment underneath is actually usable and not just a shallow shelf.
Depth depends on whether the bench has a back. Backless benches work well at 15 to 18 inches deep, while a backed bench can go up to about 20 inches since the back support changes how your body weight distributes across the seat.
For a fast per-person estimate, plan on roughly 22 inches of bench length per adult. A crowd of six needs about 11 feet of total bench run, split however your layout requires. Leave at least 36 inches of clear floor space behind any bench for people to walk past without brushing knees against seated guests.
Measurement | Recommended Range | Notes |
|---|---|---|
Seat height | 16-20 in (17-19 in ideal) | Add height if building in storage underneath |
Seat depth, backless | 15-18 in | Allows sitting facing either direction |
Seat depth, backed | Up to 20 in | Better for longer sitting sessions |
Space per person | ~22 in of bench length | Multiply by expected seating count |
Clearance behind bench | 36 in minimum | Keeps traffic flow clear |
The single best trick for nailing these numbers: measure the most comfortable chair you already own and copy its seat height and depth. If your favorite porch chair sits at 18 inches and feels right after an hour, build to 18 inches. Guessing is how most DIY benches end up either too low or too deep.
Pro Tip: For a bench against a solid wall or rail, cut the rear legs about one inch shorter than the front legs. That subtle backward tilt does more for comfort than adding a back rest, and it costs you nothing extra in material.
How Built-In Benches Get Framed and Anchored
The single most common DIY bench failure has nothing to do with looks. It’s fastening the bench legs directly into deck boards and nothing else. Deck boards flex and aren’t designed to carry lateral load, so a bench anchored only to boards will eventually wobble loose no matter how many screws you add.
The fix is anchoring into the structure underneath: joists, beams, or posts. If your bench runs parallel to the joists below, framing is straightforward since you can screw directly down into continuous structural lumber. If the bench runs perpendicular to the joists, add blocking or additional support roughly every four to five feet so the seat doesn’t sag between anchor points.
A few framing approaches cover most projects:
Box or frame bench: a self-contained rectangular frame with its own legs, essentially a small table with a seat on top, anchored down into joists at each leg.
Cleats: horizontal ledger strips screwed into the deck’s structural framing or a nearby wall, supporting the bench seat from underneath rather than from legs.
Sistering to joists: adding a new piece of lumber alongside an existing joist to beef up support directly under a bench run, useful when the existing joist spacing doesn’t line up with your bench footprint.
Post-supported benches: using vertical posts tied into the deck’s beam or framing system, typical for taller or heavier bench designs like ones incorporating planters.
If the bench doubles as a required guardrail, the anchoring standard goes up substantially, since it now has to resist someone leaning or pushing against it, not just sitting on it. Fine Home Building’s project guides cover framing variations for these tougher scenarios, including how to treat the bench essentially as its own mini deck structure lag-bolted into the main frame.
Before attaching anything, check the condition of the existing deck. Soft or spongy joists, rusted hardware, or ledger boards pulling away from the house are all signs that the deck itself needs attention before it can safely support a permanent bench addition. A bench is only as strong as what it’s screwed into.
DIY Deck Bench Build: Step-by-Step Checklist
Building a straightforward perimeter bench is a weekend project for most people with basic tool comfort. Here’s the sequence that avoids the most common mistakes.
Before you cut anything:
Measure the run of deck edge where the bench will sit, and note where the joists fall underneath.
Measure a comfortable chair at home for height and depth targets, as covered in the sizing section above.
Build a quick one-section mock-up at your target height before committing to the full run. Small-deck bench tutorials consistently recommend this step because it catches comfort problems before you’ve cut ten boards the wrong length.
Confirm joist direction and spacing so you know whether you need extra blocking.
Build sequence:
Frame the base structure (legs, cleats, or a box frame) and anchor it into joists or structural framing, never just deck boards.
Add blocking or bracing every 4-5 feet if the bench runs perpendicular to joists.
Install seat slats across the frame, leaving a small gap (about 1/8 inch) between boards for drainage.
Add a backrest if the design calls for one, angled slightly for comfort.
Fasten everything with corrosion-resistant screws rated for outdoor use.
Sand, seal, or finish according to your material choice.
Tools you’ll actually need: circular saw, drill/driver, a 4-foot level, clamps, an impact driver for lag bolts, and a pocket-hole jig if you want cleaner joints (optional but worth it for backrests).
Materials checklist for a sample 8-foot bench: roughly six to eight 2x4s for framing, five to six deck boards ripped to your chosen depth for the seat surface, a box of 3-inch exterior-rated screws, and lag bolts if you’re anchoring into joists through blocking.
Pro Tip: The most common DIY mistake isn’t a cutting error, it’s skipping the mock-up and guessing at height. Build one 2-foot test section, sit on it for a week, and adjust before building the full run. An hour of patience saves a full rebuild.
Meeting Codes and Safety When a Bench Doubles as a Guardrail
This is where a fun weekend project turns into a code question, and it deserves real attention if your deck sits more than a couple feet off the ground.
A bench built along the edge of an elevated deck can change what your local guardrail rules require, particularly if the bench creates a platform someone could stand on to gain extra height. Many jurisdictions require guardrails at a minimum height, often 36 inches for residential decks, and if a bench seat effectively lowers the usable clearance a person needs to climb over, inspectors may flag it.
The rule of thumb: if your bench sits directly along an elevated edge and could function as a step-up toward the rail, or if it’s replacing a section of railing entirely, check with your local building department before finalizing the design. This isn’t universal red tape. It’s a genuinely different structural and safety category than a bench sitting three feet from the edge on a ground-level patio deck.
Permit and inspection triggers generally show up when:
The bench is integrated into or replaces a required guardrail section.
The deck itself is elevated enough that fall height becomes a factor.
You’re adding significant new dead or live load (planters, storage with heavy contents) that the original deck design didn’t account for.
A short safety checklist worth running through regardless of permit status: confirm the bench can handle a realistic load of multiple adults sitting or briefly standing on it, keep gaps between bench sections and rail openings narrow enough that they don’t create a fall hazard, and if the bench is raised or has an open underside, check that nothing invites tipping.
Pro Tip: When in doubt, call your local building department before you build, not after. A five-minute phone call is cheaper than tearing out a finished bench because it failed a code review on a guardrail height it wasn’t designed to meet.
Adding Storage, Planters, Lighting, and Cushions
A bench that only seats people is doing half its job on a small deck. A few accessory choices turn the same footprint into storage, greenery, and ambiance.
Under-seat storage works two ways: a full lift-top lid that hinges the entire seat surface, or a smaller hinged access panel on part of the run. Lift-tops need enough clearance for the lid to open fully without hitting a wall or railing behind it, so measure the swing arc before committing to hinge placement.
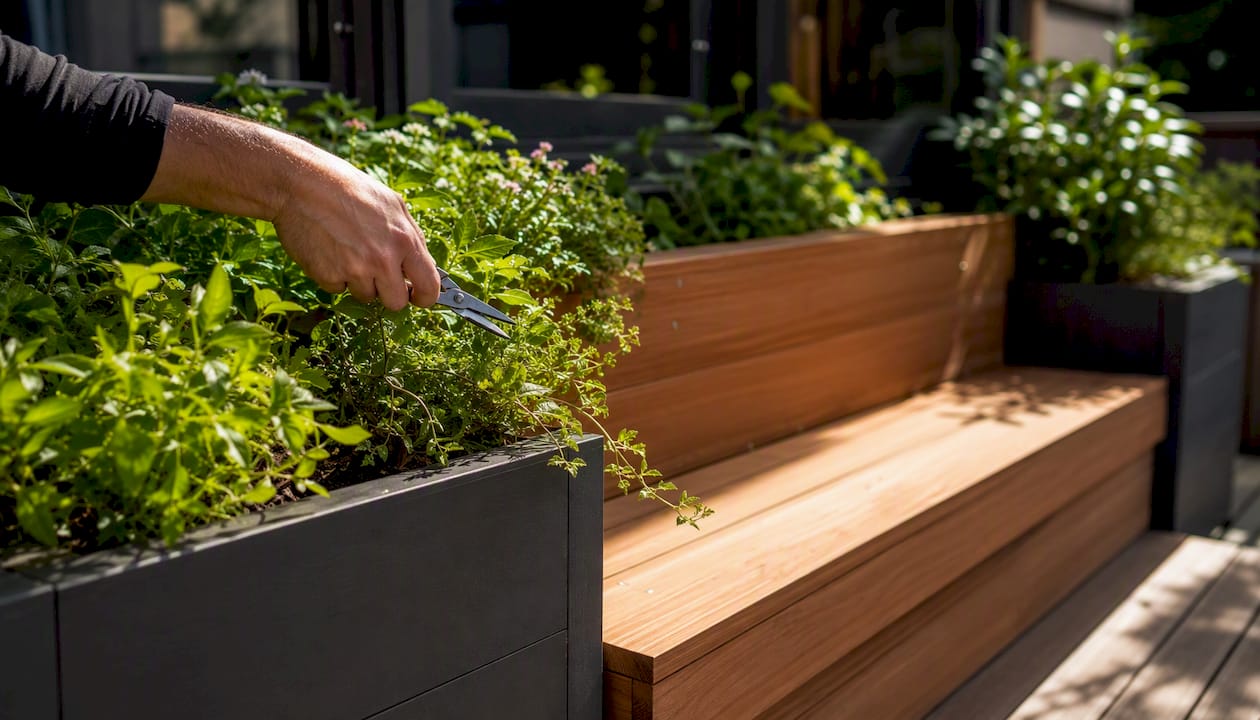
Integrated planters need their own waterproof box, separate from the bench’s structural frame. Fine Home Building’s guidance is direct on this point: saturated soil is heavy, and a planter built directly into bench framing without accounting for that weight can overload the structure over time. Build the planter as its own drained box, with gravel or a drainage layer at the bottom, and let it sit adjacent to the bench rather than sharing its load path.
Built-in lighting adds usability after sunset. Recessed puck lights along the underside of a bench or small riser lights on the vertical face are the two common approaches. Route wiring through weatherproof, low-voltage systems, and if you’re not confident running exterior electrical, this is a task worth handing to a licensed electrician rather than improvising with extension cords.
Cushions finish the look but only if you measure correctly. Measure the exact seat surface, subtract about half an inch on each side for a snug (not tight) fit, and choose outdoor-rated fabric like solution-dyed acrylic that resists mildew and fading better than indoor upholstery fabric.
Pro Tip: Order cushions after the bench is built and measured in person, not from blueprint dimensions. Lumber dimensions shift slightly during construction, and a cushion ordered a half-inch too wide never sits right.
Cost and Timeline: What to Budget For
Numbers vary a lot by region and by how elaborate the design gets, but here’s a reasonable planning range.
A simple DIY 8-foot perimeter bench built with pressure-treated lumber typically runs in the low hundreds of dollars for materials alone. Some hobbyist builds of small rail-bench combinations have come in under $200 total when kept simple and built with standard dimensional lumber. Swap to a mid-range composite decking surface like Trex for the seat boards, and material costs climb meaningfully higher, though you gain the low-maintenance payoff described earlier.
Professional installation, covering both labor and materials, costs more than a pure DIY material budget but reflects proper structural anchoring, code compliance, and finish quality that a first-time DIYer often can’t match on a first attempt. Treat any professional quote as a planning figure that will shift based on your region, bench complexity, and material choice, and always get it in writing before work starts.
Timeline-wise, a straightforward DIY perimeter bench is realistically a one to two day project for someone comfortable with basic carpentry, longer if you’re building a mock-up first (which you should) or working solo. Contractor timelines depend more on scheduling than on the build itself. A structural, permit-involved bench project typically needs to be worked into a broader deck project timeline rather than treated as a standalone afternoon job.
Pro Tip: Budget an extra 10 to 15% on top of your lumber and fastener estimate for cushions, sealant, and hardware you’ll inevitably forget to price the first time through, hinges, corner brackets, or an extra box of screws when you run short halfway through.
Maintenance and Finishing Care for Built-In Seating
The maintenance schedule you sign up for depends entirely on the material decision made back in the materials section, and it’s worth being honest with yourself about how much upkeep you’ll actually do.
Pressure-treated wood needs a fresh sealant coat roughly every one to two years to keep water from penetrating the grain and causing warping or checking. Cedar can go longer between treatments if you’re comfortable letting it weather to gray, but if you want to preserve the reddish tone, plan on restaining every couple of years as well. Composite decking like Trex needs the least attention: an occasional wash with soap and water to clear pollen, dirt, or mildew film is usually enough, with no sealing or staining required.
A short seasonal routine keeps any bench in good shape:
In spring, check for loose fasteners, boards that have started to cup or crown, and any mildew that built up over winter.
Tighten hardware and replace any corroded screws before they snap under load.
In fall, store cushions somewhere dry, a bin, closet, or covered storage box, rather than leaving fabric outside through winter moisture.
Before the first freeze, check that wood surfaces have a fresh sealant coat if you’re due for one.
If you notice loose fasteners, the fix is usually just re-driving with a slightly larger screw rather than the original hole. Board cupping (where a board curls at the edges) often means moisture is getting trapped underneath, and improving airflow or adding a small gap between boards can help. Mildew on composite surfaces typically wipes off with a mix of water and mild dish soap. No pressure washer needed, and pressure washing can actually damage composite surface texture if held too close.
Pro Tip: Write the sealant date on a piece of tape under the bench seat when you finish a coat. It sounds unnecessary until three years pass and you genuinely can’t remember whether last summer’s project happened last summer or the summer before.
When to Bring in a Contractor Like Cactus Decking
Certain bench projects cross a line from weekend DIY into professional territory, and recognizing that line early saves both money and safety headaches.
Hire a contractor when the bench functions as or replaces a guardrail, when you’re building large integrated planters with real weight considerations, when storage compartments involve electrical or gas lines (a built-in bench near an outdoor kitchen, for instance), when the layout involves curved or radius framing, or when you’ve inspected your joists and they look undersized for the load you’re planning to add.
A professional handles the parts that are hardest to get right without experience: structural reinforcement calculated for actual load, pulling permits and passing inspection, complex finish work like seamless composite seams, integrated lighting wired to code, and warranty-backed installation that protects you if something fails down the line. Cactus Decking’s custom installation service covers exactly this range of work, from initial structural assessment through finished bench.
Before requesting a quote, put together a short packet: rough measurements of the space, a few photos of the deck as it stands now, two or three inspiration photos from a gallery search that show the style you’re after, and a rough budget range so the contractor can steer material recommendations accordingly. A contractor handling a typical built-in bench scope will usually assess the existing deck’s structural capacity first, confirm whether the bench interacts with any guardrail requirements, then move into design, material selection, and permitting before construction starts. That sequence, structure first, style second, is the opposite of how most DIY projects start, and it’s the reason professional builds hold up longer.
A Practical Take on Built-In vs. Freestanding Seating
Built-in benches win when a deck is small enough that every square foot of floor space matters, or when the deck’s shape (a corner, a curve around a fire feature) makes freestanding furniture look like an afterthought. They lose when your outdoor entertaining style actually changes season to season. A bench bolted into the joists can’t move to make room for a hot tub next summer or slide out of the way for a bigger dining table at Thanksgiving.
The honest answer for most mid-size decks is a hybrid: build in seating along one edge, usually the edge with the best view or the one against a rail, and leave the rest of the floor open for furniture you can rearrange. That gets you the visual anchor and guaranteed seating of a built-in without locking the whole deck into one configuration forever.
One test worth running before you build anything: sit in your planned bench location using a kitchen chair at roughly the height you’re targeting, for at least fifteen minutes, during the time of day you’d actually use the deck. Comfort at 2 p.m. in full sun and comfort at 7 p.m. after the sun drops are two different experiences, and the fifteen-minute test catches problems no amount of measuring on paper will reveal.
Get a Built-In Bench Built Right the First Time
If measuring joists and researching guardrail codes sounds like more weekend than you want to spend, that’s exactly the gap a contractor closes. Cactus Decking designs and builds custom deck seating in Everett, Washington, with an in-house crew that handles structural framing, permitting, and finish work under one warranty instead of juggling separate trades yourself.
The process starts simple: bring rough measurements of your deck, a few photos of the current setup, and any inspiration images you’ve pulled from a gallery search, and the design consultation turns that into a real plan with material options, including low-maintenance composite like Trex. The project gallery shows finished bench and railing work from past builds if you want to see what’s actually achievable before committing to a direction. When you’re ready, request an estimate for a custom installation and get a plan built around your deck’s actual structure, not a guess.
Frequently Asked Questions
How high should a built-in deck bench be? Most built-in benches fall between 16 and 20 inches, with 17 to 19 inches being the sweet spot for average adult comfort. Add a couple inches if you’re building in storage underneath.
Can I attach a bench directly to deck boards? No. Deck boards flex and aren’t rated for lateral load, which is why benches need to anchor into joists, posts, or added blocking underneath the decking.
Does a built-in bench count as a guardrail? Only if it’s positioned along an elevated edge in a way that replaces or interacts with required rail height. Check your local building department whenever a bench sits directly on an elevated edge.
Is composite decking like Trex worth it for a bench seat? If you want to skip annual sealing and staining, yes. Composite costs more upfront than pressure-treated wood but needs only occasional washing rather than a maintenance schedule.
How much bench length do I need per person? Plan on roughly 22 inches of bench length per adult, plus at least 36 inches of clear space behind the bench for foot traffic.
This article provides general design and construction guidance. Always confirm current building codes, permit requirements, and structural specifics with your local building department or a licensed contractor before starting a project involving guardrails or load-bearing changes.