
A deck replacement checklist has three jobs. It tells you whether the deck needs replacing at all, what the new structure must include (ledger, footings, framing, stairs, railings), and what to verify before the permit is closed out. Below is the full list, with the Everett, Washington permit triggers called out where they apply.
TL;DR
- Replace instead of repairing when the ledger, posts, beams, or joists have widespread rot, or when repairs would cost more than about half of a rebuild.
- A good checklist covers the whole system: ledger and flashing, footings, framing, decking, stairs, railings, and hardware. Surface boards are the smallest part of it.
- In Everett, a permit is required for a deck attached to a building, more than 30 inches above ground, over 200 square feet, or serving the main exit.
- Decide on lighting, covers, and railing style during design, not after the frame is built.
- Check connections, flashing, and footings before they are covered, then confirm the permit is finaled.
Table of Contents
- Step 1: Decide whether to repair or replace
- Step 2: Plan the project before you call for bids
- Step 3: Know the Everett permit triggers
- Step 4: The structural checklist
- Step 5: Choose materials with maintenance in mind
- Step 6: Plan lighting, covers, and extras now
- Step 7: What to watch during construction and at final inspection
- Our perspective: what we see on replacement jobs
- Ready to replace your deck in Everett?
- FAQ
- Sources
Step 1: Decide whether to repair or replace
Start with the age and the damage pattern. Wood decks typically last 10 to 15 years, and a deck near the end of that range with rot in several places is a replacement candidate, according to Bob Vila’s repair-or-replace guide. The same source gives a cost rule: if repairs approach half the cost of replacement, replacement is usually the better spend.
The scale of the problem is large. NADRA estimates that more than 69% of decks in use, roughly 30 million, are past their useful life and need repair or replacement.
Walk the deck with this list:
- Probe the wood. A screwdriver or ice pick that sinks 1/4 to 1/2 inch into the surface, or wood that feels soft and spongy, may indicate decay. Probe the posts at grade, the beam ends, and the joists next to the house.
- Look at the ledger. Pervasive rot in joists, beams, or posts is a common reason for full replacement, and so is a ledger pulling away from the house because of rot.
- Check for movement. Wobbly posts, sagging beams, and footings that have heaved in wet or freezing ground point to structural problems no new boards will fix.
- Test the hardware. Loose or corroded connectors, nails where bolts or structural screws belong, and wobbly railings all count.
- Add up the repair list. If you are about to patch the frame, a footing, and the stairs, price the rebuild too. Putting new work onto a frame that is already 15 years old ties new material to old material that is close to the end of its life.
If the problems are limited to worn surface boards on a sound frame, resurfacing can make sense. If the ledger or footings are the problem, our write-up on why we replace a wood deck rather than resurface it explains the reasoning.
Because deck failures cause real injuries, the U.S. Consumer Product Safety Commission advises having your deck professionally inspected for structural soundness. It reported about 2,900 injuries and two deaths tied to deck, balcony, and porch collapses or failures from 2016 to 2019. If your deck is old, shows rot at the house, or you cannot tell what is holding it up, get it looked at before anyone steps on it.
Step 2: Plan the project before you call for bids
A replacement goes smoothly when the paperwork and decisions come first. Work through these:
- Confirm property lines and setbacks. Review your survey for easements and boundaries. Setbacks are the most common reason permits stall, and we cover them in our guide to Everett’s deck setback rules.
- Check permit requirements. More on this in the next section.
- Call 811 before any digging. Utility locates are part of standard deck planning, and footing holes are digging.
- Finalize the design and a materials list. Size, shape, stair location, rail style, and features should be settled so every bid covers the same scope.
- Verify the contractor. Ask for proof of license, bonding, and insurance, and compare three written bids. Our contractor-selection guide walks through what to verify.
If you want help with the design stage, our Everett deck design service handles layout, materials, and features before construction begins.
Step 3: Know the Everett permit triggers
Not every deck project in Everett needs the same level of review. According to the City of Everett’s residential deck handout, a building permit is required when the deck:
- is attached to a building,
- is more than 30 inches above the ground,
- is over 200 square feet, or
- serves the main exit of the home.
The handout references the 2021 International Residential Code, Section R507, as the prescriptive method. Designs that fall outside it need plans from a licensed architect or engineer. The city lists specific cases that need that stamped design, including:
- stacked decks,
- decks that support hot tubs, spas, or other heavy loads such as pavers,
- walking surfaces more than 14 feet above ground,
- ledgers attached to overhangs, bay windows, brick, stone, or concrete block, and
- decks on ground sloping steeper than 1:1.
A replacement is not exempt just because a deck already stands there. If you are rebuilding the structure, treat it as new construction and confirm with the city before work starts. Our deck permit requirements guide lists what to have ready, and we handle permitting as part of our deck replacement service.
Step 4: The structural checklist
This is the core of any replacement. Use it to read a bid or to check the work as it goes in.
Ledger and flashing
The ledger is the board that fastens the deck to your house, and it is the most critical connection. The American Wood Council’s DCA 6 deck guide says an attached deck’s ledger should be at least a nominal 2x8, use approved corrosion-resistant flashing, and attach only where the house band or rim joist can support the deck. If your house does not match those prescriptive details, the options are a freestanding deck or a full engineered plan.

Flashing sends water away from the joint where deck meets house. It should be sound and firmly in place, and replaced if water collects there. In the Pacific Northwest’s wet climate, this is the detail we look at first.
Footings, posts, and beams
- Footing depth and size match the design and local requirements.
- Posts sit plumb in proper post bases.
- Beam-to-post connections use approved hardware.
- Fasteners and connectors are rated for exterior, treated-lumber use.
These items come from a published deck-building checklist, which also lists joist spacing, typically 12 or 16 inches on center, as a check item. Your engineer or the plan will specify the exact figure for your decking material, because composite and PVC boards often need tighter spacing than wood.
Decking surface
Check that boards are fastened with the manufacturer’s recommended fasteners and gap spacing. Composite boards need extra allowance because they expand and contract more with temperature than natural wood, as the BC Housing deck guide notes.
Stairs
Stair risers and treads should be uniform in dimension from top to bottom. Uneven steps are a common trip hazard and a common inspection note. Stair handrails should be graspable, about 1-1/4 to 2 inches in diameter, per the same checklist. If you want stairs rebuilt or widened, see our deck stairs page.

Railings and guards
The AWC’s DCA 6 guide based on the 2015 IRC says decks more than 30 inches above grade need guards, with structural requirements for the guard posts and their attachments. It also advises confirming the currently adopted code and guard dimensions with your local building official. A published checklist gives common targets: guards at least 36 inches high (42 inches in some jurisdictions) and baluster spacing no wider than 4 inches. Because the height varies by jurisdiction, read our deck railing height guide and ask the city. We install deck railing systems to the dimensions the local code requires.
Step 5: Choose materials with maintenance in mind
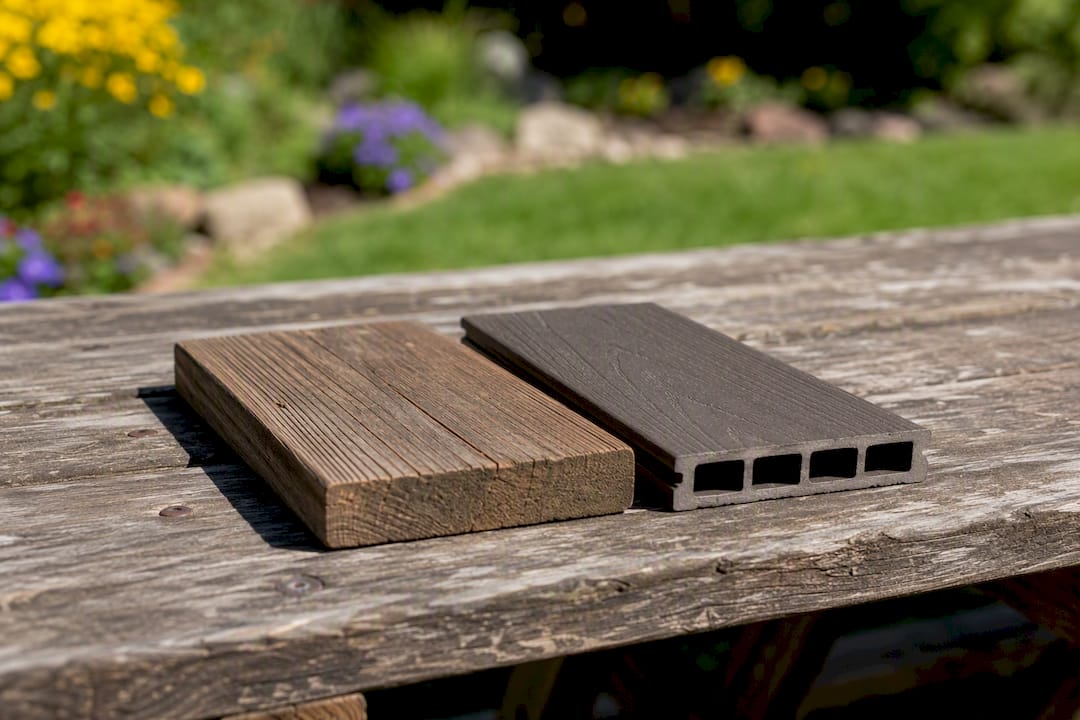
A replacement is the one time you can change materials. Consumer Reports’ decking buying guide compares the main options:
| Material | What to expect | Indicative material cost per 100 sq ft |
|---|---|---|
| Wood (cedar, pressure-treated) | Can crack, change color, and stain if not refinished | about $200 to $1,100 or more |
| Composite | No staining needed | about $300 to $700 |
| Plastic/PVC | Resists the elements without staining, but can be slippery and may sag | about $525 to $1,200 |
Those prices cover boards only. Consumer Reports notes they exclude the supporting structure, stairs, railings, and labor, and that labor can exceed material cost when you hire a professional. It also says to judge the whole system, not just the surface boards.
In practice, ask these questions about each material:
- How slippery is it when wet and shaded? That matters in Everett’s rainy months.
- What will the surface need every year, and what does it cost?
- Does the product need special fasteners or closer joist spacing?
- How does it handle sun, moisture, and spills?
All decking needs cleaning, and treated wood or plastic surfaces can reduce but not remove maintenance, as the BC Housing guide points out. We build with composite, PVC, and cedar, and can help you weigh them against your budget and the amount of upkeep you want. If you care about eco-conscious options, bring that up at the first consultation.
Step 6: Plan lighting, covers, and extras now
The cheapest time to add features is while the frame is open. Think through these before the design is final:
- Lighting. Stair risers, post caps, and rail lights make steps safer after dark. Wiring paths and fixture locations are far easier to run before the boards go down. Electrical work can bring its own permit and inspection, so confirm with the city.
- Covers. A cover adds loads (wind, rain, and in some areas snow) to posts and footings. Decide on it in the design stage so the structure is sized for it from the start, and check whether it changes the permit scope.
- Hot tubs and heavy features. In Everett, decks supporting hot tubs or similar heavy objects need plans from a licensed architect or engineer, as the city handout above states.
- Footprint. Resurfacing keeps your current footprint. A full replacement is your chance to enlarge, reshape, or relocate stairs, within setback limits.
We offer Cactus Decking service directory and deck cover installation service as part of the same project, so the structure, wiring, and finishes are planned together.
Step 7: What to watch during construction and at final inspection
The key habit is to check the hidden things before they are hidden. Make sure structural connections, flashing, and footings are right before decking covers them. One municipal residential deck guide describes the final inspection as verifying code-compliant hardware, stable railings (often tested with a 200-pound lateral load), and uniform stair dimensions, with the permit marked as finaled by the inspector. Other cities use their own process, so ask Everett’s permit office how it runs inspections for your project.
Before final, walk the deck yourself:
- Push on every railing post. Nothing should flex.
- Check that each step is the same height as the others.
- Look at the ledger from the side. Flashing should be tucked and continuous.
- Confirm there are no exposed nails or stray cut ends of fasteners.
- Ask for the inspection sign-off in writing.
A pre-final inspection checklist is useful for any permitted project, since it helps you line up paperwork, access, and open items before the inspector arrives. For the sequence of work from demolition to final, see our deck installation process guide.
Our perspective: what we see on replacement jobs
Most homeowners start by asking how much it costs to redo the boards. The better question is what the deck is standing on. When we open up an older wood deck in this part of Washington, the surface often looks tired, but the real issues are at the ledger, where water gets behind the flashing, and at the posts, where wood meets wet ground.
That is why we recommend pricing the full replacement next to any large repair. A patched frame under new boards means you are paying twice for the same worry. Our own in-house build crew, not subcontractors, does the work, so the person who spots a rotted rim joist is the person who knows how to fix it. Our installations are warranty-backed, and we explain each phase of the process, from consultation to final inspection, so you are never guessing what comes next.
We also push our clients to decide on railings, stairs, lights, and covers at the start. It saves rework and keeps the permit clean.
— Vlad
Ready to replace your deck in Everett?
If your checklist turned up rot at the ledger, soft posts, or a repair list that keeps growing, we can inspect the deck, walk you through repair versus replacement, and handle permitting and construction. See our deck replacement service or start with the Cactus Decking home page to request a consultation.
FAQ
How do I know if my deck needs to be replaced?
Look for widespread rot in the posts, beams, joists, or ledger, and for a deck that is 10 to 15 years old with damage in several places. If repairs would cost about half the price of a rebuild, replacement is usually the better value. Have a professional inspect any deck with a pulling or rotted ledger before it is used.
Do I need a permit to replace a deck in Everett?
Everett requires a building permit for decks attached to a building, more than 30 inches above ground, over 200 square feet, or serving the main exit. Complex designs may need plans from a licensed architect or engineer. Confirm your specific project with the city before you start.
What should I replace my deck with?
The main choices are wood, composite, and PVC. Composite needs no staining, PVC resists weather but can be slippery, and wood needs regular refinishing. Pick based on the upkeep you will accept, how wet and shaded the deck is, and your budget.
Is it worth replacing just the deck boards?
It can be, if the frame, ledger, footings, and railings are sound. If any of those are failing, new boards only cover the problem. Check the structure first, then decide.
Sources
- Solved! Should I Repair or Replace My Deck? (Bob Vila)
- Deck Construction Based on 2018 IRC (ICC)
- Check Your Deck (NADRA)
- Deck Replacement: When It’s Needed (TimberTech)
- Repair or Replace a Deck? How to Decide
- HOME SAFE: Outdoor Repairs (CPSC)
- Free Deck Building Checklist: Permits Through Final
- Residential Decks (City of Everett)
- DCA 6 Deck Guide, 2012 IRC (American Wood Council)
- DCA 6 Deck Guide, 2015 IRC (American Wood Council)
- Illustrated Guide: Building Safe and Durable Wood Decks (BC Housing)
- Ultimate Decking Buying Guide (Consumer Reports)
- Residential Decks (Lenexa)
- Pre-final inspection checklist