Homeowners: Inspect Posts First When You Replace Deck Railings
Protect your family and budget when replacing deck railings. See $900–$1,800 typical costs, code backed post attachment checks, permit tips, and when to...
Homeowners: Inspect Posts First When You Replace Deck Railings
Replace your deck railing when the posts wiggle, the wood is soft, or the fasteners pull loose. Cosmetic swaps of balusters alone won’t fix a compromised post connection. Most homeowners pay roughly $900 to $1,800 for the job, with per-linear-foot costs swinging widely by material. Check post attachment and local code before you begin any work.
TL;DR:
Most deck railing replacements cost between $900 and $1,800, with the price varying greatly based on material and project scope.
Excessive lateral movement at the top rail indicates failure in post connections, often requiring framing inspection and repairs before replacing the railing.
High-end infill options like cable and glass significantly increase costs due to stronger posts and precise installation requirements.
Proper post attachment to framing, not just decking, is essential for safety, and inspection of rot or loose connections under posts is a critical step.
DIY replacement is feasible only with solid structural posts and framing; complex topics like cable tension and glass systems are best handled by licensed professionals.
CactusdeckingBuild A Safer, Longer-Lasting DeckCactus Decking creates tailored outdoor spaces with durable materials, in-house craftsmanship, and warranty-backed installations in Everett.Explore Cactus Decking
Table of Contents
How Do You Know If Your Railing Needs Replacing?
What Does Deck Railing Replacement Cost?
Which Railing Material Should You Choose?
How Do You Actually Replace a Deck Railing?
Should You DIY This or Hire a Pro?
What Code and Safety Rules Apply to Deck Railings?
How Can You Save Money Without Cutting Corners?
Why the Process Matters as Much as the Materials
Ready to Replace Your Deck Railing the Right Way?
Sources
How Do You Know If Your Railing Needs Replacing?
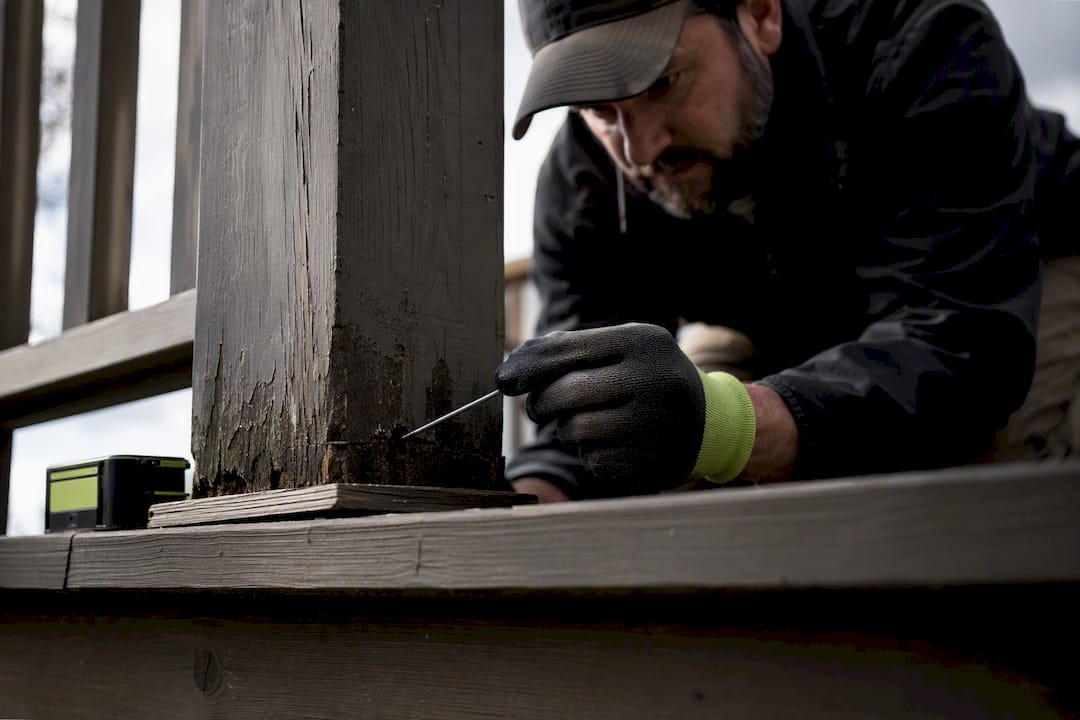
Grab the top rail and push sideways. Real lateral wiggle, more than an inch or so of give, usually means the posts or their connections have failed, not just the infill. A few checks separate a cosmetic job from a structural one:
Lateral wiggle test: push each post at the top; excessive movement signals a failed connection, not a loose baluster.
Visible rot or soft spots: probe the post base and any wood touching the deck surface with a screwdriver.
Fastener withdrawal: look for nails backing out or bolts spinning freely in their holes.
Movement at post bases: watch for gaps opening between the post and the deck framing as you push.
Here’s the part most homeowners miss: the deck surface can look brand new while the post underneath is bolted to nothing but decking boards. AWC’s DCA6 guidance requires guard posts to anchor into substantial framing, the rim joist or the joists themselves, not just surface decking. You often have to pull a board or two to actually see that connection. If you find hidden rot near a ledger or rim joist, stop and call a contractor. That’s structural work, not a weekend fix.
What Does Deck Railing Replacement Cost?
National averages put deck railing replacement between about $900 and $1,800, averaging near $1,100. Per-linear-foot pricing tells a more useful story since it scales with your deck’s actual perimeter.
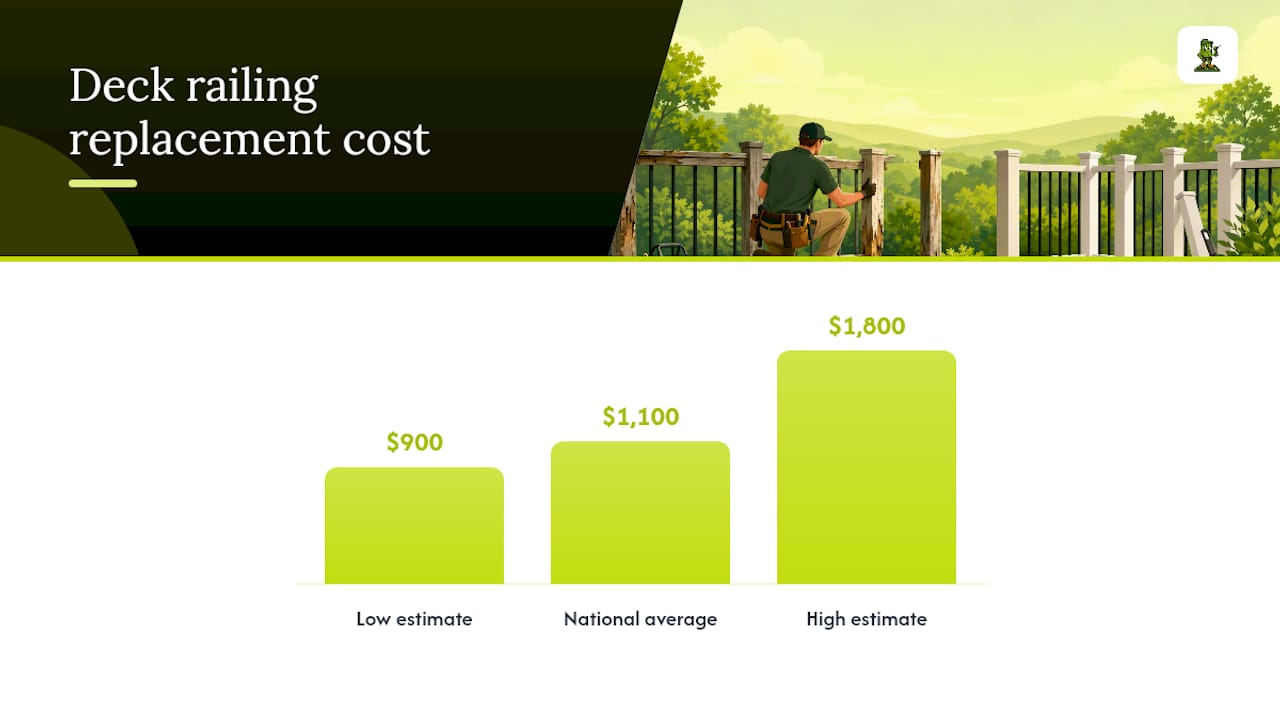
Cost snapshot: installed railing typically runs from low cost per linear foot for basic pressure-treated wood up to significantly higher costs for premium glass or cable systems, according to industry cost data. That’s not a typo. The spread between materials is enormous.
Several factors push a quote higher than the sticker price on infill material alone:
Permit fees, which vary by jurisdiction and sometimes get skipped by contractors who shouldn’t skip them.
Demolition and disposal of the old railing, especially with painted or treated lumber.
Stair runs and corners, which need extra posts, angle cuts, and labor.
Post repair or replacement if your inspection turned up rot or bad connections.
Contractors price jobs three main ways: per linear foot, hourly, or line-item. Per-linear-foot quotes are easiest to compare across bids, but only if everyone is quoting the same scope. Ask each contractor to break out material, labor, permits, and disposal separately so you’re comparing apples to apples, not one company’s all-in number against another’s stripped-down estimate.
Which Railing Material Should You Choose?
Material choice is a maintenance and budget tradeoff, not a strict ranking. What works for a beach house in a humid climate might be the wrong call in a drier, colder region, and vice versa.
Wood: lowest installed cost, but expects annual staining or sealing and a shorter lifespan if maintenance slips.
Composite or PVC: mid-range pricing, minimal upkeep, though some systems use proprietary connectors that limit repair flexibility down the road.
Aluminum: durable, low-maintenance, mid-to-upper pricing, holds up well in wet Pacific Northwest conditions.
Cable: higher installed cost because cable tension demands stronger, often larger posts and more precise labor.
Glass: the most expensive option per linear foot, and it requires manufacturer-tested assemblies rather than improvised glazing.
Glass and cable both raise the structural bar. Cable railing puts real tension load on posts, so undersized or poorly anchored posts that survived under a wood railing may fail under cable. Glass panels need an attached top rail unless the glass is laminated, per ICC glazing provisions.
Pro Tip: Ask any contractor quoting cable or glass to confirm post size and spacing in writing. Underspecified posts are the single most common failure point in upgraded railing systems.
How Do You Actually Replace a Deck Railing?
Replacing a railing is less about swinging a hammer and more about sequencing. Skip a step and you either redo work or build something unsafe.
Demo carefully. Remove balusters and top rails first, then posts. Note how each post was originally fastened before you toss it.
Expose and inspect the framing. Pull back enough decking to see the rim joist or joists where posts attach. This is the step that actually determines your scope and budget.
Repair or replace framing as needed. Soft or rotted rim joist sections need to be cut back to solid wood before anything gets reattached.
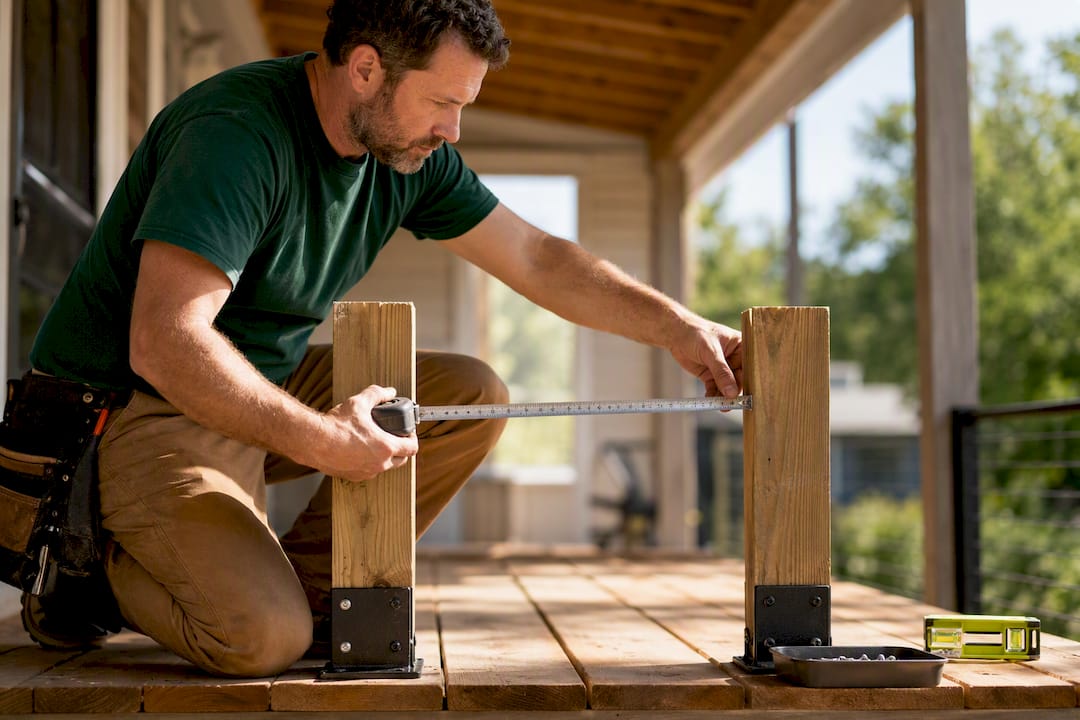
Install blocking and hold-downs. Solid blocking between joists gives posts something real to bolt into. Use hold-down connectors and bolt patterns matching tested DCA6 specifications, not whatever lag bolts happen to be in the truck.
Set and attach posts. Follow manufacturer spacing and fastener specs tied to the load path, since post spacing affects how much force each connection carries.
Attach rails and infill. Balusters, cable, or glass panels go in last, following the 4 inch sphere rule for spacing.
Test before you call it done. A firm push test at the top of each post, roughly simulating a 200 pound concentrated load, plus a visual check of every connection, tells you if it’s ready.
Prebuilt vinyl railing sections are genuinely DIY friendly for straight runs, provided you drill through the deck for through bolts and follow the manufacturer’s sleeve instructions instead of relying on surface screws.
Pro Tip: Structural post repair, engineered connection details, and any glass system install are the three tasks most homeowners hand to a licensed contractor. Getting these wrong risks a fall hazard, not just a callback.
Should You DIY This or Hire a Pro?
DIY makes sense for straightforward infill swaps on decks where your inspection confirmed solid posts and sound framing. It stops making sense the moment you find rot near the ledger, questionable post anchoring, or anything involving cable tension or glass panels.
When you do bring in a contractor, ask these questions before signing anything:
How exactly will posts be attached, and to what framing member?
What connector specs and hold-down hardware are you using?
Who pulls the permit, and is that cost included?
What warranty covers labor versus materials, and for how long?
Are demolition and disposal fees itemized separately?
Walk away from any quote that skips a post inspection, never mentions permits, or describes attachment only as “securely fastened” without specifics. That vagueness is often covering for shortcuts.
What Code and Safety Rules Apply to Deck Railings?
Most jurisdictions follow IRC-based guard and handrail rules, though local amendments can tighten them, so confirm specifics with your local authority having jurisdiction before finalizing a design.
Guard height: typically 36 inches for open-sided walking surfaces.
Stair handrail height: generally 34 to 38 inches, measured differently than guard height.
Baluster spacing: infill openings must not allow a 4 inch sphere to pass through.
Post attachment: must tie into joists or rim joist with tested connectors, not decking alone, per AWC DCA6.
Glass guard systems get extra scrutiny. Structural glass panels need an attached top rail unless the glass is laminated, since ICC treats glazing in guards as a hazardous location. For a deeper breakdown of how these height and spacing rules apply to your specific deck, Cactus Decking’s guide to railing height requirements walks through the details.
How Can You Save Money Without Cutting Corners?
The cheapest railing job and the safest railing job aren’t always the same job, so the goal is trimming cost without trimming the parts that matter.
Ask for separate line-item pricing on post repair, demolition, permits, stairs, and any lighting add-ons.
Handle simple prep yourself, like clearing furniture and plants away from the work zone, to shave labor hours.
Never skip tested connectors or post repairs to save money. That’s the one place a shortcut becomes a liability.
Schedule during a contractor’s slower season if your timeline allows; late fall and winter often bring softer pricing.
Get multiple quotes using identical scope descriptions so you’re actually comparing the same job.
Pro Tip: If a quote seems unusually low, ask specifically whether it includes post inspection and code-compliant connectors. Low bids often win by quietly dropping the one step that matters most.
For material and style ideas that still respect these safety rules, Cactus Decking’s railing ideas guide is worth a look before you finalize a design.
Why the Process Matters as Much as the Materials
Most railing failures trace back to a shortcut somewhere in the process, not a bad material choice. An organized path from consultation through construction typically includes an in-house crew, warranty-backed installations, and offers composite, PVC, and cedar decking options suited to Pacific Northwest weather. A warranty-backed installation means someone stands behind the connection work years after the last screw goes in, which is exactly where DIY and low-bid jobs tend to go quiet.
— Vlad
Ready to Replace Your Deck Railing the Right Way?
If your post inspection turned up soft wood, loose connections, or you’d simply rather not spend a weekend bolting into a rim joist, a professional install closes that gap fast. Cactus Decking handles Deck Railing Systems and full Deck Replacement projects in and around Everett, Washington, with an in-house crew that pulls permits and stands behind the work with a warranty.
When you request a quote, ask for separate line items covering demolition, post repair, connector hardware, permitting, disposal, and warranty terms, the same items this guide walked through. That transparency is exactly what a rushed or subcontracted bid tends to skip. If you’re weighing DIY against hiring out, a partner resource on common DIY installation pitfalls is a useful gut check before you commit to either path. Reach out through Cactus Decking’s services page to schedule a consultation and get a written, itemized quote for your railing project.
Sources
DCA6 Prescriptive Residential Wood Deck Construction Guide Based on 2015 IRC
How Much Does It Cost to Replace Deck Railings? 2026 Data | Angi
ICC change summary: glazing in guards and railings (2018 sample)
FAQ
How much does it cost to replace a deck railing?
Most homeowners pay between $900 and $1,800, averaging around $1,100, though per-linear-foot pricing varies enormously by material. Wood runs cheapest while glass and cable systems cost far more due to stronger post and labor requirements. Cactus Decking’s exact pricing for railing systems is available by requesting a quote through its services page.
What is the cheapest way to install a railing on my deck?
Pressure-treated wood infill is typically the least expensive option per linear foot. Keep in mind that cheap infill on top of a bad post connection doesn’t solve the actual safety problem, so a post and framing inspection should come before any material decision.
How can I upgrade my deck railings?
Swapping wood balusters for cable, glass, or composite systems refreshes the look, but each upgrade brings its own structural demands, especially cable, which needs stronger posts to handle tension. Check post condition first, then choose a material that fits both your budget and your climate’s maintenance realities.
How do I replace worn-out spindles on my porch railing?
Remove the top and bottom rails enough to slide old spindles out, then match spacing so no gap exceeds the 4 inch sphere rule required under most guard codes. If the rails or posts themselves show rot or looseness during removal, address that structural issue before installing new spindles.