Deck Railing Ideas: Styles, Safety, and DIY Tips
Explore top deck railing ideas that blend style and safety. Discover low-maintenance materials, trendy designs, and DIY tips for your home!

Deck Railing Ideas: Styles, Safety, and DIY Tips
For most homeowners, the best deck railing ideas come down to three directions: view-preserving infill (cable or glass), low-maintenance frames (aluminum or composite), and mixed-material accents for a custom look. If views matter, cable or frameless glass wins. If you live somewhere wet or humid, aluminum or composite outlasts wood without the upkeep. If you want personality without sacrificing safety, mix materials. The International Code Council sets baseline guard requirements for decks raised at least 30 inches above grade, and cable rail is consistently among the most requested styles for its clean, modern profile. Read the gallery below to find your style, then jump to the code checklist or the DIY vs. pro section before you buy anything.
Table of Contents
What deck railing ideas work best for your style and budget?
How do you mix materials for a custom railing look?
What are the best privacy railing ideas for your deck?
What are the cheapest deck railing options and can you DIY?
What are the building code basics for deck railings in the U.S.?
How long do different railing materials actually last?
How do you choose the right railing for your deck?
How does a professional railing installation actually work?
How long does a deck railing project take from start to finish?
Key Takeaways
The thing most homeowners get wrong about railing upgrades
Ready to plan your railing with Cactusdecking?
Useful sources and further reading
What deck railing ideas work best for your style and budget?
The gallery below covers every major material and style. Each entry gives you a quick read on what it looks like, what it costs relative to other options, and where it performs best.
Cable railing
Stainless steel cables run horizontally between posts, leaving sightlines almost completely open. It’s the go-to for second-story decks with a view or any modern exterior. Cable systems require tensioned hardware and precise post spacing, so installation is more demanding than a basic picket kit.
Pro: Maximum view preservation, modern aesthetic, long lifespan with marine-grade hardware
Con: Horizontal cables can be climbable by small children; regular tension checks needed
Cost shape: Mid to high
Best for: Second-story decks, lakefront or hillside properties, contemporary homes
Frameless and semi-frameless glass panels
Tempered glass panels (typically 3/8"–1/2" thick) deliver an almost invisible barrier. Frameless glass systems are engineered to meet IRC guard loads when anchored correctly with quality spigots or channel bases. The result is a deck that feels twice as large.
Pro: Unobstructed views, upscale appearance, wind protection
Con: Highest installed cost; glass needs cleaning to stay clear; spigot anchoring demands precise framing
Cost shape: High
Best for: Pool decks, rooftop decks, high-elevation decks where wind and views both matter
Aluminum railing
Powder-coated aluminum is the workhorse of low-maintenance railing. It won’t rust, it holds paint well, and prefabricated panel kits make it one of the more DIY-accessible options in the mid-range.
Pro: Rust-resistant, lightweight, available in dozens of colors and profiles
Con: Can feel less substantial than steel or wood; standard picket profiles read as generic
Cost shape: Low to mid
Best for: Humid climates, coastal areas, homeowners who want set-it-and-forget-it maintenance
Composite railing
Composite posts and rails use wood fiber and polymer blends to mimic the warmth of wood without the rot risk. Brands like Trex offer matching railing systems designed to pair with their decking lines, which simplifies the design process considerably.
Pro: Wood-like appearance, resists rot and insects, low maintenance
Con: Can fade or chalk over time in intense UV; heavier than aluminum
Cost shape: Mid
Best for: Homeowners who want a natural look without annual sealing or staining
Traditional wood railing
Pressure-treated lumber, cedar, or hardwood rails give a classic, warm look that suits craftsman and cottage-style homes. Cedar is a natural choice in the Pacific Northwest. The trade-off is real: wood needs sealing or staining every one to three years depending on climate.
Pro: Easiest to customize on-site, warm aesthetic, lowest material cost
Con: Highest maintenance demand; susceptible to rot, warping, and insect damage in wet climates
Cost shape: Low (pressure-treated) to high (hardwood)
Best for: Ground-level decks, front porches, traditional or farmhouse exteriors
Steel and wrought-iron aesthetic
Powder-coated steel or aluminum panels styled to look like wrought iron bring an ornate, formal look. True wrought iron is rare today; most “iron look” railings are steel or cast aluminum.
Pro: Strong visual statement, very durable when properly coated
Con: Heavy; real steel can rust if the coating chips; higher cost than standard aluminum
Cost shape: Mid to high
Best for: Traditional, Victorian, or formal home styles; front porches
Mesh and industrial infill
Welded wire mesh or perforated metal panels fill the space between posts for an industrial or contemporary look. The mesh opening size must comply with baluster spacing rules (no opening larger than 4 inches for residential guards).
Pro: Unique look, good airflow, durable
Con: Can feel cold or utilitarian; harder to source as a prefab kit
Cost shape: Mid
Best for: Urban rooftop decks, modern or industrial-style homes
Horizontal vs. vertical layouts
Horizontal pickets or boards create a modern, fence-like look and are trending fast.
Vertical pickets are the traditional default. The key safety note: horizontal elements that form a ladder pattern can be climbable by children, which some local codes restrict. Vertical layouts avoid that concern entirely.
Mixed-material combos
Composite posts with cable infill, wood top rails with glass panels, or aluminum frames with wood accents. These combinations are the fastest-growing design trend in residential decking right now. More on how to pull them off in the next section.
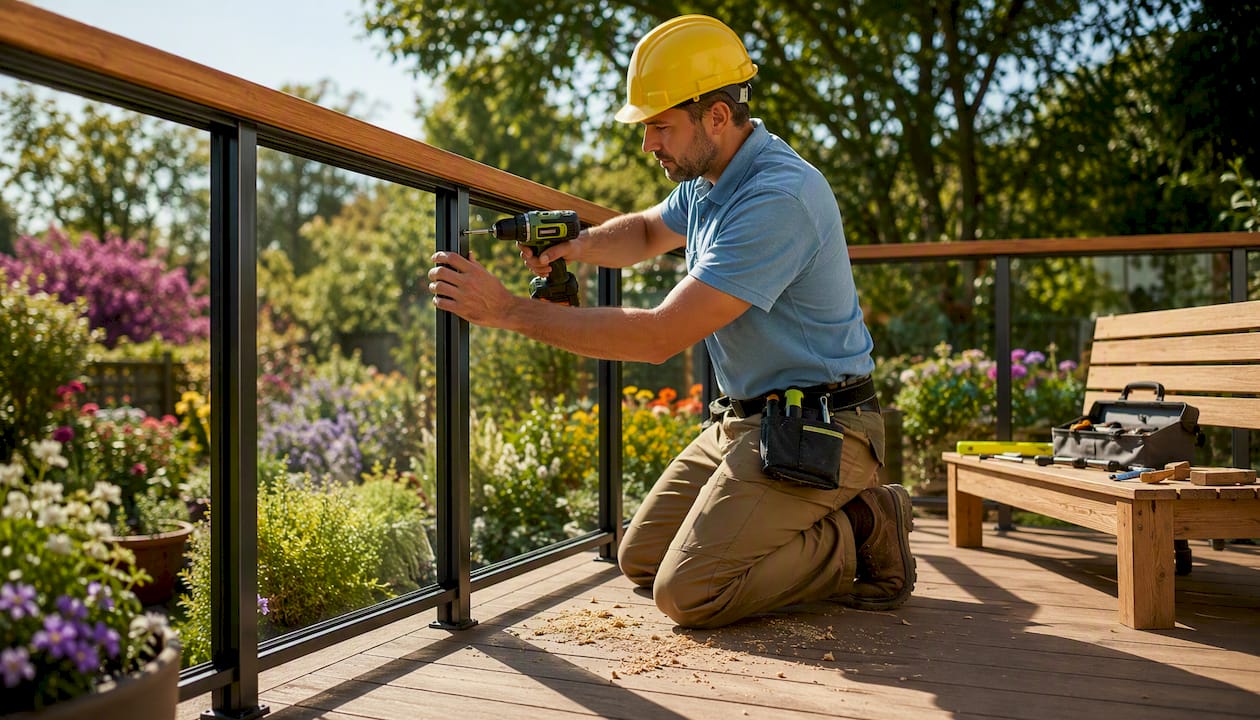
Pro Tip: When comparing railing styles in a showroom or online gallery, look at the railing from inside the house, not just from the yard. The view from your kitchen window or living room is the one you’ll see every day.
How do you mix materials for a custom railing look?
Mixed-material railings let you get a premium look without paying premium prices across every component. The logic is simple: use a cost-effective material where structural strength matters most (posts and top rail), and spend on the infill where the visual impact is highest.
A few pairings that work well in practice:
Composite posts + cable infill. The posts handle the load; the cables preserve the view. This combo is popular on Northwest decks because composite holds up in wet weather and the cable hardware is stainless. The warm tone of composite softens what could otherwise feel like a very industrial look.
Wood top rail + glass panels. A cedar or hardwood cap rail adds warmth and a tactile quality that glass alone lacks. The wood needs to be sealed, but since it’s only the top rail, the maintenance commitment is manageable.
Aluminum frame + horizontal composite boards. This gives a modern privacy-fence aesthetic with very little upkeep. The aluminum handles the structural load; the composite boards provide the look.
A few rules that keep mixed-material railings from looking chaotic. First, pick one dominant material and let everything else support it. Second, match finish temperatures: warm wood tones pair with bronze or black hardware, not brushed chrome. Third, keep all code-sensitive dimensions consistent regardless of material. Baluster spacing, top-rail height, and post anchoring requirements don’t change because you switched from wood to composite.
Transitions at corners and stair runs are where mixed-material railings most often go wrong. Post caps and trim pieces in a matching finish tie the look together. At stair transitions, the top rail must follow the rake angle continuously, which sometimes requires a custom-cut piece. Plan for that cut before you order materials.
Pro Tip: Order a sample of each material before committing. Composite and aluminum colors look different in direct sunlight than they do on a screen or in a showroom. Hold them against your siding and deck boards outside on a sunny day.
What are the best privacy railing ideas for your deck?
Privacy railings solve a specific problem: you want to use your deck without feeling like you’re on display. The options range from nearly opaque to subtly screening, and each one trades something.
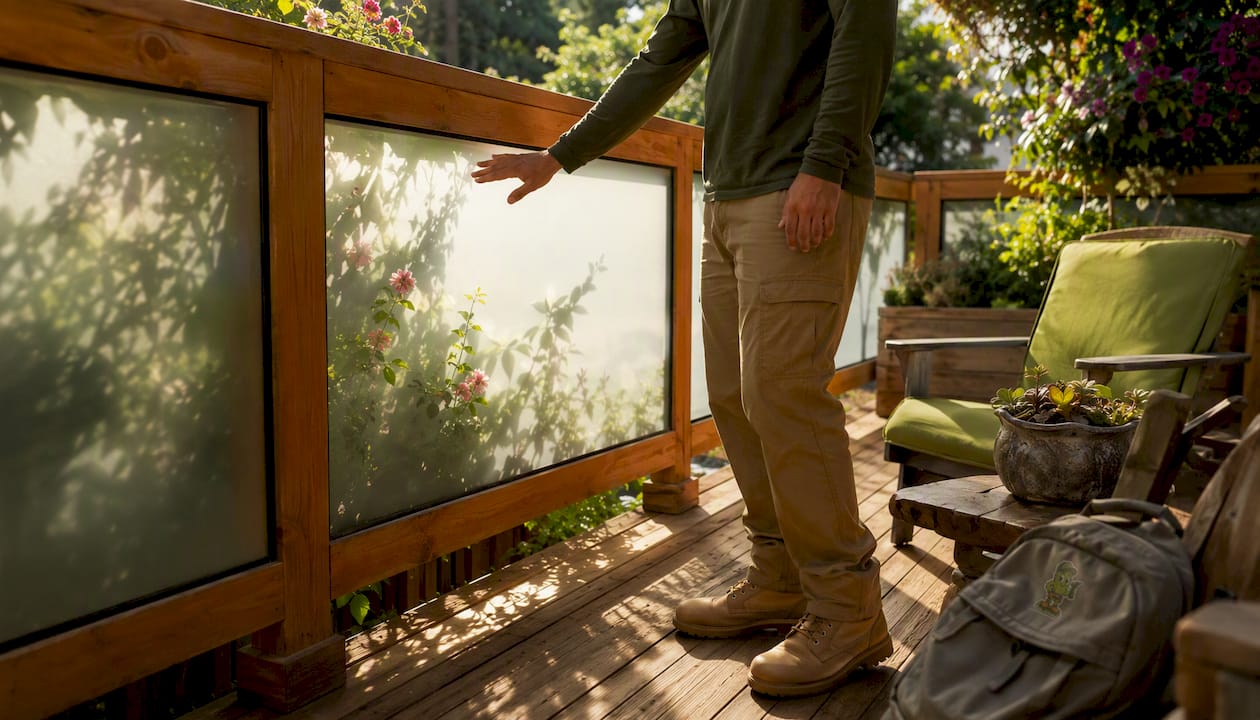
Frosted or opaque glass panels block sightlines while keeping the space feeling open and airy. They’re a good fit for urban decks where neighbors are close but you still want natural light. The trade-off is cost: frosted glass runs higher than clear, and the panels still need regular cleaning.
Vertical wood or composite slats create a slatted-fence look that filters light and air while blocking direct views. Spacing the slats 2–3 inches apart lets air move through, which matters on a hot deck. Tighter spacing gives more privacy but can make a small deck feel enclosed.
Lattice or trellis with climbing plants is the softest privacy option. It takes a season or two for plants to fill in, but the result is a living wall that adds texture and color. Lattice works best on ground-level or low-elevation decks where the structure doesn’t need to meet guard-height requirements.
Retractable screens attach to posts and roll down when you need privacy and up when you don’t. They’re practical for decks that face a street or a neighbor’s window. Quality matters here: cheap screens sag and tear within a season or two.
Built-in planter walls and bench-top screens combine function with privacy. A planter box along the railing perimeter adds greenery, raises the effective privacy height, and doubles as a design feature. Bench-top screens work similarly, creating a defined outdoor room without a full enclosure.
For partial privacy, consider mixing heights. A solid lower section (36 inches) with open cable or glass above it gives privacy from seated neighbors while keeping the sky open. Gates with screen inserts handle entry points without breaking the design.
Pro Tip: Add low-voltage LED strip lighting under the top rail or along the base of privacy slats. Without it, a slatted or solid privacy railing turns your deck into a dark box after sunset. The lighting adds ambiance and makes the space usable at night.
What are the cheapest deck railing options and can you DIY?
Budget-friendly railing is real, but “cheap” and “safe” have to coexist. Here’s where the money goes and where you can save it.
Budget-friendly material options
Pressure-treated wood picket kits are the lowest material cost. A basic kit from a big-box home center covers a standard 8-foot section for a fraction of what aluminum or composite costs. The catch is ongoing maintenance.
Vinyl/PVC picket kits cost slightly more than wood but need almost no upkeep. They’re available in prefab sections that snap or screw together.
Basic aluminum picket kits sit in the low-to-mid range and are genuinely low-maintenance. Many come pre-assembled in 6- or 8-foot sections.
Simple cable kits marketed for DIY installation are available from specialty retailers. They cost more than picket kits but less than a professionally installed cable system.
DIY starter ideas
Modular railing kits are the most accessible DIY option. They come with pre-drilled posts, pre-assembled infill panels, and hardware. If you can use a drill, a level, and a tape measure, you can install one on a ground-level deck. Adding planter boxes along the railing perimeter is another low-cost way to add privacy and visual interest without touching the structural railing at all.
Tools and tolerances to expect
A 4-foot level (or longer) for post plumb checks
A torque wrench for post anchor bolts (follow manufacturer specs)
A cable tension gauge if installing cable rail (under-tensioned cables sag and fail inspection)
A drill with a depth stop for consistent anchor holes
A miter saw for accurate top-rail cuts at stair angles
DIY vs. pro decision checklist
Hire a professional when any of these apply:
The deck is second-story or higher (fall risk during installation, structural anchoring complexity)
You’re installing frameless glass (spigot anchoring requires precise framing; errors are expensive)
The project requires a permit and stamped drawings (most jurisdictions require this for new guards)
Stair transitions are involved (rake angles, continuous top-rail requirements)
The existing framing is unknown or suspect (you need blocking in the right places before you can anchor posts)
You’re in a coastal or high-wind zone where load requirements exceed standard residential specs
Self-installing complex systems like frameless glass or precise cable runs can reduce total project cost, but they demand level framing and careful tension work that many first-timers underestimate. A single out-of-plumb post in a glass system means the whole panel run is off.
What are the building code basics for deck railings in the U.S.?
Guards are generally required on any deck platform raised 30 inches or more above grade, per ICC model codes. That’s the federal baseline. Local jurisdictions often go further.
The most commonly cited IRC requirements for residential deck guards:
Minimum guard height: 36 inches for decks less than 30 feet above grade; some jurisdictions require 42 inches on higher decks or around pools
Baluster/opening limit: No opening in the guard should allow a 4-inch sphere to pass through
Top-rail load: Guards must withstand a 200-pound concentrated load applied in any direction at the top rail
Post anchoring: Posts must be anchored to the framing, not just the decking surface
Code callout: U.S. codes require guards on platforms at least 30 inches above grade, but local amendments frequently raise the bar. Always verify with your local building department before buying materials or scheduling installation.
A few safety points that go beyond the numbers. Horizontal elements that form a ladder pattern are a climbing hazard for children. If your design uses horizontal cable or horizontal boards, check whether your local code restricts them near play areas. Stair railings have their own requirements: handrails on stairs must be graspable (typically 1.25"–2" diameter) and continuous from top to bottom. Post anchoring at stair landings is a common failure point in DIY installations.
Permits matter. Most jurisdictions require a permit for new deck guards, and some require stamped engineering drawings for glass or cable systems. Skipping the permit doesn’t just risk a fine; it can create problems when you sell the house. Cactusdecking handles deck railing height compliance and permitting as part of its standard process, which removes that burden from the homeowner entirely.
How long do different railing materials actually last?
Maintenance expectations vary more by material than most homeowners expect. The table below gives a realistic picture.
Material | Maintenance level | Typical issues | Cleaning frequency | Relative lifespan |
|---|---|---|---|---|
Pressure-treated wood | High | Rot, warping, splintering, insect damage | Seal/stain every 1–3 years | long lifespan with maintenance |
Cedar/hardwood | High | Graying, checking, rot at joints | Seal annually | long lifespan with maintenance |
Composite | Low | UV fading, surface chalking | Wash every 6–12 months | 25–30 years |
Aluminum (powder-coated) | Very low | Coating chips, fading in intense UV | Rinse every 6–12 months | 30+ years |
Steel/wrought-iron look | Medium | Rust if coating chips | Inspect coating annually; touch up as needed | long lifespan with maintenance |
Frameless glass | Low (structure) | Smudging, mineral deposits, seal degradation | Clean glass every 1–3 months | long lifespan (hardware dependent) |
Cable (stainless steel) | Low | Tension loss, surface oxidation in coastal air | Wipe down annually; check tension seasonally | 30+ years with marine-grade hardware |
Climate considerations. In wet or humid climates like the Pacific Northwest, wood degrades faster than the table above suggests unless you’re diligent about sealing. Composite and aluminum are the practical choices for high-rainfall areas. Coastal salt air accelerates corrosion on any metal with a compromised coating; powder-coated aluminum and marine-grade stainless hardware are the reliable options there. In freeze-thaw climates, post anchors and concrete footings take the most stress; inspect them every spring.
One thing worth saying plainly: even materials marketed as “maintenance-free” benefit from routine cleaning every 6–12 months. Environmental grime, pollen, and mildew build up on composite and aluminum just as they do on wood. Neglect accelerates finish degradation and can void manufacturer warranties. An annual wash-down with a mild soap and a soft brush is all it takes for most low-maintenance materials.
Pro Tip: For coastal or poolside railings, check the hardware grade, not just the railing material. A composite post with zinc-plated screws will fail at the fasteners long before the composite itself shows wear. Specify stainless steel fasteners throughout, and ask your installer to confirm the hardware spec in writing. For poolside applications, pool deck maintenance practices also apply to the railing hardware in splash zones.
How do you choose the right railing for your deck?
Work through these questions in order and the decision gets much easier.
Core decision flow:
Does the deck require a code-compliant guard? (Is it 30"+ above grade?)
Do views matter? (If yes, cable or glass. If no, all options are open.)
What’s your maintenance tolerance? (Low: aluminum or composite. Higher: wood.)
What’s the budget range?
Site and use checklist:
Deck elevation (determines whether a guard is required and what height)
Proximity to a pool (may trigger additional barrier requirements)
Children or pets (horizontal elements, gate latches, baluster spacing)
Climate zone (wet, coastal, freeze-thaw, or dry)
HOA or historic district restrictions
Existing framing condition (can it support glass or cable post loads?)
Stair runs (continuous handrail required; adds complexity and cost)
View priority (high, medium, or none)
Budget matrix:
Band | Representative choices |
|---|---|
Low | Pressure-treated wood pickets, vinyl/PVC prefab kits |
Mid | Aluminum picket panels, composite railing systems, basic cable kits |
High | Frameless or semi-frameless glass, custom cable with composite posts, powder-coated steel |
Questions to ask a contractor before signing:
Do you handle the permit, or is that on me?
Will you provide stamped drawings if the inspector requires them?
What blocking or framing prep is needed before installation starts?
What’s the warranty on materials and labor, and who handles a warranty claim?
How do you protect the existing deck surface during installation?
What’s the realistic timeline from deposit to final inspection?
Red flags: a contractor who can’t answer the permit question, who quotes without seeing the framing, or who offers no written warranty on labor.
How does a professional railing installation actually work?
The standard professional process follows a clear sequence, and understanding it helps you evaluate any contractor you’re considering.
Consultation and design. A good installer starts by looking at the existing framing, not just the deck surface. Post blocking, ledger connections, and joist spacing all affect what railing systems are feasible. This is where Cactusdecking’s consultation process adds real value: the team reviews your framing condition, discusses material options, and helps you match the railing to both your aesthetic goals and your budget before anything is ordered.
Permit handling. Most new guard installations require a permit. Cactusdecking manages permitting as part of the project, including any stamped drawings required for glass or cable systems. That’s one less thing to track.
Material selection and ordering. Once the design is confirmed and the permit is in process, materials are ordered. Lead times vary by material; glass panels and custom cable hardware typically run longer than standard aluminum or composite kits. Building that into the schedule prevents delays.
Build and installation. Cactusdecking uses an in-house crew rather than subcontractors, which means the same team that planned the job builds it. Post anchoring, infill installation, top-rail fitting, and stair transitions are all handled in sequence with quality checks at each stage.
Warranty and follow-up. Cactusdecking backs its installations with a warranty on both materials and labor. If something moves, loosens, or fails, there’s a clear process for getting it addressed.
Common add-ons worth discussing during the design phase: integrated deck lighting (under-rail LED strips, post-cap lights), drink rails (a wider top rail with a flat surface), glass gates for pool access, and privacy planters along the railing perimeter. These are far easier and cheaper to integrate during the original installation than to retrofit later.
Cactusdecking serves Everett, WA and the surrounding area. Local permitting requirements in Snohomish County are factored into every project from the start, so there are no surprises at inspection. Their full range of deck railing systems covers everything from basic aluminum picket to custom cable and composite combinations.
How long does a deck railing project take from start to finish?
The honest answer: longer than most homeowners expect, mostly because of permitting. Here’s a realistic breakdown.
Design and consultation: 1–2 weeks. This includes the site visit, framing review, material selection, and finalizing the design. If you’re comparing multiple contractors, add time.
Permit application and approval: 2–6 weeks. This is the variable that catches people off guard. Simple projects in straightforward jurisdictions can move in two weeks. Complex systems (glass, cable with stamped drawings) or busy building departments can push this to six weeks or more. Apply early.
Material lead times: 1–4 weeks. Standard aluminum and composite kits are usually in stock at distributors. Custom cable hardware, glass panels, and specialty composite colors can take two to four weeks to arrive.
Installation: 1–3 days for a typical residential deck. A straightforward aluminum or composite system on a single-level deck often wraps in a day. A multi-level deck with glass panels, stair transitions, and integrated lighting takes longer.
Inspection and sign-off: 1–2 weeks after installation, depending on the building department’s schedule.
Total realistic timeline from first consultation to permitted, inspected completion: 6–12 weeks for most projects. If you’re planning a railing upgrade for a specific season or event, start the process at least three months out. Rushing the permit phase is the one thing that reliably delays projects.
Key Takeaways
The most effective deck railing upgrade balances view preservation, climate-appropriate materials, and code compliance before you spend a dollar on materials.
Point | Details |
|---|---|
Prioritize view or privacy first | Cable and glass preserve sightlines; composite slats and frosted glass add privacy. Decide this before choosing a material. |
Match material to your climate | Aluminum and composite outperform wood in wet or coastal climates; wood suits dry climates with committed maintenance. |
Verify code before buying | Guards are required at 30"+ above grade per ICC model codes; local rules often require 36"–42" heights and permits. |
Budget realistically by band | Low: wood or vinyl kits. Mid: aluminum or composite panels. High: frameless glass or custom cable systems. |
Cactusdecking handles design to permit | For Everett, WA homeowners, Cactusdecking manages consultation, permitting, in-house installation, and warranty-backed completion. |
The thing most homeowners get wrong about railing upgrades
The conversation around deck railings almost always starts with style, which is fine. But the decision that causes the most regret isn’t the infill choice or the color. It’s under-engineered post blocking.
Glass and cable systems transfer significant lateral loads into the posts, and the posts transfer those loads into the framing. If the blocking isn’t there, or if it’s undersized, the posts will move. A railing that wobbles isn’t just annoying; it fails the load test that most inspectors run. Retrofitting blocking after the decking is down is expensive and disruptive.
The fix is simple: before you commit to any railing system, have someone look at the framing from underneath. You’re checking for solid blocking between joists at every post location, adequate joist depth, and sound ledger connections. On a deck with accessible framing, this takes fifteen minutes. On a deck with a finished ceiling below it, it’s a more involved conversation.
The other thing installers see constantly: homeowners who choose a railing style based on photos taken in a different climate. A cedar top rail looks stunning in a dry Arizona climate. In western Washington, it’s gray and checking within two seasons unless you’re committed to annual maintenance. Match the material to where you actually live, not where the photo was taken.
Ready to plan your railing with Cactusdecking?
Picking a railing style is the fun part. Getting the framing assessed, the permit filed, and the installation done right is where most homeowners want a professional in their corner.
Cactusdecking offers the full sequence in Everett, WA: a site consultation that starts with your framing (not just your Pinterest board), material selection across composite, cable, aluminum, and wood options, permit handling, and warranty-backed installation by an in-house crew. No subcontractors, no guesswork on code compliance.
To request a quote, have these ready: your deck’s approximate dimensions, the elevation above grade, a few photos of the existing framing if accessible, and a rough sense of your style preference and budget band. From there, the team can give you a realistic scope and timeline.
Start with a design consult to see what’s possible for your space, or browse the completed project gallery to find a look you want to bring to your own yard.
Useful sources and further reading
These are the primary resources used to verify code requirements, material guidance, and design recommendations in this article. Local rules vary; always confirm requirements with your local building department before starting a project.
International Code Council (ICC) — model residential codes including guard requirements
Deck Railing Style Guide — Decks.com
Deck Railing Ideas: 25+ Designs for Every Style and Budget — The 5th Wall Co.
Deck Railing Height: What Every Homeowner Must Know — Cactusdecking