Multi Level Deck Ideas That Actually Work for Your Yard
Explore innovative multi level deck ideas that transform your outdoor space. Create distinct zones for dining, lounging, and entertaining!
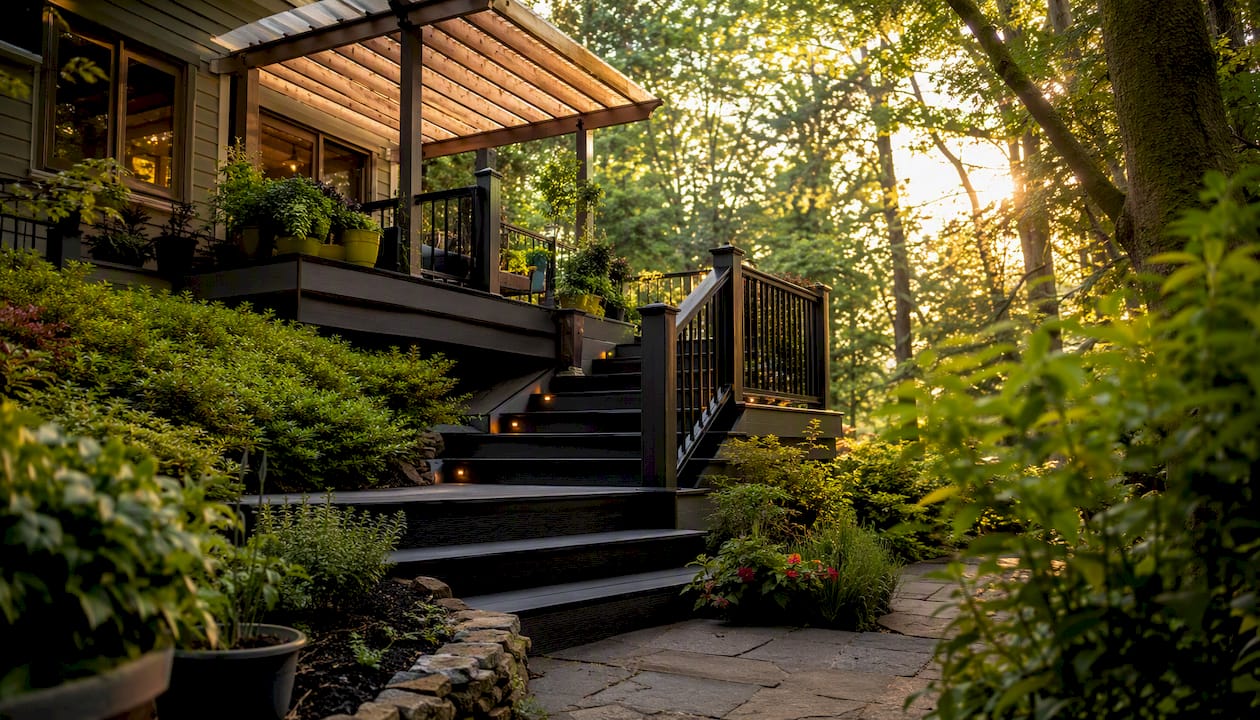
Multi Level Deck Ideas That Actually Work for Your Yard
A multi-level deck is the most practical way to turn a sloped lot, a long rear elevation, or an awkward grade change into distinct outdoor rooms that each serve a purpose. If your yard drops away from the house, has a pool at the bottom, or simply needs a dining zone separated from a lounging area, a tiered design solves all of it at once.
The six idea families worth exploring first:
Split-level entertainer — upper tier off the kitchen door, lower tier for seating or fire
Hillside terraced cascade — three or more platforms that follow the natural slope
Pool or hot-tub surround — transition deck that connects the house to water features
Rooftop terrace — flat-roof or garage-top platform for urban lots with no yard depth
Hot-tub retreat — dedicated raised pad with privacy screening and step-down access
Compact urban two-tier — modest footprint, big visual impact for narrow city lots
One quick feasibility check before you go further: if any walking surface sits 30 inches or more above grade, the International Residential Code (IRC) requires guardrails, and a building permit is almost certainly required. Door threshold heights, slope percent, and soil conditions determine the rest.
Table of Contents
10 Multi Level Deck Ideas and When Each One Works Best
How to plan a multi-level deck before calling a contractor
What makes multi-level decks structurally different (and what to ask your contractor)
Choosing materials, railings, lighting, and built-ins across tiers
What does a multi-level deck actually cost?
Common mistakes homeowners make with multi-level decks
Key Takeaways
Why the structural plan matters more than the inspiration photo
Cactusdecking builds multi-level decks in Everett, WA
Verified sources and further reading
10 Multi Level Deck Ideas and When Each One Works Best
Good multi level deck design starts with matching the concept to the site, not the other way around. Here are ten distinct ideas, each with a practical note on where it shines.
1. The split-level entertainer
Two platforms offset by 18–30 inches, with the upper deck directly off the kitchen and the lower deck stepping down toward the yard. The height difference creates a natural visual separation between the cooking/dining zone and the lounge area without a wall or fence. Works best on lots with a gentle 2–5% slope. A pergola or partial cover over the upper tier ties it to the house architecture and keeps the grill area dry.
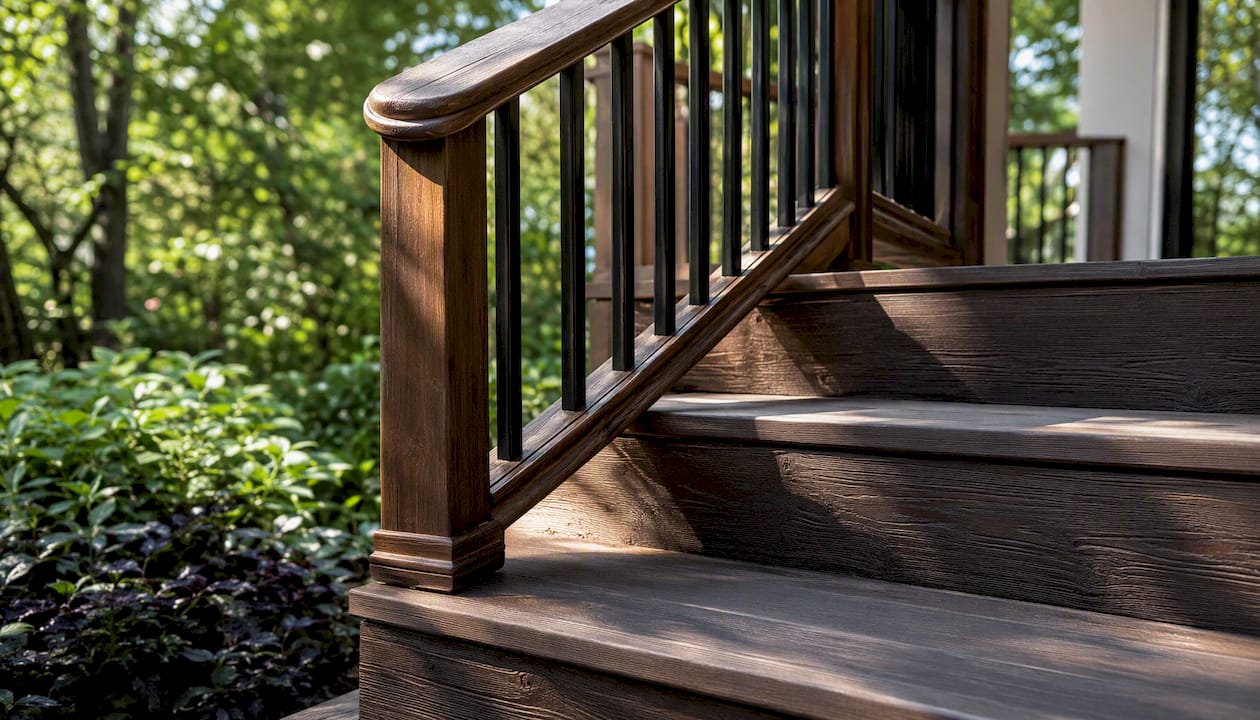
What to photograph for inspiration: the stair transition detail and how the railing wraps the corner.
2. The hillside terraced cascade
Three or more platforms that follow a steep slope, each connected by short stair runs of 2–4 steps. This approach works with the grade rather than fighting it, which reduces the amount of fill or retaining wall work required. Each tier can hold a distinct function: dining at the top, fire pit in the middle, garden-level seating at the bottom. Minimum practical width per tier is around 10 feet to fit a table or a pair of lounge chairs comfortably.
Visual cue: consistent railing style across all tiers, with plant boxes at the edges to soften the grade transitions.
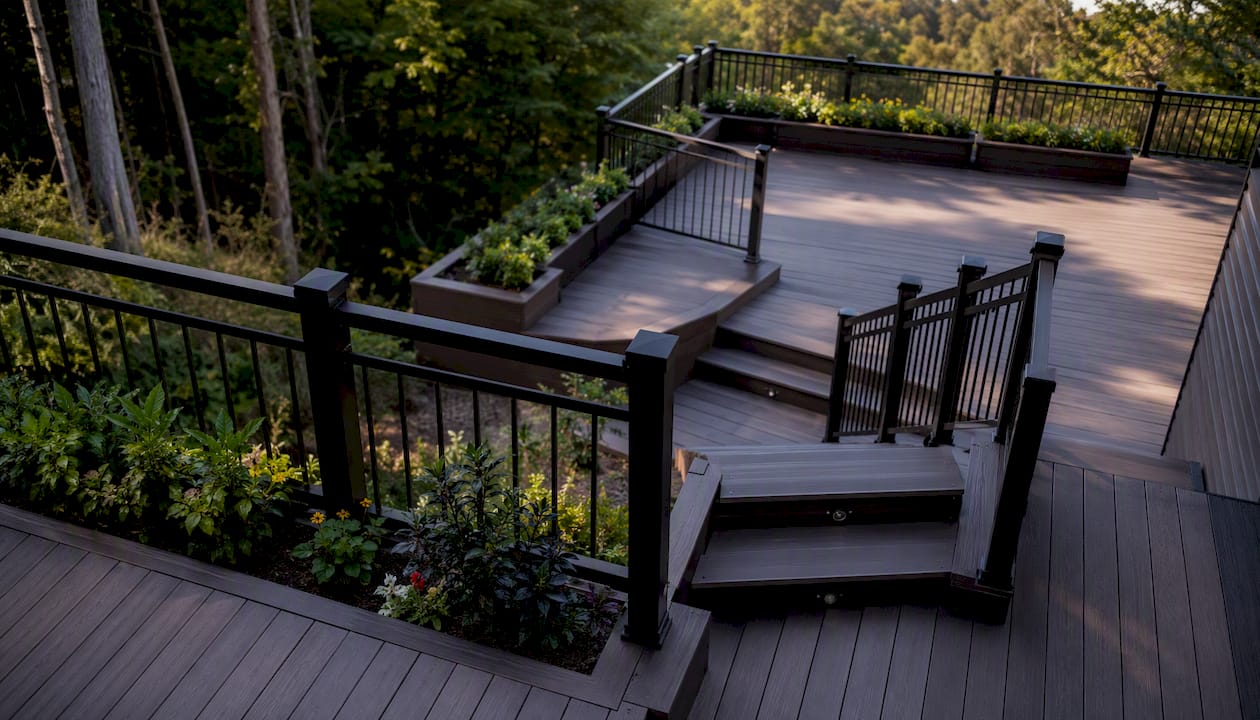
3. The wrap-around with step-down lounge
An L-shaped or U-shaped upper deck that wraps two sides of the house, with one arm stepping down to a lower lounge platform. Ideal for corner lots or homes with two exterior doors at different elevations. The wrap-around geometry naturally creates sheltered pockets for seating. Cedar or capped composite in a warm tone reads well against most siding colors.
4. The pool-transition deck
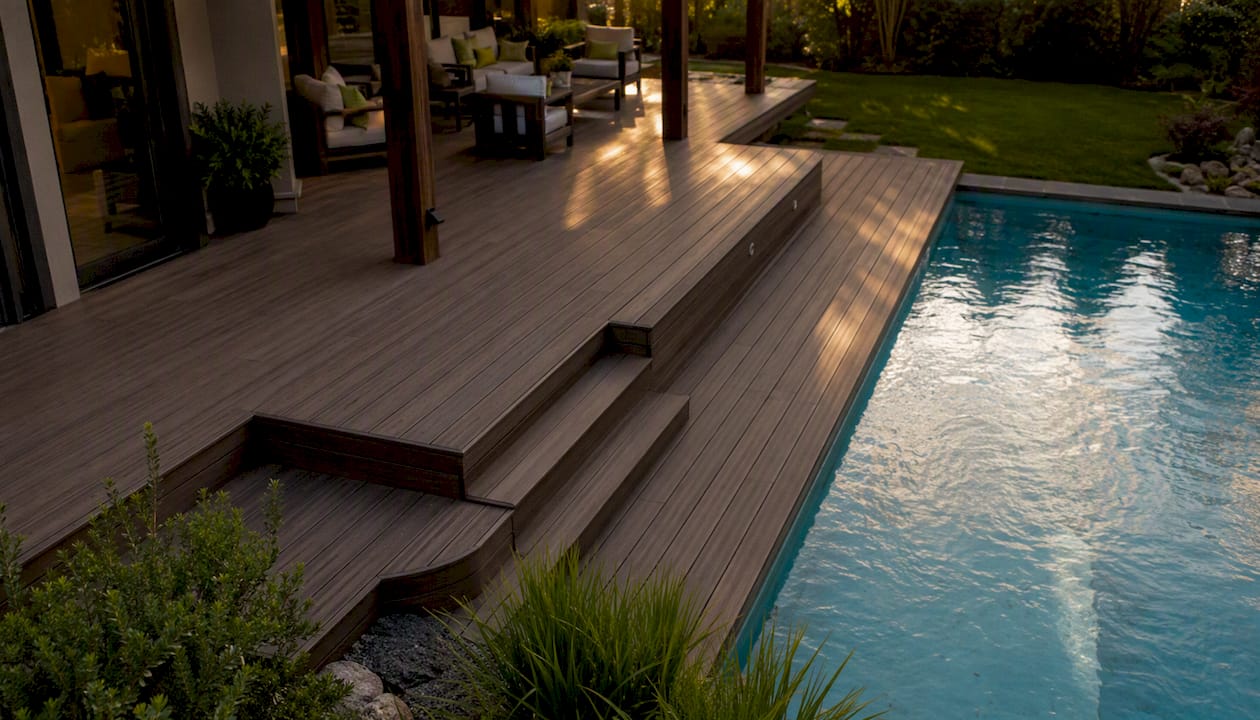
A multi-tier platform that connects the house to an in-ground pool, with the upper level serving as a shaded dining area and the lower level as a pool surround. Pool surrounds and rooftop patios benefit from materials that handle wet-dry cycles well — capped composite or PVC outperforms pressure-treated wood in these conditions. The stair run between levels should be wide (at least 48 inches) to handle pool traffic safely.
What to save: overhead shots that show the full transition from house to water.
5. The rooftop terrace
Built on a flat roof or above a garage, this concept works for urban lots where the yard is minimal or nonexistent. Structural requirements are significant: the existing roof must be engineered to carry live and dead loads, and waterproofing below the deck surface is non-negotiable. Pedestal-mounted composite decking systems are common here because they allow drainage without penetrating the membrane. Views are the payoff.
6. The compact urban two-tier
A modest footprint — often 12 x 16 feet total — split into two levels with a single stair run of 3–4 steps. Small tiers expand usable space without major grading, making this the right call for narrow city lots where every square foot counts. The lower tier often doubles as a landing zone for the yard. Mixed materials (composite decking with aluminum rails) keep the look clean and maintenance low.
7. The outdoor-kitchen platform
An upper-level platform sized specifically for a built-in grill station, counter, and bar seating, with a lower tier for dining. The kitchen platform needs extra structural attention: built-in grills and stone counters add concentrated loads that require beefier framing and footings. Gas line and electrical rough-in should happen during framing, not after. Budget an extra 15–20% over a standard deck for the utility work alone.
8. The hot-tub retreat
A dedicated raised pad, typically 12 x 12 feet minimum, framed to carry the wet weight of a filled hot tub (often 4,000–6,000 lbs). This is one of the most structurally demanding applications in residential decking. The pad usually sits one step below the main deck level, which lowers the entry point and adds a sense of enclosure. Privacy screens or a pergola overhead complete the retreat feel.
9. The mixed-material statement deck
Two tiers using different but complementary materials — composite decking on the upper level, large-format pavers or stone on the lower — to create visual contrast and define zones. The transition between materials becomes a design feature rather than a seam. Works best when the lower tier is at or near grade, where pavers are structurally simpler and drainage is easier to manage.
10. The staggered side-yard levels
When the primary rear yard is small, a staggered deck wraps around the side of the house, using the grade change along the foundation to create a second level. Often overlooked, this layout can add 150–200 square feet of usable outdoor space without touching the rear yard at all. Narrow stair runs (36 inches minimum per IRC) connect the levels along the house wall.
How to plan a multi-level deck before calling a contractor
A solid plan saves money and prevents the most common layout regrets. Work through this checklist before your first contractor call.
Site assessment:
Measure door threshold heights on every exterior door that will connect to the deck
Calculate slope percent across the build area (a 1-foot drop over 10 feet = 10% slope)
Identify drainage direction and note any low spots where water pools
Check soil type — clay-heavy soil requires deeper footings than sandy or loam soils
Call 811 to locate underground utilities before any digging
Circulation and stair placement:
Stairs should follow the natural path people already walk in the yard
Prefer wide stairs (48+ inches) with landings between flights over narrow, steep runs
Standardize rise and run across every stair in the project — consistent riser/run geometry reduces trip hazards and keeps the build code-compliant
Place the primary stair where it connects the most-used tier to the yard, not where it’s structurally convenient
Layout logic:
Dining area belongs on the tier closest to the kitchen door
Lounge and fire pit areas work best on mid or lower tiers, further from cooking traffic
Private zones (hot tub, reading nook) go furthest from the house or around a corner
Pro Tip: Before finalizing any tier’s footprint, set out your actual furniture — a 60-inch round table needs at least a 12 x 12-foot clear zone, and a sectional sofa needs more. Sketch on paper first, then walk it out with tape on the ground. Tiers that look generous on a plan feel cramped once the chairs are in.
For deck design in Everett, Cactusdecking’s site assessment process covers all of these points before a single board is specified.
What makes multi-level decks structurally different (and what to ask your contractor)
Single-level decks are relatively forgiving. Multi-level builds are not. Each platform introduces its own independent load path — meaning each tier needs its own footings, post-and-beam network, and connections to adjacent framing. When post heights or spans exceed the prescriptive limits in the IRC span tables, an engineer’s stamped plans are required, not optional.
The IRC requires guardrails on any walking surface 30 inches or more above grade. On a multi-level deck, each platform must be evaluated individually — a lower tier that sits only 18 inches off grade may not need a rail, while the upper tier at 48 inches absolutely does. Footings, post sizing, and ledger connections must each meet the structural load requirements for their specific platform, not the deck as a whole.
Typical inspection milestones for a permitted multi-level deck: footing inspection before concrete is poured, framing inspection before decking is installed, and a final inspection after rails, stairs, and any electrical work are complete. Skipping any of these creates liability and can complicate a future home sale.
Check deck permit requirements for a practical overview of what local permitting typically involves.
Questions to ask every contractor before signing:
Can you sketch the load path for each tier and show me where the footings will be?
What footing depth and diameter do you use for this soil type and post height?
How do you handle the ledger connection on the attached level?
What’s your drainage plan where one tier covers another?
Do you pull the permit, or does that fall to me?
Can you show me photos of a similar multi-level project you’ve completed?
What does your warranty cover, and for how long?
Line-item pricing matters here. Ask for framing, decking, railing, and stairs quoted separately so you can value-engineer without accidentally cutting structural elements. For custom deck installation that includes permitting and warranty coverage, Cactusdecking handles the full scope.
Choosing materials, railings, lighting, and built-ins across tiers
Visual continuity across levels is what separates a well-designed tiered deck from one that looks like it was built in phases. The material and finish decisions you make on tier one should carry through to tier three.
Material comparison:
Material | Durability | Maintenance | Best Use Case | Relative Cost |
|---|---|---|---|---|
Pressure-treated pine | Good | Moderate (annual sealing) | Budget framing and decking | Lowest |
Cedar | Good | Moderate (staining every 2–3 yrs) | Natural look, moderate climate | Low-mid |
Hardwood (ipe, tigerwood) | Excellent | Low-moderate (oiling) | Premium look, high-traffic tiers | High |
Capped composite | Excellent | Very low (occasional wash) | All tiers, wet areas, pool surrounds | Mid-high |
PVC | Excellent | Very low | Wet environments, rooftop | High |
Capped composite and PVC hold up best in the Pacific Northwest’s wet climate and are the materials Cactusdecking most often recommends for multi-tier builds in Everett.
Railing strategies:
Cable rail preserves sightlines on hillside or waterfront decks where the view is the point
Glass panels offer uninterrupted vistas and work well on rooftop terraces
Aluminum balusters with a wood top cap give warmth without the maintenance of an all-wood rail
Check deck railing height requirements before specifying any system — height minimums vary by platform elevation
Lighting design for multi-level decks:
Step lights and under-rail LEDs are the workhorses of tiered deck lighting. The goal is to mark every level change clearly at night while creating a warm, layered ambiance. Deck and step lighting options range from simple plug-in step inserts to hardwired zoned systems that let you dim the lounge tier independently from the dining tier. Recessed stair lights on every riser are the single best safety investment on a multi-level build.
Built-ins and heavy loads:
Frame hot tub pads with doubled joists and a dedicated beam, not standard joist spacing
Under-deck storage is most practical on lower tiers with at least 5 feet of clearance
Bench seating along tier edges doubles as a secondary guardrail element when framed correctly
Planter boxes at tier transitions soften the grade change and add greenery without pots
What does a multi-level deck actually cost?
Cost on a tiered deck is driven more by structure than by surface area. Height above grade, number of stair runs, railing linear footage, and material choice each add more to the final number than simply adding square footage does. A two-tier deck costs more per usable square foot than a comparable single-level build because framing complexity increases with each tier.
Ballpark cost ranges (U.S., 2025 estimates — regional variation applies):
Build Scenario | Estimated Range | Key Cost Drivers |
|---|---|---|
Simple two-tier, pressure-treated | — | Post height, stair count, permit fees |
Composite two-tier with wide stairs | — | Material premium, railing system, lighting |
Hillside three-tier, engineered plans | — | Engineering, deep footings, multiple stair runs |
These are ballpark figures for planning purposes. Get itemized quotes from licensed contractors for your specific site.
Typical project timeline:
Site visit and design: 1–3 weeks
Permitting: 2–6+ weeks (varies significantly by municipality)
Foundation and framing: 1–3 weeks
Decking and rail installation: 1–2 weeks
Final inspection: approximately 1 week after completion
Budgeting tip: Always ask for a quote that separates framing, decking, railing, and stairs into line items. That breakdown lets you swap composite for pressure-treated on the lower tier, or simplify the railing system, without accidentally cutting structural elements that can’t be compromised.
Common mistakes homeowners make with multi-level decks
Most regrets on tiered decks trace back to decisions made in the planning phase, not the build phase.
Mistakes to avoid:
Ignoring drainage under covered lower tiers. When an upper deck covers a lower space, water finds its way in. Without a dry-below drainage system or waterproof membrane, the lower tier becomes unusable and the beams rot faster.
Pro Tip: After framing is complete but before decking goes down, walk every stair run with your eyes closed. If you hesitate or catch a foot, the rise/run is inconsistent. Fix it at framing — not after the boards are down.
Maintenance on multi-level decks also deserves more attention than single-level builds. Inspect ledger connections and lower-level beams after every major storm. Keep ventilation open under covered tiers to prevent moisture buildup. Check baluster spacing and rail fasteners annually — deck stair and railing connections loosen over time, especially on tiers that see heavy foot traffic.
Key Takeaways
A multi-level deck is the right choice when your site has slope, distinct outdoor zones to separate, or a feature like a pool or hot tub that needs its own platform — and the structural investment pays off in usability and resale value when the build is planned correctly.
Point | Details |
|---|---|
Match design to site first | Slope, drainage, and door thresholds should drive the layout before aesthetics do. |
Guardrails are code-required at 30"+ | Each platform on a multi-level deck must be individually assessed per IRC requirements. |
Structure costs more than surface | Height, stairs, and railings drive cost more than square footage on tiered builds. |
Stair placement determines flow | Place stairs where people naturally walk, with consistent 7–8" rise and 10–11" run throughout. |
Cactusdecking handles the full scope | From design and permitting to warranty-backed installation in Everett, WA and surrounding areas. |
Why the structural plan matters more than the inspiration photo
Most homeowners start with a photo they love and work backward. That’s fine for aesthetics, but the decks that hold up for 20 years and stay low-maintenance are the ones where the structural plan came first.
The slope of the site, the direction water drains, and the soil composition under those footings determine whether a beautiful tiered design stays beautiful or starts showing problems at the ledger connections within five years. A hillside cascade that looks stunning in a photo was designed around a specific grade, specific soil, and specific post heights. Copy the look without understanding those variables and you’re guessing.
The detail most homeowners underestimate is drainage at transitions. Where one tier covers another, water doesn’t just disappear. It finds the path of least resistance, which is usually the ledger board or the rim joist of the lower tier. A dry-below framing strategy or a proper drainage channel isn’t a luxury add-on; it’s what keeps the lower level usable and the structure sound.
The other thing worth saying plainly: stair placement is a design decision, not a framing afterthought. The best multi-level decks I’ve seen treat the stair run as the hinge of the whole layout. Get it right and every tier feels connected. Get it wrong and the deck feels like two separate projects that happen to share a property.
Cactusdecking builds multi-level decks in Everett, WA
Turning a sloped yard or a long rear elevation into a layered outdoor living space takes more than good ideas. It takes accurate site assessment, structural planning that accounts for each tier’s load path, and a permit process that doesn’t stall your project for months.
Cactusdecking designs and builds custom multi-level decks in Everett, Washington and surrounding areas, using composite, PVC, and cedar materials with warranty-backed installations. The process is straightforward: a site visit and measurement, a design sketch that accounts for your door thresholds and grade, permitting handled in-house, staged construction with inspections at every milestone, and a final walkthrough with warranty documentation.
What to expect when you reach out:
A site visit where slope, drainage, and door access are assessed before any design is proposed
Material options presented with honest maintenance and cost tradeoffs
Permit applications filed by the crew, not handed back to you
A project gallery of completed multi-level builds you can review before committing
Ready to see what your yard can actually hold? Start with a design consultation and get a plan built around your specific site.
Verified sources and further reading
These sources back the technical claims in this article and are worth bookmarking if you want to go deeper on code requirements, structural details, or design inspiration.
Multi-Level Deck Construction: Design and Structural Considerations | National Deck Authority
How to Build a Multi Level Deck (Design & Ideas)
Multi-Level Deck Design Ideas to Make the Most of Your Space
Designing Multi-Level Decks That Work with Your Landscape | MG Construction & Decks
2-Tier Deck: Design, Costs & Building Guide