Under Deck Ventilation for Homeowners: Check 2 Inches Before Repairs
Check under deck ventilation, measure for 2 inches of clearance, spot blocked airflow, and compare fixes using manufacturer and contractor guidance.
Under Deck Ventilation for Homeowners: Check 2 Inches Before Repairs
Yes, ventilating under your deck matters. For most decks, good airflow is the single best defense against rot, mold, and corroded fasteners, and when airflow can’t be achieved, an under-deck drainage or ceiling system is the right substitute. Start by measuring your clearance from grade and checking whether your skirting blocks airflow, then schedule an inspection if anything looks trapped or damp.
TL;DR:
Measure grade clearance to the lowest framing member, aim for at least 2 inches, and verify the exact requirement in the product guide.
For blocked airflow, add intake and exhaust vents on opposite sides or replace solid skirting with louvers; homeowners can handle these simpler retrofits.
When composite or PVC decks sit close to grade, supported sleepers 1.5 to 2 inches high may be required to preserve airflow and warranty coverage.
Use drainage or ceiling systems when living space sits below, airflow is impossible, or leaks persist, but plan slope, flashing, and exhaust.
Clear vents and louvered panels at least twice a year, and inspect after heavy rain for pooling, shifted panels, or debris blocking airflow.
CactusdeckingBuild a Deck That Handles MoistureCactus Decking builds custom outdoor spaces in Everett with composite, PVC, or cedar options to suit your needs and preferences.Explore deck construction
Table of Contents
Why ventilation under a deck matters
Clearances, slope, and installation guidelines to check now
Fixing airflow under a low or obstructed deck
Under-deck drainage and ceiling systems: when they make sense
Contractor’s inspection checklist and material notes
How local humidity affects your ventilation needs
Keeping your ventilation system working long-term
When to hire a pro and what to expect
Getting your deck’s airflow fixed right
Sources
Why ventilation under a deck matters
Trapped moisture is the root cause behind most deck substructure failures. When air can’t move freely beneath the boards, water sits on joists and beams long after a rainstorm, and that steady dampness feeds wood rot, mold growth, and corrosion on screws, brackets, and hangers.
This isn’t limited to wood decks. Composite decking manufacturers explicitly warn against attaching boards directly to solid or watertight surfaces, and blocked airflow in these setups can shorten the material’s lifespan and create warranty issues.
The fix starts with basic physics: cross-ventilation, meaning intake on one side and exhaust on the opposite side, keeps air moving instead of pooling in dead zones.
Moisture trapped against joists accelerates wood rot and fastener corrosion.
Stagnant air pockets under low decks are where mold tends to start.
Composite and PVC decking installed without airflow can still trap humidity against the substructure.
Composite decking manufacturers require clearances and prohibit mounting boards on solid, watertight surfaces when installation guidance applies, which makes ventilation a built-in requirement rather than an optional upgrade.
Clearances, slope, and installation guidelines to check now
Before deciding on a fix, grab a tape measure and check a few numbers against manufacturer and retailer standards. Composite decking installation guidance recommends a clearance from grade for the substructure, with added perimeter or soffit venting wherever that clearance is obstructed, according to Lowe’s installation guide.
Where airflow is limited, TimberTech specifies a minimum sleeper height to create a required air cavity beneath the boards, a detail confirmed in its composite installation guide.
Slope matters too. Framing should pitch slightly away from the house, with retailer guidance citing small slopes as a workable minimum, per the same Lowe’s guide.
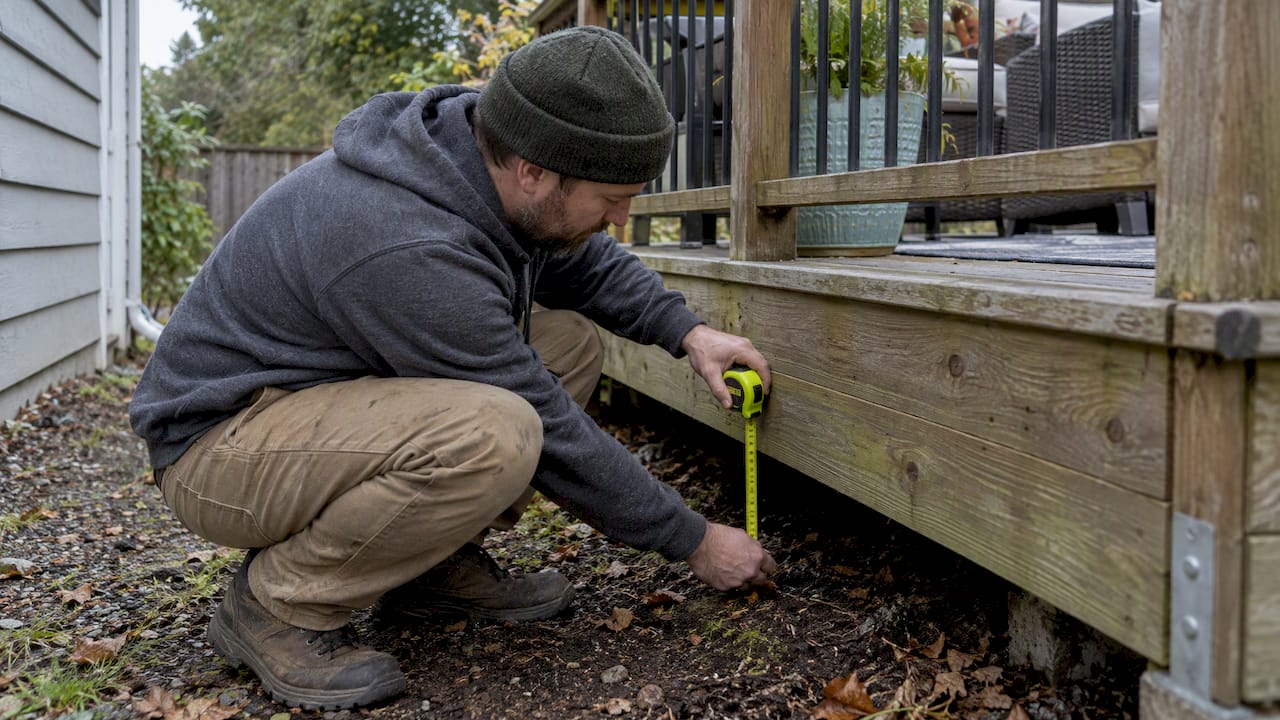
Measure clearance from grade to the lowest framing member; aim for at least 2 inches.
Check for standing water, soil contact, or staining on joists after a rain.
Confirm the deck surface slopes away from the house rather than toward it.
Look under skirting for gaps or louvers that allow air movement.
Fixing airflow under a low or obstructed deck
Most ventilation problems can be solved in stages, starting with the least invasive option and moving up only if the simpler fix doesn’t resolve the issue.
Add intake and exhaust vents on opposite sides of the skirting so air enters on one side and exits on the other, preventing the dead zones where moisture collects.
Swap solid skirting for louvered or removable panels. This is a low-cost update that keeps the look of a finished deck while letting air pass through; our deck skirting ideas cover styles that work well for retrofits.
Install a sleeper system where the deck sits close to grade or on a hard surface. A supported sleeper system, typically 1.5 to 2 inches high, creates the air cavity manufacturers require in obstructed-flow conditions.
Replace damaged decking or framing if inspection reveals rot, consistent staining, or fastener corrosion that a vent retrofit won’t reverse.
The same principle applies in other building systems: ventilation design relies on pairing intake and exhaust points so air keeps moving instead of stalling, a concept also used in roofing ventilation to protect attic spaces from trapped humidity.
Pro Tip: Check your skirting on a humid afternoon. If the air underneath feels noticeably heavier or damper than the air around it, you likely have a dead zone that needs an opposite-side vent.
Steps one and two are reasonable DIY projects for a handy homeowner. Sleeper systems and framing replacement involve structural work and are worth handing to a contractor, especially if rot or corrosion is already visible.
Under-deck drainage and ceiling systems: when they make sense
When a deck sits low to the ground, over a patio, or above living space, full ventilation sometimes isn’t realistic. That’s when an under-deck drainage or ceiling system becomes the better answer. These systems channel water running through the deck boards into gutters and downspouts, creating a dry, usable area underneath instead of a damp crawlspace.
The trade-off is that a drainage system changes how air moves through the space, so flashing, slope, and exhaust points need careful planning rather than a simple vent retrofit. Done without that planning, a drainage panel can trap humidity instead of clearing it.
A drainage or ceiling system is usually the right call when:
There’s finished or usable living space directly beneath the deck.
Water intrusion keeps recurring despite vents, skirting changes, or regrading.
The deck’s height or site conditions make true cross-ventilation impossible.
We install these systems as part of our deck covers work, pairing drainage with proper slope and exhaust planning so the space below stays dry year-round.
Contractor’s inspection checklist and material notes
A thorough inspection measures clearance from grade, checks slope direction, and looks for rot at ledger connections, fastener corrosion, and staining that points to standing water. Each measurement determines whether the fix is a vent retrofit, a sleeper system, or a full rebuild.
Material matters here. Cedar decks need airflow to prevent rot the same way any wood structure does, while composite and PVC decking need it to protect the boards themselves and preserve manufacturer warranties. Low-clearance composite installations almost always call for a sleeper system rather than a simple vent swap, since the air cavity requirement is built into most manufacturer guidance.
How local humidity affects your ventilation needs
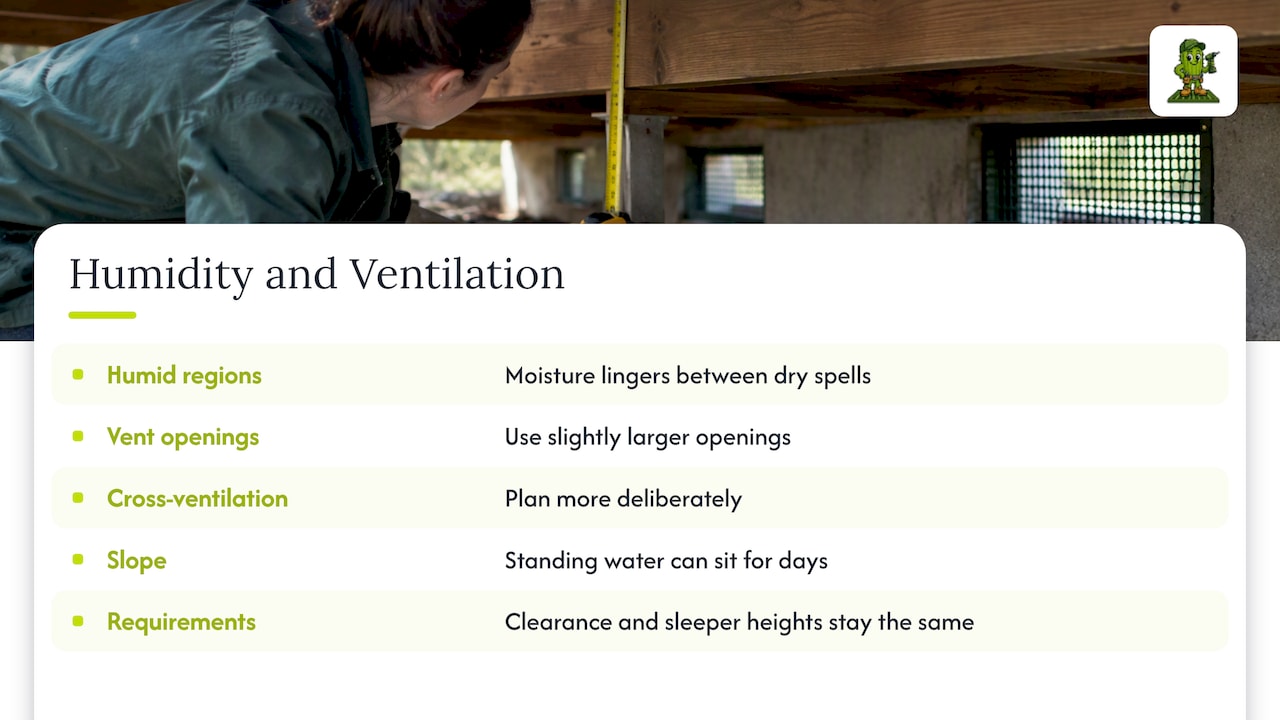
Climate changes how urgent a ventilation fix is. In consistently humid regions, including the Pacific Northwest’s wet fall and winter months, moisture under a deck has more opportunities to linger between dry spells, which gives rot and mold a longer runway to take hold.
Decks in these climates benefit from slightly larger vent openings and more deliberate cross-ventilation planning than the same structure would need in a drier region, since the air moving through has less capacity to dry out trapped moisture quickly. Homeowners in rainy climates should also pay closer attention to slope, since standing water that would evaporate fast elsewhere can sit for days under persistent cloud cover and drizzle.
This doesn’t change the underlying guidance from manufacturers or retailers. The same clearance minimums, sleeper heights, and slope recommendations apply everywhere, but a humid climate makes it less forgiving to skip them. A vent gap that’s borderline adequate in a dry region may prove insufficient where the air itself stays damp for weeks at a time.
If you live somewhere with a long wet season, treat the inspection checklist earlier in this guide as a seasonal habit rather than a one-time check, particularly after the first heavy rains of fall.
Keeping your ventilation system working long-term
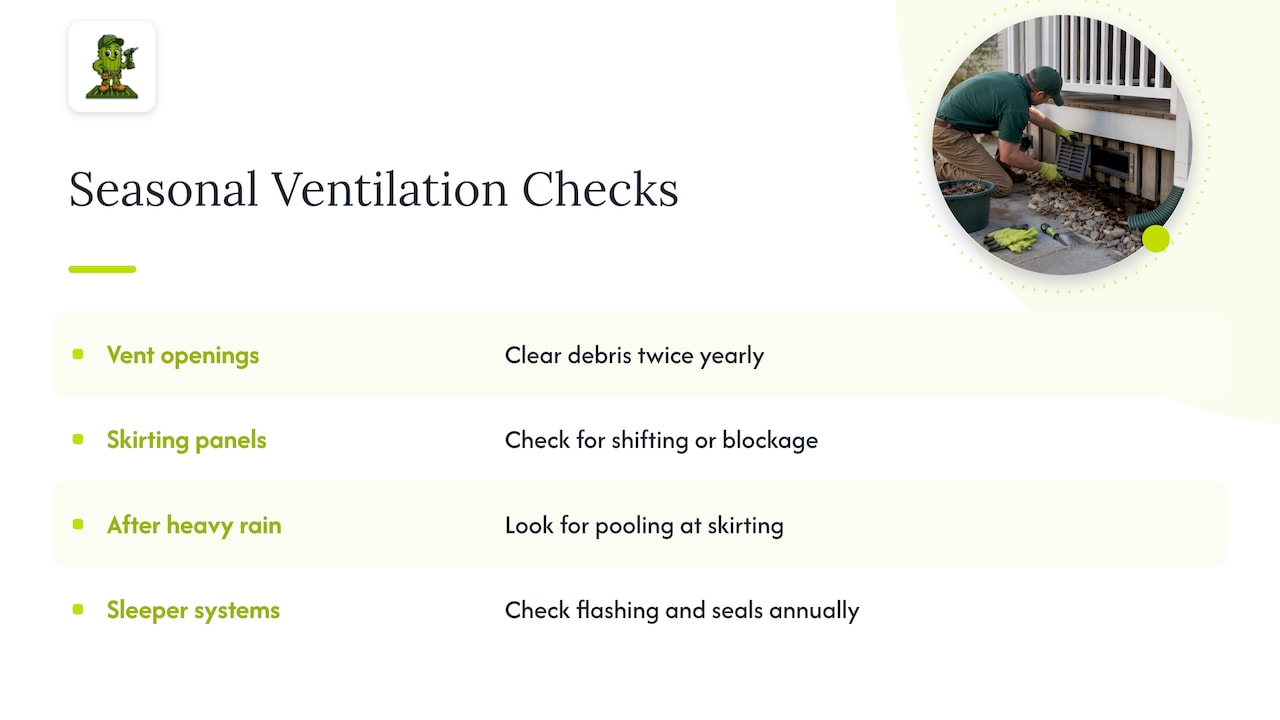
Ventilation fixes aren’t a one-time install and forget situation. Vents and louvered skirting panels collect leaves, dirt, and spiderwebs over time, and a blocked vent works no better than no vent at all.
A simple seasonal routine keeps airflow working as intended. Clear debris from vent openings and louvered panels at least twice a year, ideally before the wet season starts and again after leaves drop in autumn. Check that skirting panels haven’t shifted, warped, or been blocked by stored items like planters or firewood, which homeowners often stack right against the one gap that’s supposed to be moving air.
Walk the perimeter after a heavy rain and look for water pooling against the skirting rather than draining away. Standing water at the base often means the slope has shifted slightly or that soil or mulch has built up against an intake vent. Re-grading a small section or trimming back landscaping can restore the clearance a vent needs to function.
For sleeper systems and drainage installations, an annual check of flashing and seals helps catch small failures before they turn into bigger repairs. Small gaps in flashing are easy to miss but are often where water finds its way back into a space that was otherwise properly ventilated.
When to hire a pro and what to expect
Simple fixes like swapping solid skirting for louvered panels are well within DIY range for most homeowners. Once an inspection turns up rot at a ledger board, corroded fasteners, or a substructure sitting lower than grade allows, that’s hidden damage a contractor should evaluate before you spend money on a surface-level fix that won’t solve the real problem.
A solid inspection includes measuring clearance and slope, checking fastener condition, and confirming whether the issue is ventilation, drainage, or both. A fair estimate should spell out whether the fix is a vent retrofit, a sleeper system, or partial replacement, and why.
Professional repair work matters most when a warranty is on the line. Manufacturers tie coverage to installation details like clearance and sleeper height, so a repair that skips those specifics can void protection you’re otherwise entitled to.
— Vlad
Getting your deck’s airflow fixed right
We see under-deck ventilation problems often in our work across Everett and the surrounding area, and the fix usually falls into one of a few categories. Each project is handled directly by the build team without subcontracting the work out.

Inspection and vent retrofits for decks with blocked or insufficient airflow.
Sleeper systems for low-clearance composite or PVC installations that need a supported air cavity.
Deck covers and drainage systems when the space below needs to stay dry for living use.
Full deck replacement when rot or corrosion has gone past the point of a targeted repair.
The process starts with a consultation and inspection, moves into a clear estimate, and ends with installation backed by warranty so you know exactly what’s being fixed and why. If you’re not sure which category your deck falls into, request an inspection through our deck replacement page and we’ll walk the site with you before recommending anything.
FAQ
How to increase ventilation under a house?
Increasing ventilation under a house typically means adding or clearing foundation vents on opposite sides of the structure to create cross-flow, similar to the intake-and-exhaust principle used under decks. Under-floor ventilation rules referenced by NADRA are written for enclosed crawlspaces, so a foundation specialist should confirm vent sizing and placement for your specific house.
What is the best way to waterproof under a deck?
An under-deck drainage or ceiling system is the most reliable way to waterproof the space beneath a deck, since it channels water from above into gutters and downspouts instead of letting it drip through. These systems work best when paired with proper flashing and slope, which we install as part of our deck covers work.
What is the 30cm rule for decking?
There isn’t a universal clearance rule established by major deck manufacturers or U.S. building codes for residential decking clearance. Clearance recommendations vary by material and installation type, so check your specific product’s installation guide, such as TimberTech’s composite guide, for the exact minimum that applies.
How much fall on a deck?
Deck framing should slope slightly away from the house to drain water properly, with retailer installation guidance citing examples like 1/8 inch per 8 feet as a workable minimum, according to Lowe’s installation guide. This small pitch is enough to move water off the surface without being noticeable underfoot.
Can poor ventilation under a deck cause mold?
Yes, trapped moisture from poor airflow creates the damp conditions mold needs to grow, both on the underside of the decking and on nearby framing. If you’re already seeing mold, our guide on removing mold from a deck covers safe removal steps before you address the underlying ventilation issue.