
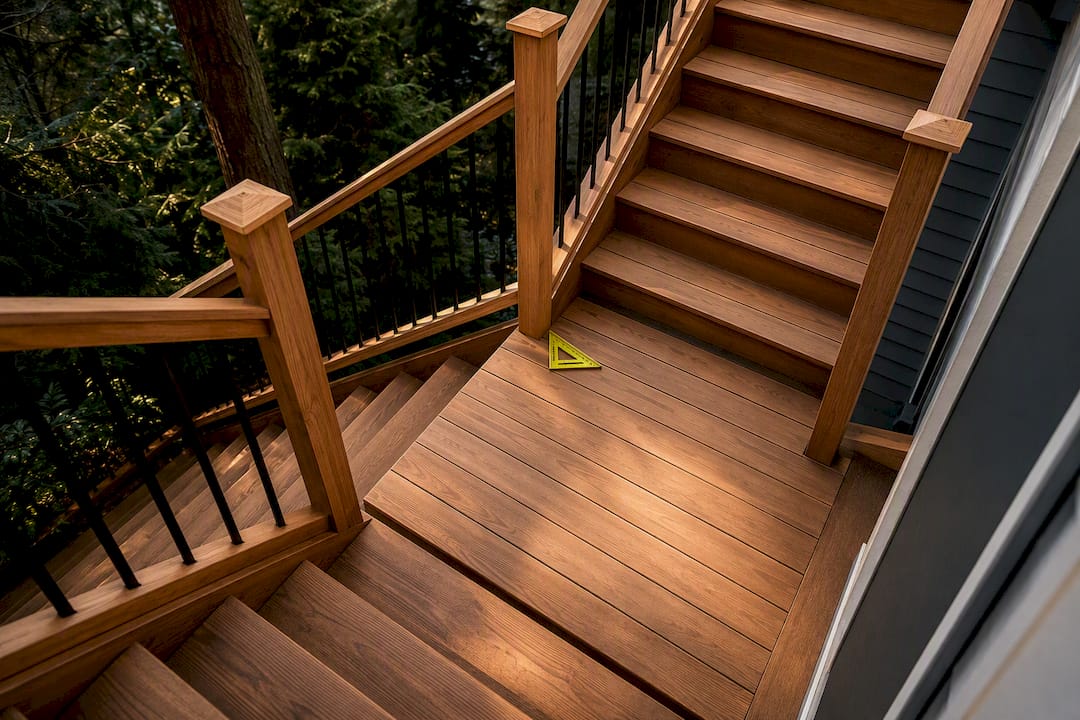
A switchback deck stair is a U-shaped, half-turn design with two parallel flights joined by an intermediate landing, built to climb a steep rise inside a compact horizontal footprint. The landing doubles as a rest point and a fall-arrest platform, which is why switchback layouts show up so often on tall decks with limited yard space. This guide covers the exact measurements, the code minimums, a worked calculation, and a full build sequence.
TL;DR:
- Switchback stairs are ideal for steep decks with limited horizontal space, reducing the needed run by about half compared to straight stairs.
- They require a minimum width of 36 inches, risers no taller than 7.75 inches, and treads at least 10 inches deep, with a landing at least as wide as the stair.
- Proper site measurement and slope consideration are crucial, as uneven grade can affect landing height and overall safety.
- A typical riser count is based on dividing total rise by a target height of 7 to 7.75 inches, then adjusting to ensure uniform steps within a 3/8 inch variation.
- Using quality materials like pressure-treated lumber, cedar, composite, or galvanized steel, combined with careful framing and guard requirements, ensures durability and safety.
Table of Contents
- What Is a Switchback (U-Shaped) Deck Stair?
- When Should You Choose a Switchback Layout?
- Code Basics and Required Dimensions for Safe Switchback Stairs
- How to Calculate Risers, Landings, and Stringer Cuts
- Materials and Assembly Choices for Outdoor Stairs
- Step-by-Step: Building a Switchback Stair From Site Prep to Railing
- Layout Examples and Planning Tools for Your Project
- What Pros Check on Site Before Building a Switchback Stair
- Ready to Build Your Switchback Stairs? Here’s How Cactus Decking Helps
- Sources
What Is a Switchback (U-Shaped) Deck Stair?
A switchback stair uses two parallel flights of steps connected by an intermediate landing that turns the direction of travel 180 degrees. That single feature separates it from an L-shaped stair, which turns only 90 degrees, and from a straight run, which climbs in one direction with no turn at all. Metal Stairs describes switchback and U-shaped stairs as functionally interchangeable terms for the same layout: two flights, one landing, one direction reversal.
Homeowners searching for “u shaped deck stairs” and “switchback deck stairs” are almost always looking at the same design. The half-turn shape earns its popularity because it solves a specific space problem: getting from a tall deck down to grade without eating up 15 or 20 feet of yard in a straight run.
There are three common variants worth knowing before you sketch anything:
- Single 180° landing: two flights of equal length meeting at one landing. This is the classic switchback, and it’s the most space-efficient version for a single-story deck-to-grade drop.
- Two quarter-landings: the stair turns 90 degrees, runs a short flight, then turns another 90 degrees, forming a squared-off U instead of a straight-back U. This works well when you need to route around an obstacle like a utility meter or a tree.
- Stacked multi-turn arrangements: used on decks with unusually tall rises (think walk-out basements combined with an upper deck), where two or more switchbacks stack to break the climb into manageable segments.
The landing itself is where design gets interesting. On a tight lot, it’s just a functional platform. On a bigger project, it becomes a design element in its own right, wide enough for a bench, a planter, or a lighting fixture that turns a mid-stair pause into an actual feature. The footprint tradeoff is real: a switchback needs roughly half the horizontal run of a straight stair covering the same total rise, but it needs more framing, more footings, and more linear feet of railing.
When Should You Choose a Switchback Layout?
Not every deck needs this configuration, and picking it just because it looks good in a photo is how projects go over budget. Run through these checks before committing to the layout.
- Check your rise-to-run ratio first. If your deck sits eight feet or higher above grade and your yard only gives you 10 to 12 feet of clear run before hitting a fence, patio, or slope, a straight stair simply won’t fit. A switchback folds that same rise into roughly half the horizontal distance.
- Account for yard slope and grading. A sloped yard changes where the bottom landing actually lands. Get an accurate site measurement before you calculate riser counts, because a stair designed for flat ground can end up with a mismatched final step on sloped soil.
- Weigh the need for a rest point. Anyone climbing more than about 12 steps in one continuous flight benefits from a landing to pause on, and that matters more for aging homeowners, anyone carrying groceries or a cooler, or households with young kids who tire on long runs.
- Consider disability and mobility access. A landing partway up a tall stair gives a cane or walker user a flat spot to reset, something a straight run of 14 steps never offers.
- Compare maintenance against spiral or straight alternatives. Spiral stairs save even more footprint but are harder to build safely for outdoor traffic and awkward for carrying furniture or a grill. Straight stairs are the simplest to maintain but need the most yard space. A switchback splits the difference: more framing than a straight run, less complexity than a spiral, and a landing surface that needs the same periodic cleaning and refinishing as the rest of your deck boards.
If your site has the horizontal room and you don’t need a rest point, a straight stair is cheaper to build and has fewer joints to maintain. The switchback earns its extra framing cost specifically on tight, tall sites.
Code Basics and Required Dimensions for Safe Switchback Stairs
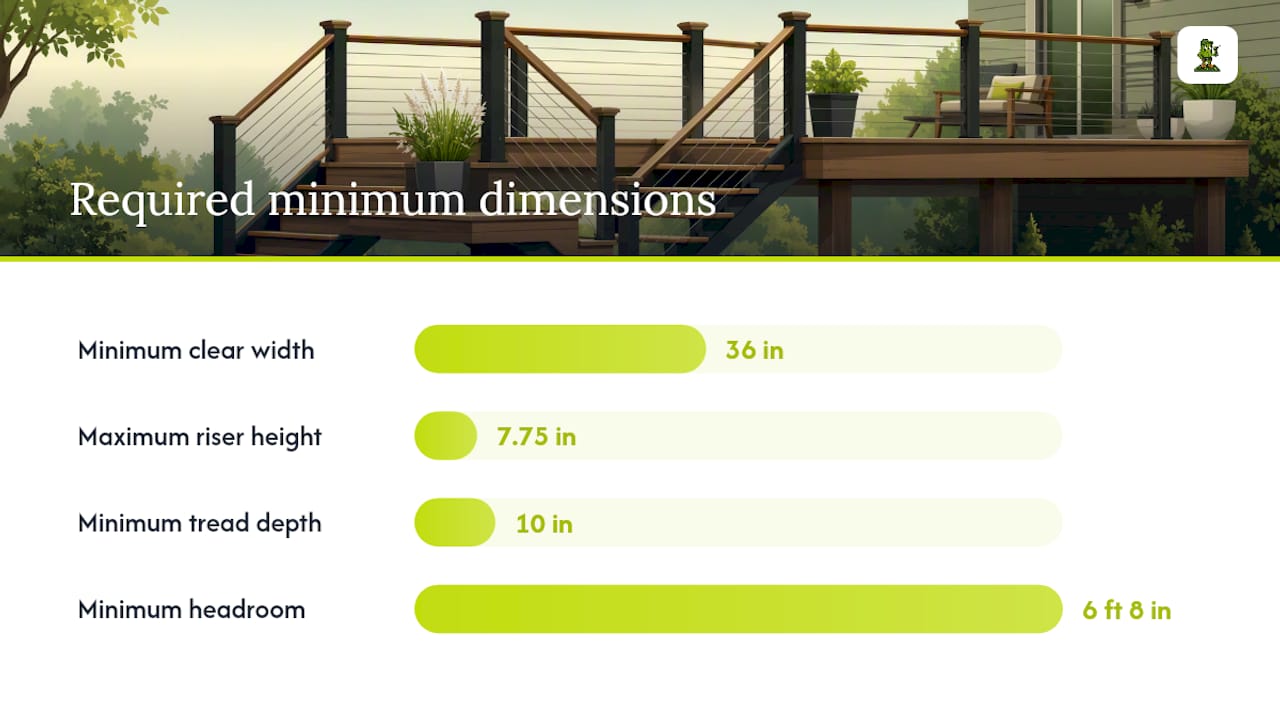
Every switchback deck stair has to satisfy the same baseline dimensions a straight stair does, and the International Residential Code (IRC) sets the floor that most U.S. jurisdictions build on, sometimes with stricter local amendments layered on top.
Before you cut a single stringer, verify these figures against your local building department, since amendments can tighten any of them:
- Minimum clear width: generally 36 inches, measured between handrails where they exist.
- Maximum riser height: typically capped around 7.75 inches per step.
- Minimum tread depth: usually no less than 10 inches.
- Landing depth: the landing must be at least as deep as the stair is wide, in the direction of travel.
- Minimum headroom: commonly 6 feet 8 inches measured vertically from the tread nosing.
Statistic Check: The IRC’s Chapter 3 building planning provisions set the width, riser, tread, and landing minimums that most local codes reference directly, but the IRC is a model code. Your city or county adopts it with its own amendments, and those amendments are the numbers that actually govern your permit. Never assume the base IRC figure is what your inspector will check.
Landing depth isn’t a bureaucratic detail. Because a switchback landing sits mid-stair, it functions as a fall-arrest platform. If someone stumbles on the upper flight, the landing is what stops that fall before it turns into a tumble down the second flight. That’s also why the landing has to be flat, level, and at least as wide as the stair itself. A landing that’s too shallow doesn’t give a falling person anywhere to land, and it doesn’t give anyone climbing a real place to stop and reset.
Handrail and guard requirements deserve equal attention on a switchback because you effectively have two flights and a landing, each needing continuous rail coverage. Watch for a few specific triggers:
- Guards on landings: any landing edge with a drop of 30 inches or more typically needs a guard, not just a handrail, and that guard has to meet the same baluster-spacing rules as the rest of the deck.
- Handrail continuity: both flights need continuous graspable handrail, and many jurisdictions require the rail to extend past the top and bottom risers.
- Baluster spacing: most codes cap the gap at 4 inches to keep small children from squeezing through, on the landing rail as well as the flight rails.
Skipping the landing guard because “it’s just a landing, not a full flight” is one of the most common inspection failures on switchback builds. Treat the landing rail with the same seriousness as the flight rails, because from a fall-safety standpoint, it is the same rail.
How to Calculate Risers, Landings, and Stringer Cuts
The single biggest mistake DIYers make on a switchback build is calculating each flight separately. Treat the whole stair, both flights plus the landing, as one math problem from the start.
- Measure total rise first. Measure the exact vertical distance from the top of your deck surface to the finished grade below, using a level and a tape measure, not an estimate.
- Pick a target riser height. Aim for something in the 7 to 7.75 inch range; This Old House’s stair-building guide recommends staying at or under 8 inches for comfortable outdoor climbing.
- Divide total rise by target riser height, then round to a whole number. That whole number is your total riser count across both flights combined.
- Divide the actual total rise by that riser count to get your final, exact riser height, applied uniformly to every step in both flights.
- Set the landing height to an exact multiple of that riser height. If your final riser height is 7.2 inches and you want six risers in the lower flight, the landing sits at exactly 43.2 inches above grade, no rounding.
Here’s a worked example. Say your total rise is 96 inches. Divide by a 7.5-inch target riser, and you get 12.8, which rounds to 13 risers. Ninety-six divided by 13 gives an actual riser height of 7.38 inches, which is well under the roughly 7.75-inch code ceiling. Split that into two flights of, say, 7 and 6 risers; the landing then sits at 7 times 7.38, or 51.6 inches above grade. If your rise doesn’t divide evenly no matter how you split the flights, adjust the target riser height slightly rather than leaving one riser noticeably taller than the rest. The IRC and most inspectors want riser variation held within 3/8 inch across the entire stair, a tolerance This Old House also flags as a must-hit target.
Stringer length comes next: use the Pythagorean relationship between your total run and total rise for each flight, then add extra material for the top and bottom cuts. If you’re using composite decking for treads, account for the extra thickness, composite boards often run thicker than dimensional lumber and sometimes need two boards side by side per tread, which changes your stringer notch depth.
Pro Tip: Run your numbers through an online U-shaped staircase calculator or a dedicated switchback staircase calculator before you cut anything. Plug in your total rise and run, and the tool outputs riser count, tread depth, landing height, and stringer length for both flights at once, which catches division errors before they become physical mistakes.
Materials and Assembly Choices for Outdoor Stairs
Outdoor exposure changes the calculus on materials more than indoor stair design ever does. Rain, freeze-thaw cycles, and UV exposure all attack a switchback stair’s two flights and landing simultaneously, so the material decision matters as much as the geometry.
Pressure-treated lumber remains the default for stringers because it’s affordable, widely available, and strong enough to span long switchback flights without extra bracing. It does need periodic resealing, and cut ends should get field-treated with preservative before installation. Cedar offers a warmer look and natural rot resistance but costs more and needs more frequent finish maintenance to hold its color outdoors. Composite decking works well for treads and landing surfaces because it resists moisture and doesn’t splinter, though it typically needs a wood or metal stringer underneath since most composite products aren’t rated as structural. Galvanized metal stringers cost more upfront but eliminate the rot risk entirely and hold up well in wet climates, at the tradeoff of a more industrial look that doesn’t suit every deck style.
A few assembly details matter regardless of which materials you pick:
- Use stainless steel or coated deck screws and structural hardware; standard zinc coatings corrode faster outdoors and can streak composite or cedar surfaces.
- Decide early whether the landing attaches to a ledger board on the house or deck, or stands freestanding on its own footings; a freestanding landing gives more flexibility on tricky slopes but needs its own posts and footings.
- Cut stringers by hand for a fully custom fit, use pre-fabricated metal stringer brackets to speed up layout, or order prebuilt modular stair sections; each option trades labor time against finish precision, with hand-cut stringers taking the longest but giving the cleanest custom result on an irregular site.
Cactusdecking’s deck stairs construction service covers this material selection process directly with clients, matching stringer and tread material to the site’s exposure and the homeowner’s maintenance appetite.
Step-by-Step: Building a Switchback Stair From Site Prep to Railing
A switchback build has more moving parts than a straight run because you’re essentially building a small deck (the landing) in the middle of your stair. Here’s the order that keeps the project on track.
- Prep the site and lay out footings. Mark the location of the landing posts and stair stringers, then dig and pour footings below your local frost line. If the landing is freestanding rather than ledger-attached, treat it exactly like a small deck box: posts on footings, with beams sized for the load.
- Decide ledger versus freestanding for the landing. A ledger-attached landing ties into the house or deck framing and needs proper flashing to prevent water intrusion behind the siding. A freestanding landing skips that risk entirely but needs its own structural posts and bracing against racking.
- Frame the landing like a mini deck. RedX Apps’ guide to building stairs with a landing recommends doubling the rim joists wherever stringers will bear weight, and spacing joists at 16 inches on center for a solid surface underfoot.
- Cut and install stringers for the lower flight. Use a framing square to lay out consistent riser and tread lines on each stringer, a technique This Old House walks through in detail, then cut all stringers for one flight together so they match exactly.
- Attach the lower flight to the ledger or grade-level footing, and to the landing framing above it. Confirm the top of the lower flight lands exactly at your calculated landing height before fastening permanently.
- Cut and install stringers for the upper flight, running from the landing surface up to the deck. Double-check that both flights end up with identical riser heights; a mismatch between flights is the single most common error on switchback builds.
- Install risers and treads on both flights, working bottom to top, and check each tread with a level as you go.
- Set railing posts, then install balusters and rail caps on both flights and around the landing perimeter. Use corrosion-resistant fasteners throughout, since railing hardware sees more hand contact and more weather exposure than almost any other part of the stair.
- Run a final inspection checklist before calling for a code inspection: riser height uniformity within 3/8 inch, tread depth at minimum, landing depth at least as wide as the stair, guard height and baluster spacing on the landing, and secure, uplift-resistant attachment at both the ledger and the footings. InspectApedia’s deck stair build steps covers this kind of safety-first checklist in more depth if you want a second pass before the inspector arrives.
Pro Tip: Dry-fit both stringers against the landing framing before you drive a single permanent fastener. It’s much easier to shim a quarter-inch gap at this stage than to discover a riser mismatch after the treads are screwed down.
This sequence is also roughly what a professional crew follows on a job site, though a pro typically compresses steps 1 through 3 into a single afternoon using pre-cut lumber packages and a crew of two or three, where a solo DIYer might spend a full weekend on footings and landing framing alone.
Layout Examples and Planning Tools for Your Project
Three footprints cover most residential switchback situations, and picking the right one starts with your available yard depth.
- Single 180° landing: the standard choice for a deck 8 to 12 feet above grade with roughly 8 to 10 feet of horizontal clearance. Two equal flights, one landing, minimal framing complexity.
- Two small landings with an intermediate flight: useful when a tall deck needs to break a 12+ foot rise into three shorter climbs, or when the site has an obstacle partway down that a single landing can’t route around cleanly.
- Compact stacked multi-turn: reserved for unusually tall drops, like a deck over a daylight basement, where stacking two switchbacks keeps every individual flight short and code-compliant while still fitting a narrow side-yard footprint.
Once you know which footprint fits, run your numbers through a calculator rather than doing the math by hand for every scenario. A U-shaped staircase calculator takes your total rise and run and outputs riser and tread counts, landing height, and stringer lengths for both flights. Dedicated switchback calculators go a step further and handle multi-flight, multi-landing configurations directly, which saves real time if you’re planning a stacked design.
Turning that calculator output into something a permit office or a builder can act on just means transcribing the numbers onto a basic site diagram: total rise, riser count and height for each flight, landing height and dimensions, and total horizontal footprint. Most local permit offices accept a hand-drawn diagram as long as the dimensions are clear and match your stated riser and tread counts. If your project needs to route around a slope or fit next to an existing patio, our small deck ideas for tight backyards piece covers footprint-saving layouts that pair naturally with a switchback stair.
What Pros Check on Site Before Building a Switchback Stair
Homeowners tend to focus on riser math because it’s the part they can calculate at the kitchen table. What actually determines whether a switchback stair goes smoothly is what’s happening at grade level, and that’s where a lot of DIY plans run into trouble.
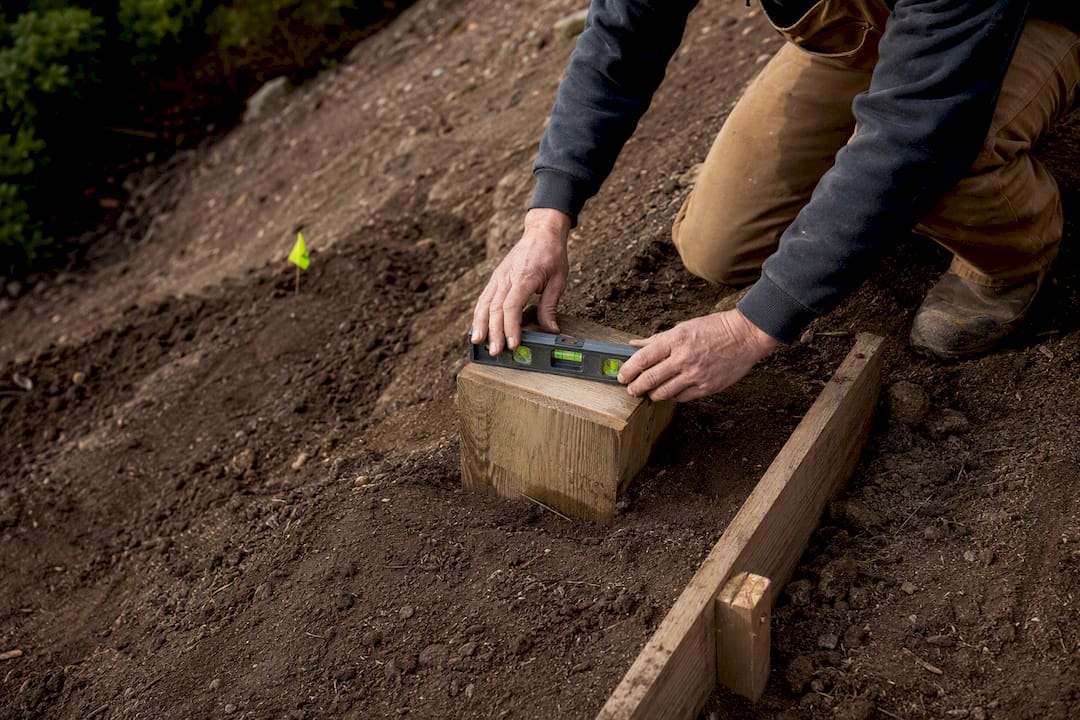
Site grade rarely matches the flat drawing in a plan set. A yard that slopes even slightly toward or away from the house shifts where your calculated landing height actually lands, and it’s common to discover a two- or three-inch discrepancy only after footings are already poured. Drainage around the base of the landing footings matters just as much; a landing post sitting in a low spot that collects runoff will fail faster than one set on properly graded, compacted soil, regardless of how well the stringers were cut.
Permitting adds another layer that trips up otherwise well-built projects. Requirements vary by jurisdiction, and even the process itself differs internationally, New Zealand’s building consent rules for decks are a useful reminder that permit thresholds and inspection triggers aren’t universal, so always confirm your specific local requirements rather than assuming what worked on a neighbor’s project applies to yours.
Some companies build switchback and U-shaped stairs with an in-house crew, warranty-backed installation, and a materials lineup that spans composite, PVC, and cedar, giving homeowners a real choice rather than a single default option., and.
— Vlad
Ready to Build Your Switchback Stairs? Here’s How Cactus Decking Helps
Professional deck contractors offer a faster path from measurement to finished stair than the DIY route this article just walked through. Where a solo build means footings, stringer math, and inspection scheduling stretched across weekends, an in-house crew may handle design, permitting paperwork, and warranty-backed installation as one coordinated process.
Our deck stairs service in Everett covers exactly what this guide walked through, from riser calculation to final railing, plus the material comparisons between pressure-treated lumber, composite, and cedar. Anyone considering a custom layout should also look at our Everett deck design service, which turn a rough sketch into a permit-ready plan.
Before your consult, gather a few photos of the drop-off area, a rough measurement of total rise if you have one, your material preference, and a general budget range. That’s enough for our crew to start scoping the project. Browse our deck gallery for finished switchback and U-shaped examples, or request an estimate to get a project timeline started.


