Deck Lighting Ideas: Safety, Ambiance & Style
Discover the best deck lighting ideas for safety and ambiance. Learn how to layer lights for a stunning outdoor space after sunset.
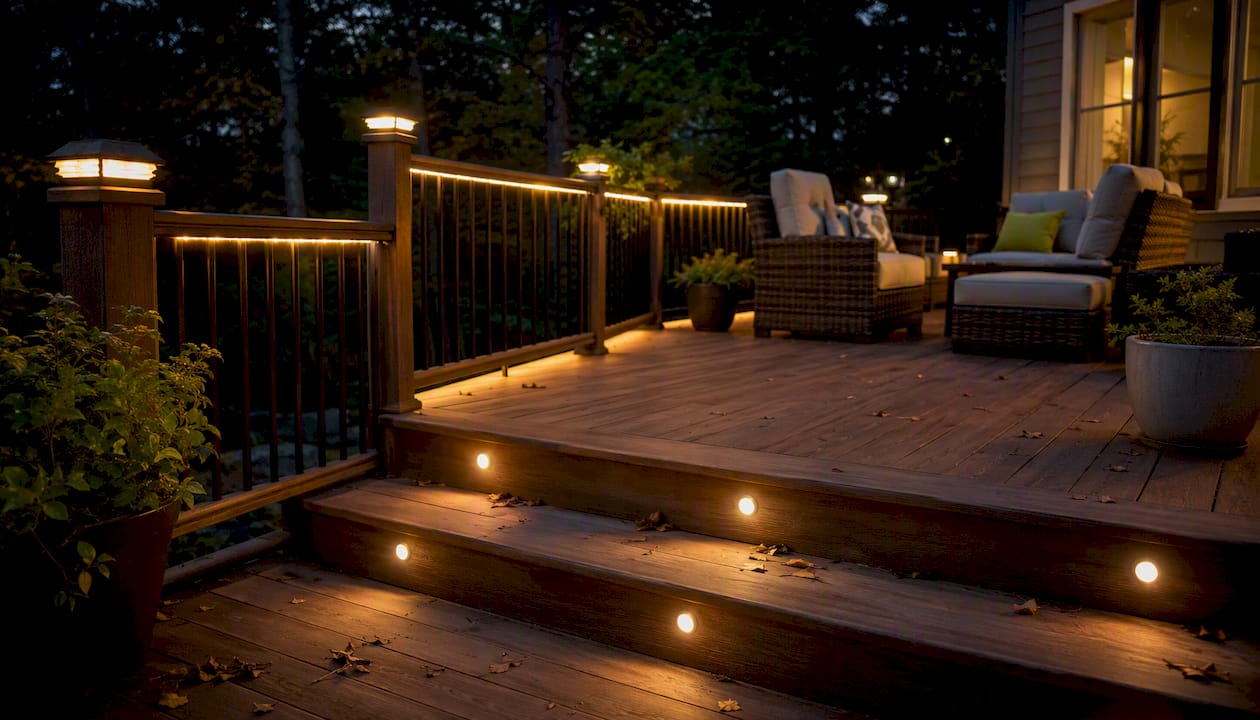
Deck Lighting Ideas: Safety, Ambiance & Style
The best approach to deck lighting is layered: safety first, ambiance second, task light where you need it. A single string of lights looks great in a photo but leaves your stairs dark and your grill zone dim. Get the layers right, and the same deck feels completely different after sunset.
Three things to nail before you buy a single fixture:
Must-light areas: every stair riser or change in level, rail edges, and any task zone (grill, dining table, bar area)
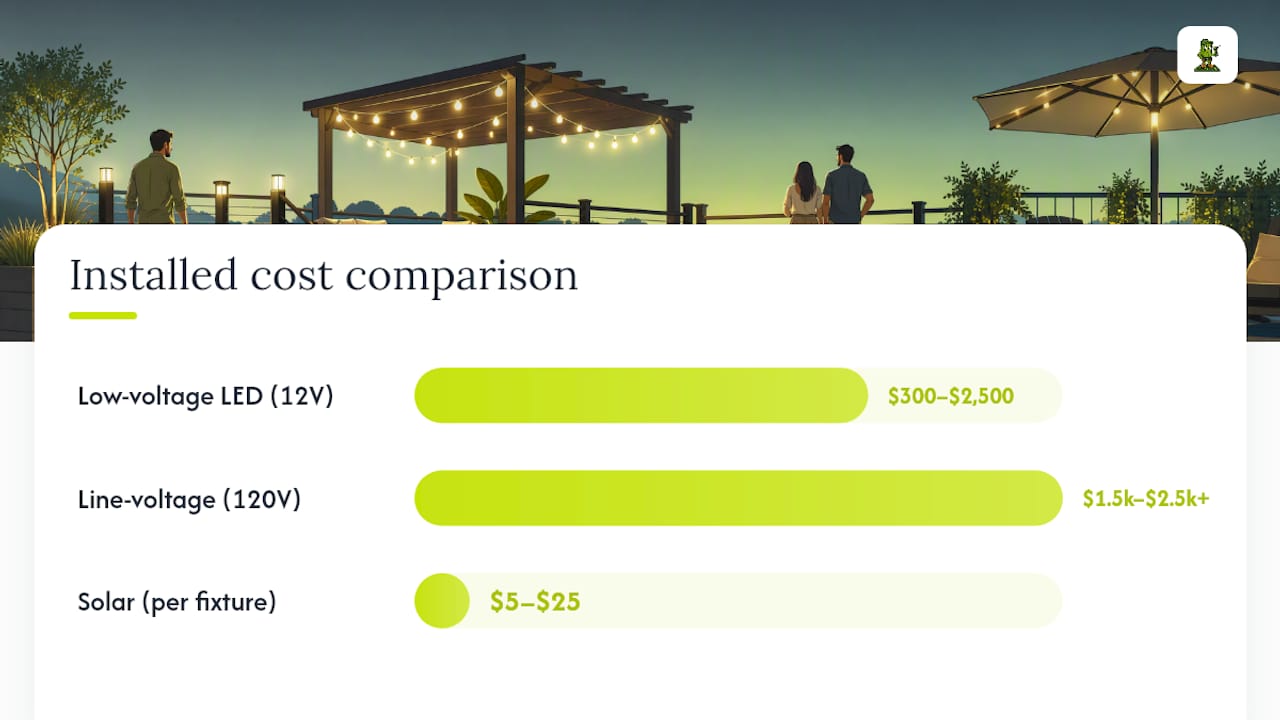
Best power source for reliability: low-voltage LED (12V) covers most homeowners well, with typical installed packages ranging from $300 to $2,500 depending on scope and power source.
Named hardware: Trex, Dekor, and similar fixture manufacturers supply common post caps, riser lights, and under-rail strips that pair with standard low-voltage transformers
Table of Contents
10 Deck Lighting Ideas Worth Trying
How to choose the right deck lights for your goals
Placement, spacing, and layout rules for stairs, rails, and edges
Power and technology options: which one fits your deck?
Why a deck pro handles lighting better than most homeowners expect
Key Takeaways
The mistake most homeowners make with deck lighting
Cactusdecking handles the full deck lighting picture in Everett, WA
Useful sources and further reading
10 Deck Lighting Ideas Worth Trying
Mixing fixture types is the single most effective way to cover safety, task, and ambiance in one design. Here are ten ideas that actually work.
1. Recessed riser/step lights
A small fixture mounts flush into the face of each stair riser and aims light downward onto the tread. The result is a soft pool of light at every step, no glare in the eyes, and a clean look that disappears during the day. Best for: safety. Power: low-voltage or line-voltage. Install: DIY-friendly with low-voltage; pro required for line-voltage.
2. Under-rail LED strips
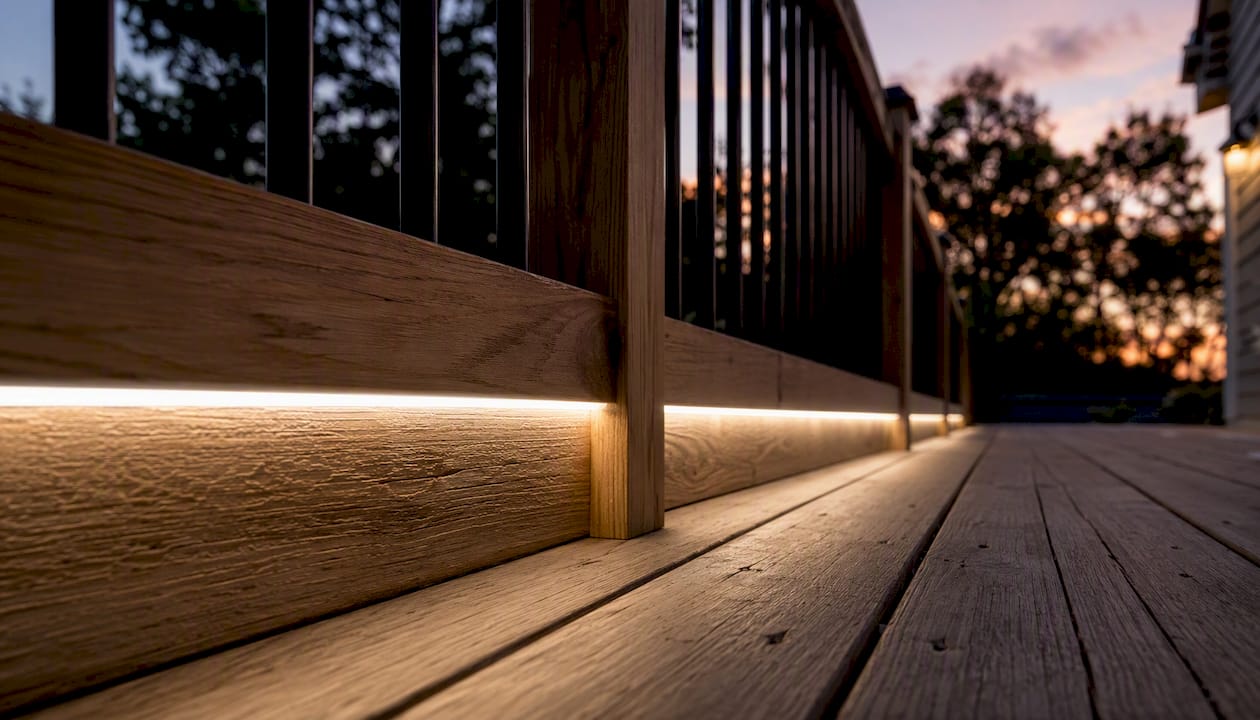
A continuous LED strip runs along the underside of the top rail cap, casting a wash of light downward along the deck perimeter. It defines edges without any visible fixture hardware. Best for: safety and ambiance. Power: low-voltage. Install: DIY with a transformer and basic wiring.
3. Post-cap and post lights
Post caps sit on top of railing posts and throw light downward and outward. They double as decorative accents during the day. Trex makes post-cap kits that integrate directly with their railing systems. Best for: ambiance and perimeter safety. Power: low-voltage or solar. Install: DIY.
4. String or festoon lights
Strung overhead between posts, a pergola, or a house bracket, string lights deliver warm, social ambiance fast. They are the easiest upgrade on this list. The tradeoff: they provide almost no task or safety light on their own. Best for: ambiance. Power: standard 120V outlet or battery. Install: DIY in an afternoon.
5. Pendant fixtures under a pergola
A single pendant or a cluster of pendants hung from a pergola structure creates a dining-room feel outdoors. This works best over a defined table or seating area. Best for: task and ambiance. Power: line-voltage (requires an electrician for a permanent overhead circuit). Install: pro recommended.
6. In-floor recessed deck lights
Flush-mounted fixtures set directly into the decking boards create a dramatic, low-profile look. Recessed in-floor lights are the most expensive option on this list and almost always need professional installation, but the result is genuinely striking. Best for: accent and ambiance. Power: low-voltage or line-voltage. Install: pro.
7. Spot and landscape uplights
Positioned in adjacent garden beds or at the base of trees, uplights wash architectural features and plantings with light, giving the deck a sense of depth and context after dark. Best for: accent. Power: low-voltage. Install: DIY.
8. Solar post and stair caps
Solar fixtures need zero wiring, which makes them a practical retrofit option where running cable is difficult. The honest caveat: they are dimmer than wired options, and battery performance drops in winter. Solar post caps cost a few dollars each. Best for: accent and light-duty safety. Power: solar. Install: DIY.
9. Under-bench and under-cap lights
Lights tucked beneath built-in bench seats or planter caps create a floating effect and add a layer of low-level ambiance without any visible hardware. Best for: ambiance and accent. Power: low-voltage. Install: DIY with planning during bench construction.
10. Tabletop torches and portable lanterns
Battery-powered lanterns and citronella torches are zero-commitment, zero-wiring options that move wherever you need them. They are not a substitute for fixed safety lighting, but they add warmth to a table setting quickly. Best for: ambiance. Power: battery or fuel. Install: none.
Pro Tip: Mix warm-white fixtures in the 2700–3000K color temperature range across all your layers. Cooler whites (4000K+) read as harsh and clinical outdoors at night, and mismatched color temps across fixture types create a disjointed look that undermines the whole design.
How to choose the right deck lights for your goals
Start with the goal, not the fixture. Safety, ambiance, and task light each point toward different hardware.
Safety calls for riser lights, under-rail strips, and post caps at every level change. These fixtures need to be on every night, which means wired (low-voltage or line-voltage) rather than solar. Check the IP rating before you buy: fixtures in wet locations need at least IP65, and any fixture near standing water should carry a UL wet-location listing.
Ambiance is where string lights, pendant fixtures, under-bench lights, and landscape uplights earn their place. Lumen output matters less here than color temperature and distribution. Stick to 2700–3000K warm white and keep individual fixtures below 100 lumens so the light feels inviting rather than interrogative.
Task lighting over a grill or dining table needs more output, typically 200–400 lumens per fixture, and directional control. A pendant or a recessed downlight works better than a diffuse post cap.
Before buying or hiring, run through this checklist:
IP rating: IP65 minimum for exposed locations, IP67 for near-water
Lumen output: 30–60 lumens per riser, 200–400 lumens for task zones
Color temperature: 2700–3000K across all layers
Dimming compatibility: confirm fixtures and transformer both support dimming
Transformer capacity: add up fixture wattage and size the transformer to 80% of its rated load maximum
Pro Tip: Matching color temperature across every fixture type, from post caps to riser lights to string lights, is the single biggest factor in whether a finished deck looks designed or just lit. Mismatched temps are the most common mistake pros see on DIY installs.
Placement, spacing, and layout rules for stairs, rails, and edges
Placement determines whether lighting feels safe and intentional or random and glary. These rules give you a working framework.
Stairs
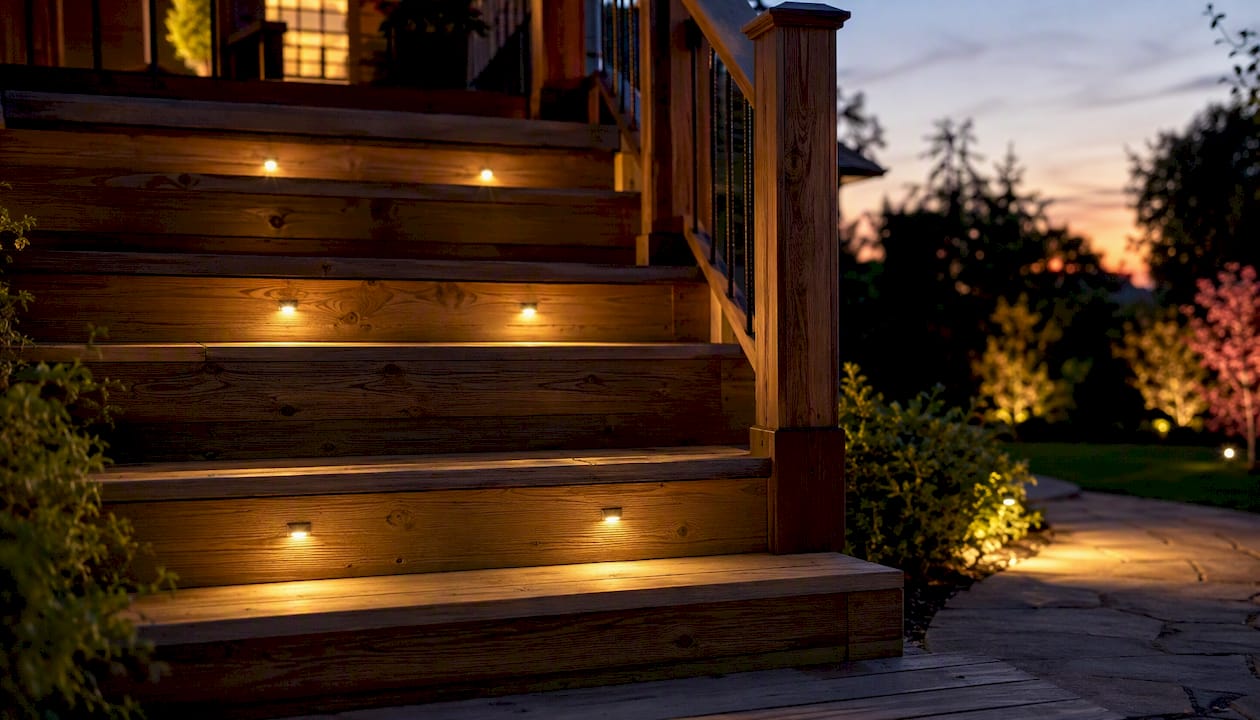
Light every riser for maximum safety. The IRC requires an artificial light source at the top landing as a code minimum, but per-riser lighting is the professional standard. Riser-mounted downward lights create contrast cues that improve foot placement and reduce glare compared with upward-facing fixtures. Per the guidance from lighting specialists, residential riser lights typically provide moderate lumens per fixture suitable for safety, with the full acceptable range sitting between 12 and 100 lumens.
Rails and posts
Space rail lights every 4–6 feet. Under-rail LED strips work well for continuous coverage between posts. Post caps go on every post, not just corner posts, for consistent perimeter definition.
Perimeter and edges
Offset fixtures slightly inward from the edge so the light source itself is not in the direct sightline of someone seated on the deck. Aim fixtures downward. Use frosted lenses or shields to prevent hotspots on the decking surface.
Zone | Spacing | Lumen range | Color temp |
|---|---|---|---|
Stair risers | One per riser | 30–60 lumens | 2700–3000K |
Rail lights | Every 4–6 ft | 30–80 lumens | 2700–3000K |
Walkways/perimeter | Every 4–6 ft | 12–100 lumens | 2700–3000K |
Task zones (grill/dining) | As needed | 200–400 lumens | 2700–3000K |
After installation, do a walk test at night before calling the job done:
Walk every stair in the dark and confirm no riser is unlit
Sit in each seating area and check for direct glare from any fixture
Verify every fixture carries a wet-location or IP65+ rating
Test GFCI protection on any outlet feeding the transformer
Power and technology options: which one fits your deck?
Low-voltage 12V LED is the sweet spot for most homeowners. A transformer plugs into a GFCI outlet, steps 120V down to 12V, and feeds all your fixtures through low-voltage cable. It is safe to handle, DIY-friendly, and dimmable. Most residential decks run entirely on a single transformer.
Line-voltage (120V) makes sense for high-output fixtures, permanent overhead circuits for pendants, or when you want a dedicated circuit that does not share load with anything else. It requires an electrician and permits in most jurisdictions.
Solar works best as a retrofit accent layer where running cable is genuinely impractical. Expect reduced output in winter and plan for battery replacement every few seasons.
Smart controls, including timers, photocells, dimmers, and app-based hubs, extend LED life by preventing continuous full-power operation and add real convenience. A photocell that turns lights on at dusk and off at dawn is the simplest upgrade with the biggest daily payoff.
Power source | Best for | Install difficulty | Weather rating | Approx. cost |
|---|---|---|---|---|
Low-voltage LED (12V) | Safety, task, ambiance | DIY | IP65+ fixtures | $300–$2,500 installed |
Line-voltage (120V) | High-output, permanent | Pro (electrician) | IP65+/wet-location | $1,500–$2,500+ installed |
Solar | Accent, light-duty safety | DIY | Varies by fixture | $5–$25/fixture |
Battery/portable | Ambiance, temporary | None | Varies | a few dollars per light |
Smart/low-voltage hybrid | All layers with automation | DIY to pro | IP65+ | Adds a modest amount for controls |
Why a deck pro handles lighting better than most homeowners expect
A contractor does not just install fixtures. The process starts with a site assessment: mapping the deck layout, identifying every level change, and planning transformer placement and cable runs before a single hole is drilled.
Electrical planning matters more than most homeowners realize. A pro sizes the transformer correctly, specifies GFCI-protected circuits where required, and confirms that every fixture carries the right IP or wet-location rating for its mounting position. Line-voltage work requires a licensed electrician and permits in most U.S. jurisdictions, and a contractor manages that coordination.
What a specialty deck builder like Cactusdecking adds on top of that:
Integrated design: lighting planned alongside railing systems and stair construction so fixture locations are built in, not retrofitted
Fixture selection matched to the decking material and finish
Professional installation and testing before handoff
Warranty-backed work and post-install support
Cactusdecking’s deck lighting service covers the full scope: design, wiring, wet-rated fixture installation, and warranty. Their project gallery shows integrated lighting across completed decks, which is the most useful reference when deciding between fixture types and layouts.
A purely DIY approach can work well for low-voltage accent and safety lighting. Where it tends to fall short is in line-voltage work, permit compliance, and the kind of integrated design that makes lighting feel like part of the deck rather than an afterthought.
Key Takeaways
Layered deck lighting, combining safety fixtures on every stair and rail edge with warm-white ambiance layers, is the most reliable way to make a deck both safe and enjoyable after dark.
Point | Details |
|---|---|
Layer your lighting | Combine safety (risers, rails), task (grill, dining), and ambiance (string, accent) for a complete system. |
Light every stair riser | Use 30–60 lumens per riser at 2700–3000K; the IRC requires at minimum a light at the top landing. |
Choose low-voltage LED | 12V systems are DIY-friendly, dimmable, and cover most decks for $300–$2,500 installed. |
Match color temperature | Keep all fixture types at 2700–3000K; mismatched temps are the most common design mistake. |
Cactusdecking | Provides integrated deck lighting design, wet-rated installation, and warranty-backed work in Everett, WA. |
The mistake most homeowners make with deck lighting
The most common pattern I see on retrofit projects is a deck that has string lights overhead and nothing else. It looks warm in photos, but the stairs are pitch black and the rail edges disappear after sunset. That is not an ambiance problem. That is a safety problem.
The second most common issue is mismatched color temperatures. A homeowner buys post caps at one store, riser lights at another, and string lights from a third. Each fixture is technically “warm white,” but one runs at 2700K, one at 3000K, and one at 3500K. Side by side, the deck looks like it was lit by three different people who never talked to each other.
The fix for both problems is simple: plan the full layer stack before buying anything, pick a single color temperature and stick to it across every fixture type, and treat stair risers as non-negotiable. On a recent Cactusdecking project, a straightforward retrofit that added riser lights and under-rail strips to an existing deck with string lights turned a visually pleasant but genuinely unsafe outdoor space into something that worked at every level. The homeowners had lived with the string-lights-only setup for two years before realizing the stairs were the problem.
One more thing: transformer sizing. Undersizing the transformer is the mistake that causes the most callbacks on DIY installs. Add up your fixture wattage, then buy a transformer rated for at least 25% more than that number. It is a small cost difference that prevents a lot of frustration.
Cactusdecking handles the full deck lighting picture in Everett, WA
Designing a layered lighting system from scratch, sizing a transformer, pulling permits for a new circuit, and making sure every fixture is wet-rated for the Pacific Northwest climate is a lot to coordinate on your own. Cactusdecking does all of it as part of a single, managed project.

The team handles everything from initial layout and electrical planning through fixture installation and final testing, with warranty-backed work on every install. If you are building a new deck, lighting gets designed in from day one alongside your custom deck installation. If you have an existing deck that needs a lighting upgrade, the process starts with a consultation to map what you have and what you need.
For integrated outdoor projects that extend lighting beyond the deck into adjacent hardscape, outdoor lighting integration principles apply across patios, walkways, and garden beds as well.
Book a consultation or view completed projects to see how integrated lighting looks on a finished deck before committing to a design direction.
Useful sources and further reading
These are the primary references behind this article, organized by what they are most useful for.
Source | Best for |
|---|---|
DeckMath: Deck Lighting Guide | Cost ranges, power source comparison, low-voltage vs solar overview |
Lowe’s: Deck Lighting Ideas | Fixture category browsing, solar retrofit ideas |
The Ultimate Deck Shop: Lumen Guide | Lumen and color-temp standards for stairs and rails |
Tanzite StoneDecks: Stair Lighting Guide | IRC code requirements and per-riser placement rules |
Tru-Scapes: Deck Lighting for Safety | How riser lights work, low-voltage system basics |
The Deck Store: Recessed Lighting | In-floor and recessed fixture options and costs |
Design examples, downward-facing fixture guidance | |
Practical idea lists for DIY homeowners |