Pergola on Deck: What Homeowners Need to Know
Wondering if a pergola on deck is right for you? Learn essential checks and tips to ensure your deck can support a beautiful structure.
Pergola on Deck: What Homeowners Need to Know
Yes — you can put a pergola on a deck, as long as the deck’s framing and load path are adequate. The deck structure underneath, not the surface boards, must carry the weight. Three checks tell you whether your deck is ready before you buy anything or break ground.
Quick checklist before you start:
Structural framing check: Locate your joists and beams. Posts must anchor into framing members or independent footings, never into surface decking alone — surface boards are not designed for vertical shear or lateral uplift.
Anchorage method: Decide between through-bolting into joists/blocking, engineered post base plates, or running posts through the deck to concrete footings. Each transfers load differently.
Wind and exposure check: A pergola acts like a sail in high wind. Elevated decks, coastal yards, and open hilltop sites need extra lateral bracing or independent footings regardless of how solid the framing looks.
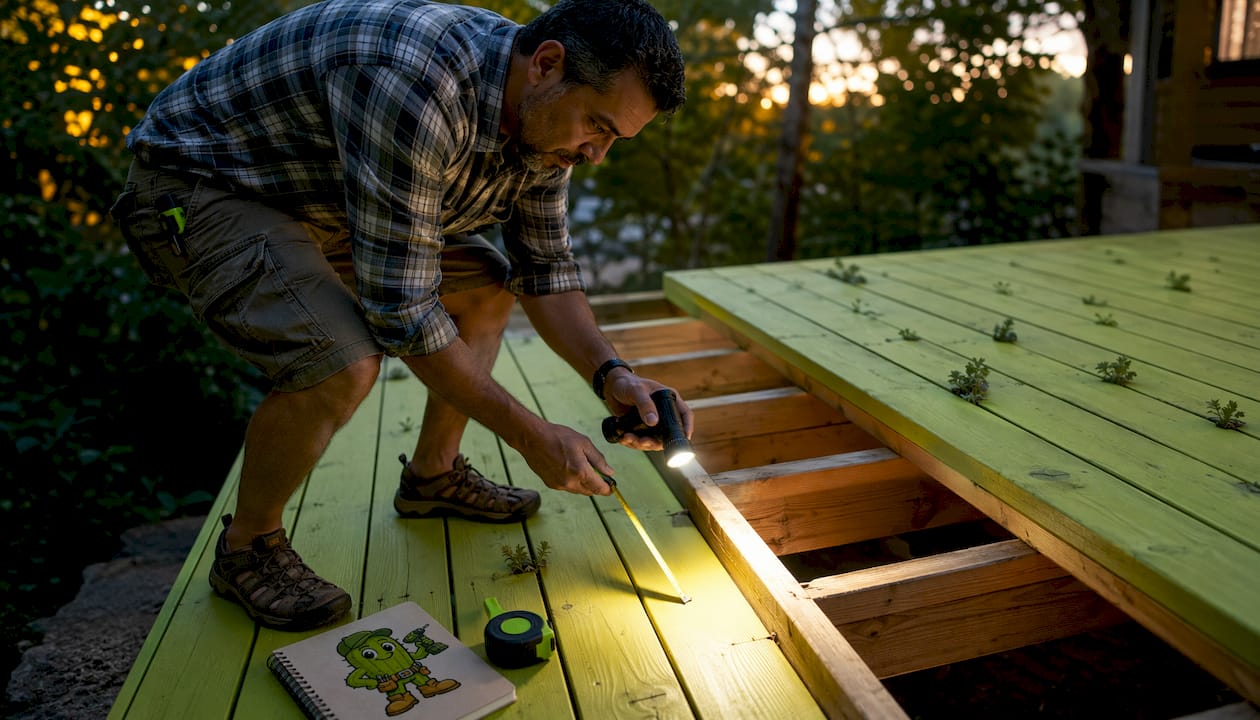
Next action: Get under your deck with a flashlight and check joist size, spacing, and condition. If you see rot, significant deflection, or joists smaller than 2×8 at 16" on center, schedule a contractor or structural engineer evaluation before proceeding.
Pro Tip: If your deck is more than 8 feet off the ground or sits in a high-wind zone, skip the framing check and go straight to a structural engineer. The cost of a one-hour consultation is far less than a failed installation.
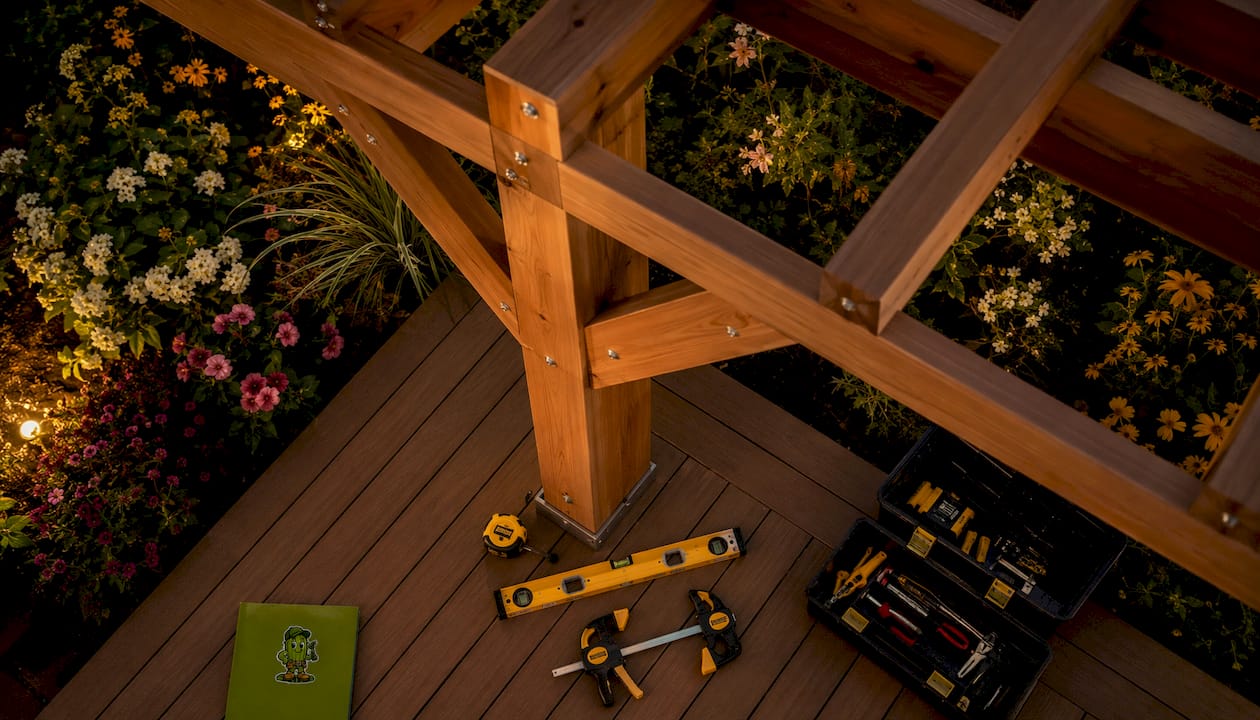
Table of Contents
Deck-mounted vs. ground-mounted: which approach fits your situation?
How do you mount a pergola to an existing deck?
Will your deck actually support a pergola’s weight?
When do you need a permit for a deck pergola in the U.S.?
Which materials and kits work best for a deck pergola?
DIY or hire a pro? How to make the right call
Cactusdecking builds pergolas on decks the right way
Key Takeaways
A contractor’s perspective on what actually goes wrong
Useful sources for permits, engineering, and installation guidance
Deck-mounted vs. ground-mounted: which approach fits your situation?
The first real decision is where the pergola’s load goes. “Deck-mounted” means the posts sit on the deck surface and anchor into the framing below. “Ground-mounted” (or through-deck footings) means the posts pass through or alongside the deck and bear on concrete footings in the ground, completely bypassing the deck framing.

Approach | Pros | Cons | Best for |
|---|---|---|---|
Deck-mounted (post bases into framing) | No excavation, reversible, lower cost, works with most aluminum kits | Adds dead load to deck framing, limited by joist capacity | Lightweight aluminum pergolas, strong existing framing, low-to-moderate wind |
Through-deck / independent footings | Transfers load to ground, handles heavy wood or large spans, best wind performance | Excavation required, more invasive, higher cost | Heavy cedar or pressure-treated wood pergolas, undersized deck framing, tall or gusty sites |
Ledger-attached to house | Reduces post count, shares load with house structure | Requires proper flashing, penetrates siding, may need permit | Attached pergolas close to the house wall |
Deck-mounted works well when you have a solid, relatively new deck with 2×8 or larger joists at 16" on center and you’re installing a lighter aluminum structure. The moment you’re looking at a heavy wood pergola, a deck with older or undersized framing, or a site with real wind exposure, independent footings become the smarter call. The extra excavation cost is real, but so is the liability of an under-anchored structure.
Pro Tip: In areas with frequent high winds, add diagonal knee braces between posts and beams even on a deck-mounted pergola. A wind uplift failure is almost always a lateral event, not a vertical one — the structure lifts and twists before it collapses downward.
How do you mount a pergola to an existing deck?
This is a job most capable DIYers can handle on a low-to-moderate deck with good framing. Follow these steps in order — skipping ahead is how mistakes happen.
Locate and mark joists. Use a stud finder or probe with a finish nail to find every joist under your planned post locations. Mark them clearly on the decking surface with painter’s tape.
Add blocking where needed. If a post location falls between joists, cut and install solid blocking (same dimension lumber as your joists) between the two nearest joists. Blocking transfers the post load into the framing. Kit instructions from Lowe’s and most manufacturers emphasize this step — do not skip it.
Install post base plates. Use engineered post base hardware rated for your post size. Fasten with structural screws or through-bolts passing fully through the decking and into the joist or blocking below. Lag screws into the face of a joist are acceptable; screws into decking boards alone are not.
Set and plumb posts. Drop posts into the base plates and hand-tighten. Use two levels on adjacent faces to plumb each post, then clamp a temporary 2×4 diagonal brace from the post to the deck framing. Do not remove bracing until the beam is bolted in place.
Install beams. Lift beams onto post tops and secure with post-to-beam hardware or through-bolts. For spans over 10 feet, use at least two ½" bolts per connection.
Set rafters and purlins. Attach rafters to beams with joist hangers or notched connections. Space purlins per your design or kit specs. Check the whole frame for square by measuring diagonals before final tightening.
Ledger attachment (house-mounted pergolas only). Bolt the ledger directly into the house’s rim joist or structural framing — never into siding or sheathing alone. Install flashing above the ledger before re-securing siding, and use a self-sealing membrane behind the ledger to prevent water intrusion.
Final safety check. Shake each post by hand. There should be no perceptible movement. Confirm all hardware is torqued, all bracing is permanent or removed, and the frame is level and square.
Pro Tip: Never remove temporary bracing until at least two sides of the frame are fully bolted together. A free-standing post with one beam attached can tip with very little force.
Safety callout: Anchoring only to surface decking boards is the single most common installation error. Surface boards flex, split, and are not connected to the load path. Through-bolts passing fully into joists or blocking are the accepted structural solution.
Will your deck actually support a pergola’s weight?
Most residential decks in the U.S. are designed to accommodate typical live and dead loads according to building codes. A pergola adds permanent dead load, so you need to know how much headroom your deck has before adding it.
Typical pergola material weights
Material | Approx. weight per linear foot (beam) | Notes |
|---|---|---|
Cedar / redwood | — | Lighter than pressure-treated, naturally rot-resistant |
Pressure-treated pine | — | Heavier when wet; dries down over time |
Vinyl / fiberglass | — | Low weight, but check wind-load ratings |
Aluminum (commercial grade) | — | Lightest high-strength option for deck-mounted installs |
Aluminum is consistently the best choice for deck-mounted pergolas on elevated or borderline decks. It weighs significantly less per post than wood while still carrying solid wind and snow ratings.
What to inspect in your framing
Walk under your deck and check these four things:
Joist size and spacing: 2×8 at 16" on center is a reasonable minimum for a deck-mounted pergola. Smaller joists or wider spacing means you need blocking at every post location, at minimum.
Beam condition: Look for splits, checks, or sagging. A beam that has deflected visibly under its own load is already overstressed.
Ledger condition: Check where the deck attaches to the house. Rot here is a structural failure waiting to happen and must be repaired before adding any pergola load.
Visible rot or insect damage: Probe suspect areas with a screwdriver. If it sinks in easily, the wood is compromised.
When to call a structural engineer: If your joists are smaller than 2×8, the deck is more than 8 feet off the ground, you’re planning a heavy wood pergola, or you see any rot or deflection, get a licensed structural engineer to sign off. An engineer will check load paths, connection details, footing capacity, and lateral stability. In borderline cases, they may specify additional blocking, sister joists, or independent footings. That sign-off also protects you if a permit inspector asks questions.
Wind uplift is the primary failure mode for deck pergolas. Designers treat a pergola like a sail: lateral wind loads and uplift forces are almost always larger than the static weight of the structure. Diagonal bracing, engineered brackets, and through-deck footings are the mitigations that actually work.
When do you need a permit for a deck pergola in the U.S.?
Permit requirements vary by municipality, but three triggers come up consistently across most U.S. jurisdictions. If any one of these applies to your project, assume a permit is required and verify with your local building department before starting.
Common permit triggers:
Attached to the house: Any pergola bolted to the house structure typically requires a permit because it becomes part of the building envelope.
Solid or waterproof roof: Open-lattice pergolas often fall below the permit threshold; solid or covered roofs almost always trigger one.
Elevated deck over 30 inches above grade: Work on elevated decks is routinely subject to structural review, regardless of the pergola type.
What inspectors typically check:
Footing depth and diameter (usually below frost line for your region)
Anchorage to structural members, not surface boards
Flashing and water management at any ledger connection
Lateral bracing where required by local wind-load tables
Compliance with setback requirements from property lines
Timeline and preparation: Permit turnaround in most U.S. municipalities runs two to six weeks for residential projects, though some jurisdictions offer over-the-counter approvals for simple structures. Bring a dimensioned site plan, a framing plan showing post locations and anchorage details, and any engineered connection specs if your engineer provided them. If you’re using a prefab kit, bring the manufacturer’s installation guide and wind-load rating sheet — inspectors often accept these in lieu of custom engineering.
Which materials and kits work best for a deck pergola?
Matching your pergola material to your existing deck avoids the most common long-term headaches: mismatched maintenance cycles, incompatible finishes, and thermal expansion issues at connection points.
Material comparison
Cedar and redwood are the classic choice. Both are naturally rot-resistant, hold stain well, and look great alongside wood decking. The downside is maintenance: plan on cleaning and re-sealing every two to three years. Cedar pairs naturally with cedar or composite decking.
Pressure-treated pine costs less upfront but is heavier, especially when freshly installed. It requires the same maintenance cycle as cedar and can be harder to finish cleanly. It works fine structurally but is rarely the best-looking option for a premium deck.
Vinyl and fiberglass are low-maintenance and lightweight, but they have limited structural profiles and can look plasticky next to natural wood decking. They work best on composite or PVC deck surfaces where the aesthetic already leans modern.
Aluminum is the standout for deck-mounted installations. It’s the lightest high-strength material available, requires almost no maintenance, and most commercial-grade aluminum kits come with wind-load ratings and deck-mount hardware included. For elevated decks or any situation where framing capacity is a concern, aluminum is the practical default.
Kit vs. custom
A prefab aluminum kit makes sense when your deck is a standard size, you want a straightforward weekend installation, and you don’t need a custom footprint. Before buying any kit, verify these five things:
Deck-mount compatibility (does it include post base hardware for surface mounting?)
Post base details and required bolt sizes
Manufacturer-stated wind-load rating for your region
Whether blocking instructions are included
Whether the kit covers your deck’s dimensions without awkward modifications
Custom wood pergolas make sense when you want a specific size, a design that integrates with existing railing posts, or a structure that matches the character of a high-end cedar or hardwood deck. The cost is higher and the timeline longer, but the result looks intentional rather than assembled.
Design guidance worth following: aim to cover a substantial portion of the deck area with the pergola to achieve a balanced look. Less than 50% tends to look like an afterthought; more risks making the space feel closed and may push you into a different permit category.
Pro Tip: Aligning pergola posts just inside existing railing posts — sometimes called a “soft attach” approach — gives the finished structure a unified look while minimizing changes to the deck framing. It also makes the deck railing system and pergola feel like one designed element rather than two separate additions.
Adding deck lighting to the pergola frame at installation time is far easier than retrofitting it later. String lights, recessed LED fixtures, and low-voltage post-cap lights all integrate cleanly into aluminum and wood frames before the final assembly is complete.
DIY or hire a pro? How to make the right call
The honest answer is that most low-deck aluminum kit installations are within reach of a capable DIYer with basic carpentry skills. Elevated decks, heavy wood structures, borderline framing, or any project requiring a permit and engineer sign-off are better handled by a licensed contractor.
Decision criteria
Skills and tools: Can you locate joists, use a drill press and impact driver, read a level accurately, and safely work at height? If any of those is a no, hire out.
Deck height and complexity: Ground-level or low decks are forgiving. Anything above 6 feet off the ground introduces fall risk and makes temporary bracing more critical.
Framing condition: If your framing needs reinforcement, blocking, or sistered joists, that work is best done by someone who can assess it in person.
Local code familiarity: Permit applications require dimensioned drawings and anchorage details. If you’ve never pulled a permit, a contractor who handles permitting routinely will save you time.
Questions to ask every contractor
Are you licensed and insured in this state? Can you provide a certificate of insurance?
Will you pull the permit, or is that my responsibility?
How will you handle the structural connection — through-bolting, post bases, or footings?
Do you use your own crew, or do you subcontract the installation?
What does your warranty cover, and for how long?
What’s your payment schedule, and what triggers each payment?
Red flags to watch for
Unwillingness to show proof of insurance or a contractor’s license
Recommending that posts anchor only to the decking surface
Vague or dismissive answers about wind loads or engineer involvement
Asking for more than 30–40% of the total cost upfront
No written contract or scope of work
Realistic cost factors
Pergola project costs vary widely based on size, material, site conditions, and region. Budget line items to expect include: structural inspection or engineer fee (if needed), the kit or custom lumber cost, any framing reinforcement or footing work, permit fees, and optional add-ons like lighting or electrical. If your deck framing needs reinforcement before the pergola can go up, factor in that work separately — it’s not always included in a pergola contractor’s scope. A deck installation contractor who also handles pergolas can often bundle framing repairs and pergola work into a single project, which simplifies permitting and scheduling.
Cactusdecking builds pergolas on decks the right way
Skipping the structural inspection is where most pergola projects go sideways. Cactusdecking’s process starts there and doesn’t move forward until the framing is confirmed.
The process runs from consultation through a structural framing inspection, then into design selection or kit specification, permit handling, installation by an in-house crew, and a final walkthrough with a warranty. No subcontractors, no guessing about what the inspector wants. The in-house crew handles the blocking, the through-bolts, the flashing at any ledger connection, and the final plumb-and-square check before they leave the site.
For homeowners in Everett and the surrounding area whose decks are borderline, Cactusdecking can assess whether the existing framing is adequate or whether a deck replacement or reinforcement makes more sense before adding a pergola. That’s a conversation worth having before you buy a kit that doesn’t fit your structure. Browse real project examples in the project gallery, then schedule a design consultation at cactusdecking.com/services/deck-design to get a professional eye on your deck before committing to a pergola plan.
Key Takeaways
A pergola on a deck is structurally sound when posts anchor into joists or footings, the framing meets load requirements, and wind uplift is addressed with bracing or independent footings.
Point | Details |
|---|---|
Structural check first | Confirm joist size, spacing, and condition before buying any pergola kit or material. |
Aluminum for elevated decks | Aluminum is the lightest high-strength option and the safest default for deck-mounted installs on borderline framing. |
Wind uplift is the real risk | Lateral wind loads cause most pergola failures; diagonal bracing or through-deck footings are the fix. |
Permit triggers to know | Attachment to the house, a solid roof, or a deck over 30 inches above grade typically requires a permit. |
Cactusdecking | Offers warranty-backed pergola installations in Everett, WA, with in-house crews, permit handling, and a structural inspection before any work begins. |
A contractor’s perspective on what actually goes wrong
The most common mistake isn’t choosing the wrong material or skipping the permit. It’s assuming the deck is fine because it looks fine from the top.
Framing problems hide. A joist that’s been slowly absorbing moisture for three seasons can look solid from the deck surface and crumble when you drive a lag bolt into it. The first thing any experienced installer does is get under the deck with a light and a screwdriver before touching anything else. Probe every joist in the post zone. If the screwdriver sinks more than a quarter inch without real resistance, that joist needs to be sistered or replaced before a single post base goes down.
The second thing that catches homeowners off guard is wind. A pergola that feels rock-solid on a calm day can develop a noticeable sway in a 25 mph gust if the lateral connections aren’t right. Diagonal knee braces between posts and beams aren’t optional decoration — they’re the difference between a structure that lasts 20 years and one that starts racking after the first winter storm. On any deck that’s more than 6 feet off the ground, or on any site with open exposure, those braces should be part of the original plan, not an afterthought added after the first windy night.
One pattern that shows up repeatedly: a homeowner installs a kit correctly by the instructions, but the kit’s instructions assume a ground-level deck with solid 2×10 framing. The actual deck has 2×6 joists at 24" on center. The post bases are technically bolted in, but the joists flex under load. The fix is blocking — two short pieces of joist-dimension lumber installed between the nearest joists on either side of each post location. It takes an hour per post and it’s the difference between a pergola that feels permanent and one that moves when you lean on it.
For long-term maintenance, inspect the connection hardware every two to three years. Galvanized hardware in a wet climate will eventually show surface rust; stainless steel or hot-dipped galvanized hardware lasts significantly longer. Check that post bases haven’t allowed water to pool at the base of the posts — that’s where rot starts on wood structures. On aluminum pergolas, look for any paint or powder-coat chips at connection points, since bare aluminum in contact with treated lumber can corrode over time without a barrier between them.
Useful sources for permits, engineering, and installation guidance
These resources are worth bookmarking whether you’re planning a DIY installation or preparing to hire a contractor.
Can You Install a Pergola on an Existing Deck? — Bon Pergola: A thorough overview of structural requirements, anchorage options, and material selection. Good starting point for any homeowner assessing feasibility.
Building a Pergola on a Deck: What to Know and Best Kits — The Luxury Pergola: Covers load ratings, anchorage methods, and kit recommendations in detail. Useful for both DIYers and homeowners preparing to brief a contractor.
Build a DIY Pergola for a Deck — Lowe’s How-To: Step-by-step kit installation guide with hardware specifics. Best for DIYers working with a standard low deck and a prefab kit.
How to Build a Pergola Over a Deck — The Pool and Deck: Practitioner-focused guide with strong coverage of wind uplift, bracing requirements, and elevated-deck considerations.
Deck with Pergola: Ideas, Structural Checklist, and What Really Costs — Aoodorshop: Covers permit triggers, sizing guidance (the 55–70% coverage rule), and cost factors in one place. Good pre-planning reference.
Beyond the Boards: A Designer’s Guide to Unifying Your Deck and Pergola — Sunjoy: Design-focused resource on integrating lighting, plants, and fabric elements so the pergola feels like a deliberate part of the outdoor space rather than an addition.