1/8 Inch Is Only a Fallback for DIY Deck Board Spacing
Match deck board gaps to each material, check manufacturer instructions and IRC guidance, calculate board orders, and use a spacer to keep gaps even.

1/8 Inch Is Only a Fallback for DIY Deck Board Spacing
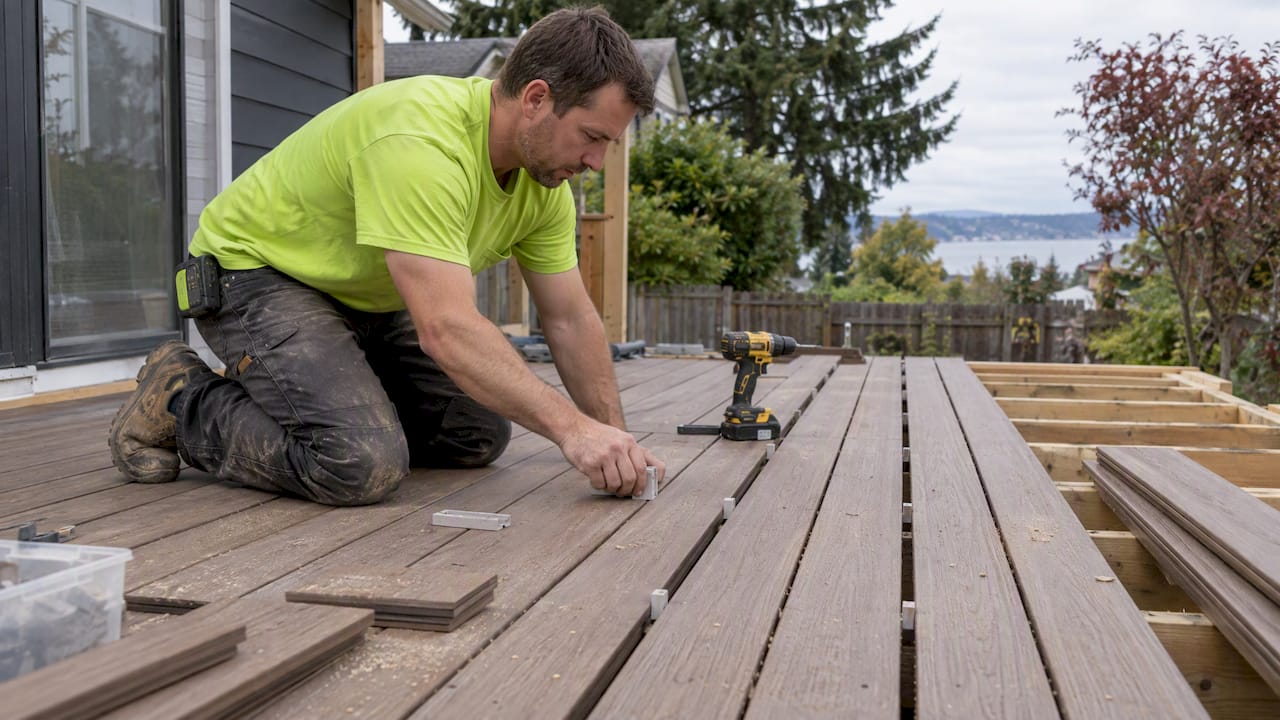
Aim for 1/8" to 1/4" between deck boards depending on material, but always check the manufacturer’s written spacing instructions first. Composite and PVC boards typically want gaps near the tighter end of that range, while dry hardwoods and dry cedar can handle gaps closer to 1/4". Pick one consistent spacer and maintain it uniformly across the whole deck.
TL;DR:
Manufacturer instructions control spacing and warranty coverage; IRC Section R507 uses roughly one eighth inch as the fallback for wood decking when instructions are unavailable.
Wet pressure treated boards can start nearly touching as they dry, while composite and PVC need 1/8 to 3/16 inch side gaps and wider end gaps.
Include the gap in board width when calculating rows, then add 10% waste for rectangles or 12% to 15% for angled layouts, borders, or stairs.
At board ends, leave wider gaps than along the sides and stagger butt joints across joists to avoid a continuous weak line.
CactusdeckingPlan a Deck That FitsCactus Decking builds custom decks in Everett with composite, PVC, and cedar options for homeowners planning an outdoor living space.Explore deck options
Table of Contents
Quick Gap Chart: Common Materials and Starter Gaps
Why These Gaps Differ: Moisture, Shrinkage, and Thermal Movement
Measuring and Ordering: Include the Gap in Your Math
On-Site Spacing and Fastening Tips: Shims, Nails, Butt Joints, and Clips
When to DIY vs. Hire a Contractor: How Cactus Decking Helps
Vlad’s On-Site Take: One Spacer Trick and a Common Installer Mistake
Contact Cactus Decking for Compliant Spacing and Pro Installation
Sources
Quick Gap Chart: Common Materials and Starter Gaps
Before you buy a single board, match your material to a starting gap. These numbers are a practical baseline, not a substitute for the instructions that come with your decking.
Material | Typical starter gap | Why |
|---|---|---|
Pressure-treated (installed wet) | Near 0" to 1/8" | Boards shrink as they dry, so tight spacing opens up naturally |
Pressure-treated (kiln-dried) | 1/8" to 1/4" | Already near equilibrium moisture, so less future movement |
Hardwoods (Ipe and similar) | 1/8" to 1/4" | Dense, stable wood moves less once acclimated |
Cedar and redwood | 1/8" to 1/4" | Moderate shrinkage; width and dryness at install matter |
Composite and PVC | 1/8" to 3/16" side, larger at ends | Thermal expansion, not moisture, drives movement |
Clip or hidden-fastener systems | Set by the clip, usually 3/16" to 1/4" | The clip itself fixes the gap, so there’s little to adjust |
None of these numbers override what your manufacturer prints on the installation sheet. IRC Section R507 requires decking to be installed according to the manufacturer’s instructions, and it references roughly 1/8 inch spacing for wood decking as a fallback when no manufacturer instructions exist. Composite and PVC lines each carry their own spec, and that spec is what your warranty is written against.
Why These Gaps Differ: Moisture, Shrinkage, and Thermal Movement
Wood and composite move for completely different reasons, and that’s why a single “standard gap” doesn’t exist.
Pressure-treated lumber usually arrives from the lumberyard still wet. Install it tight and it will shrink into a proper gap as it dries.
Kiln-dried hardwoods like Ipe start closer to their final moisture content, so you space them correctly from day one instead of waiting for shrinkage.
Composite and PVC don’t absorb and release moisture the way wood does. Their movement comes from heat, so side gaps stay tight while end gaps need more room to breathe.
Humidity and temperature swings cause modest seasonal movement in every material, which is part of why manufacturers build tolerance into their spacing charts rather than naming one fixed number.
One practical reference point: many installers use an 8d nail’s diameter, about 1/8 inch, as a spacer gauge for wood decking once it has reached a stable moisture level. That single habit keeps an entire deck consistent without any measuring tape.
Skip a brand’s spacing chart on composite or PVC and you risk buckling from thermal expansion, plus a warranty claim that gets denied because the installation didn’t follow published instructions.
Measuring and Ordering: Include the Gap in Your Math
Forgetting the gap when you order boards is one of the most common and expensive mistakes on a deck project. The fix is a simple formula called the board module.
Find your board module: actual board width plus your chosen gap. A 5.5 inch composite board with a 1/4 inch gap gives a module of 5.75 inches.
Convert the module to feet by dividing by 12. In this example, 5.75 ÷ 12 equals about 0.479 feet per board row.
Divide your deck’s width (in feet) by the module in feet to get the number of board rows you need. A 16-foot-wide deck divided by 0.479 feet comes out to roughly 33 rows.
Multiply rows by the deck’s run length to get total linear feet, then add a waste allowance: 10% for a simple rectangle, 12 to 15% for angles, picture-frame borders, or stairs.
Round the final number up to the nearest stock board length your supplier sells, since you’ll rarely use a board down to the inch.
If you mix board widths anywhere on the deck, recalculate the module for that section. A module built around 5.5 inch boards doesn’t apply to a 7.25 inch picture-frame border, and reusing the wrong number is an easy way to come up short mid-project.
On-Site Spacing and Fastening Tips: Shims, Nails, Butt Joints, and Clips
Consistency on the ground matters more than the number on paper. A gap that drifts by even 1/16 inch over a long run becomes visible once you step back.
Cut a batch of identical shims, or use an 8d or 16d nail as a fixed-width spacer, for straightforward wood decking.
Store-bought plastic spacers work well when you want a tool-free option that won’t vary from board to board.
Hidden-clip systems set their own gap automatically, which is part of why many composite and PVC lines specify them.
Leave a larger gap at board ends (butt joints) than at the sides, and stagger those butt joints across different joists so you never create one continuous line of weakness, a detail several installation guides and manufacturer spacing charts call out directly.
Fasten each board to every joist it crosses, matching the frequency and fastener type your manufacturer or local code specifies, since fastening pattern and spacing work together to control movement.
Pro Tip: Lay out five or six boards loose with your chosen spacer before you fasten anything, then let them sit for a day if the material or weather is borderline. Confirming the gap after a brief acclimation period beats discovering a problem after the whole deck is nailed down.
When to DIY vs. Hire a Contractor: How Cactus Decking Helps
Some jobs are well within reach for a careful DIYer. Others, structural ledger attachment, long unsupported spans, exotic hardwoods, tricky drainage, or code-required engineered connections, call for a licensed professional who documents the work.
We use in-house crews rather than subcontractors, which helps keep spacing and fastening consistent throughout the project. We work in composite, PVC, and cedar, and every deck installation and deck replacement we complete is warranty-backed. Following a manufacturer’s spacing specification to the letter, and documenting that we did, is one of the simplest ways to keep a warranty valid if a problem ever comes up down the road.
If you’re still deciding whether a repair or a full rebuild makes sense, this repair versus replace guidance lays out the tradeoffs worth weighing before you commit either way.
Vlad’s On-Site Take: One Spacer Trick and a Common Installer Mistake
On pressure-treated jobs, I keep a pocket full of 16d nails as spacers and never switch sizes mid-deck. The mistake I see most often is ordering boards by width alone and forgetting the gap entirely, which leaves a builder short by a row or two. Always check the manufacturer’s spec sheet before you cut a single board.
— Vlad
Contact Cactus Decking for Compliant Spacing and Pro Installation
Getting spacing right on paper is one thing. Getting it right across a 300 square foot deck, in the Pacific Northwest’s damp swings between seasons, is where craftsmanship earns its keep. We handle deck installation, deck replacement, custom deck installation, and full deck design with an in-house crew and warranty-backed work on every project.

If you’d rather hand off the measuring, ordering, and spacer work to a crew that does it daily, request a consultation for your deck installation and we’ll walk you through material options and a firm plan before any boards get cut.
FAQ
Where should I start laying deck boards when installing a deck?
Most installers start against the house or the most visible edge of the deck, working outward so any final cut board lands at the less visible perimeter. This keeps full-width boards visible from the main viewing angle and pushes any narrow rip cut to a less noticeable edge.
What accounts for most deck collapses?
Deck failures are most often tied to improper ledger board attachment to the house structure, rather than to board spacing itself. IRC R507 and related framing guidance exist specifically to address ledger attachment, joist spans, and fastening, which is why structural connections deserve more scrutiny than surface-level spacing.
How far can a 2x8 deck span without support?
Joist span limits for a 2x8 depend on species, grade, spacing between joists, and load requirements, so there isn’t one universal number. Span tables referenced alongside IRC R507 and AWC guidance set the specific limit for your lumber and layout.
How many joists does a 12x12 deck need?
The joist count for a 12 by 12 deck depends on the chosen joist spacing (commonly 12 or 16 inches on center) and the direction the joists run. A 12 foot span with joists set 16 inches on center typically needs around nine or ten joists, but your framing plan should follow the span tables tied to IRC R507 for your specific lumber.
Does board spacing really affect my warranty?
Yes. Composite and PVC manufacturers write spacing requirements directly into their installation instructions, and IRC R507 treats those instructions as the controlling standard. Installing outside the specified gap range is a common reason warranty claims get denied.